sending the Boss project to Chris Collier, Panama City, FL for Body and Paint….. more on that later.
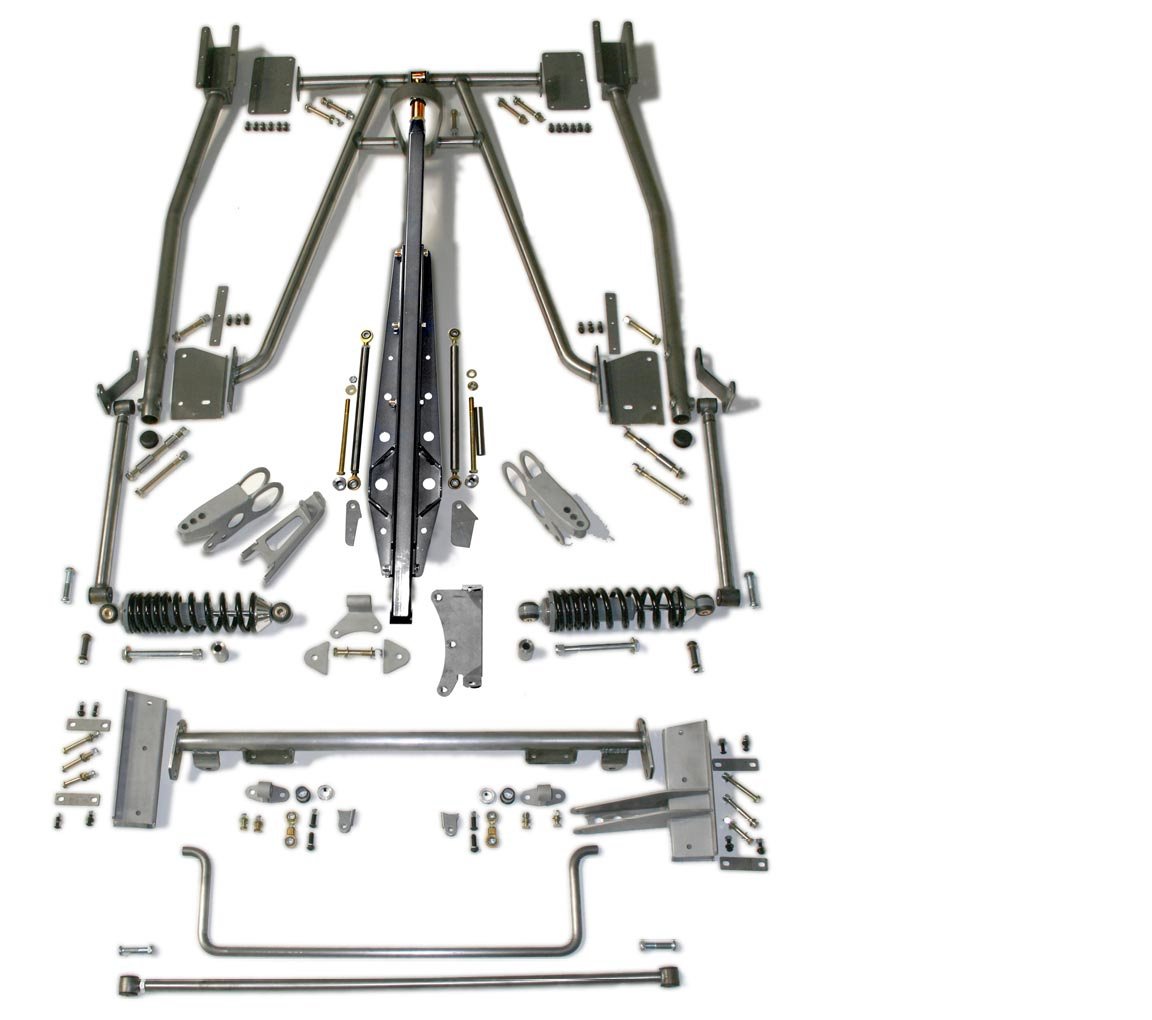
Here’s a view of the TCI with Rear End. I chose the Currie F9 rear with a 3.50:1 ratio that will map well to my engine torque and HP; and the Tremec TKO 600 5 speed transmission
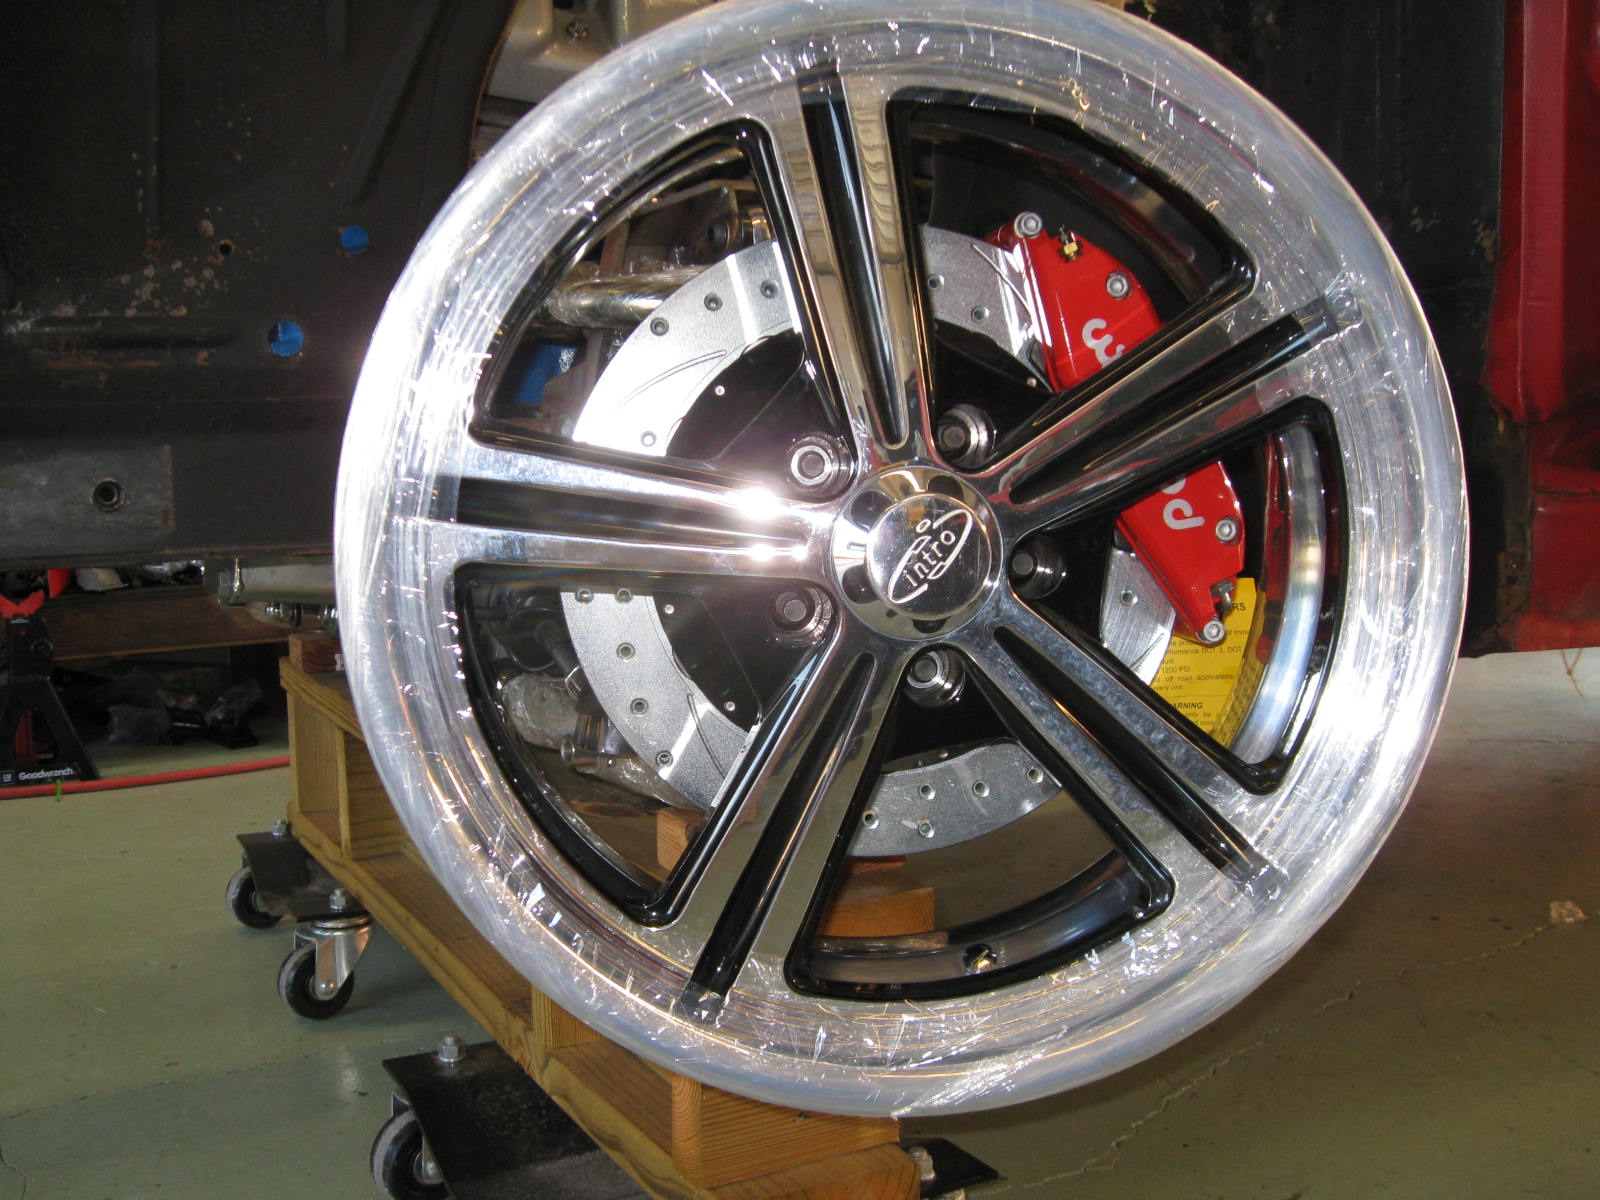
I had these 18″ custom wheels made to replicate the mid-60’s shelby 15″ wheels. I had to go to 18″ for the big brake clearance. An added benefit was the “quality” of better tire options I had that will allow for a lot better control and management of the 740HP pushing them.
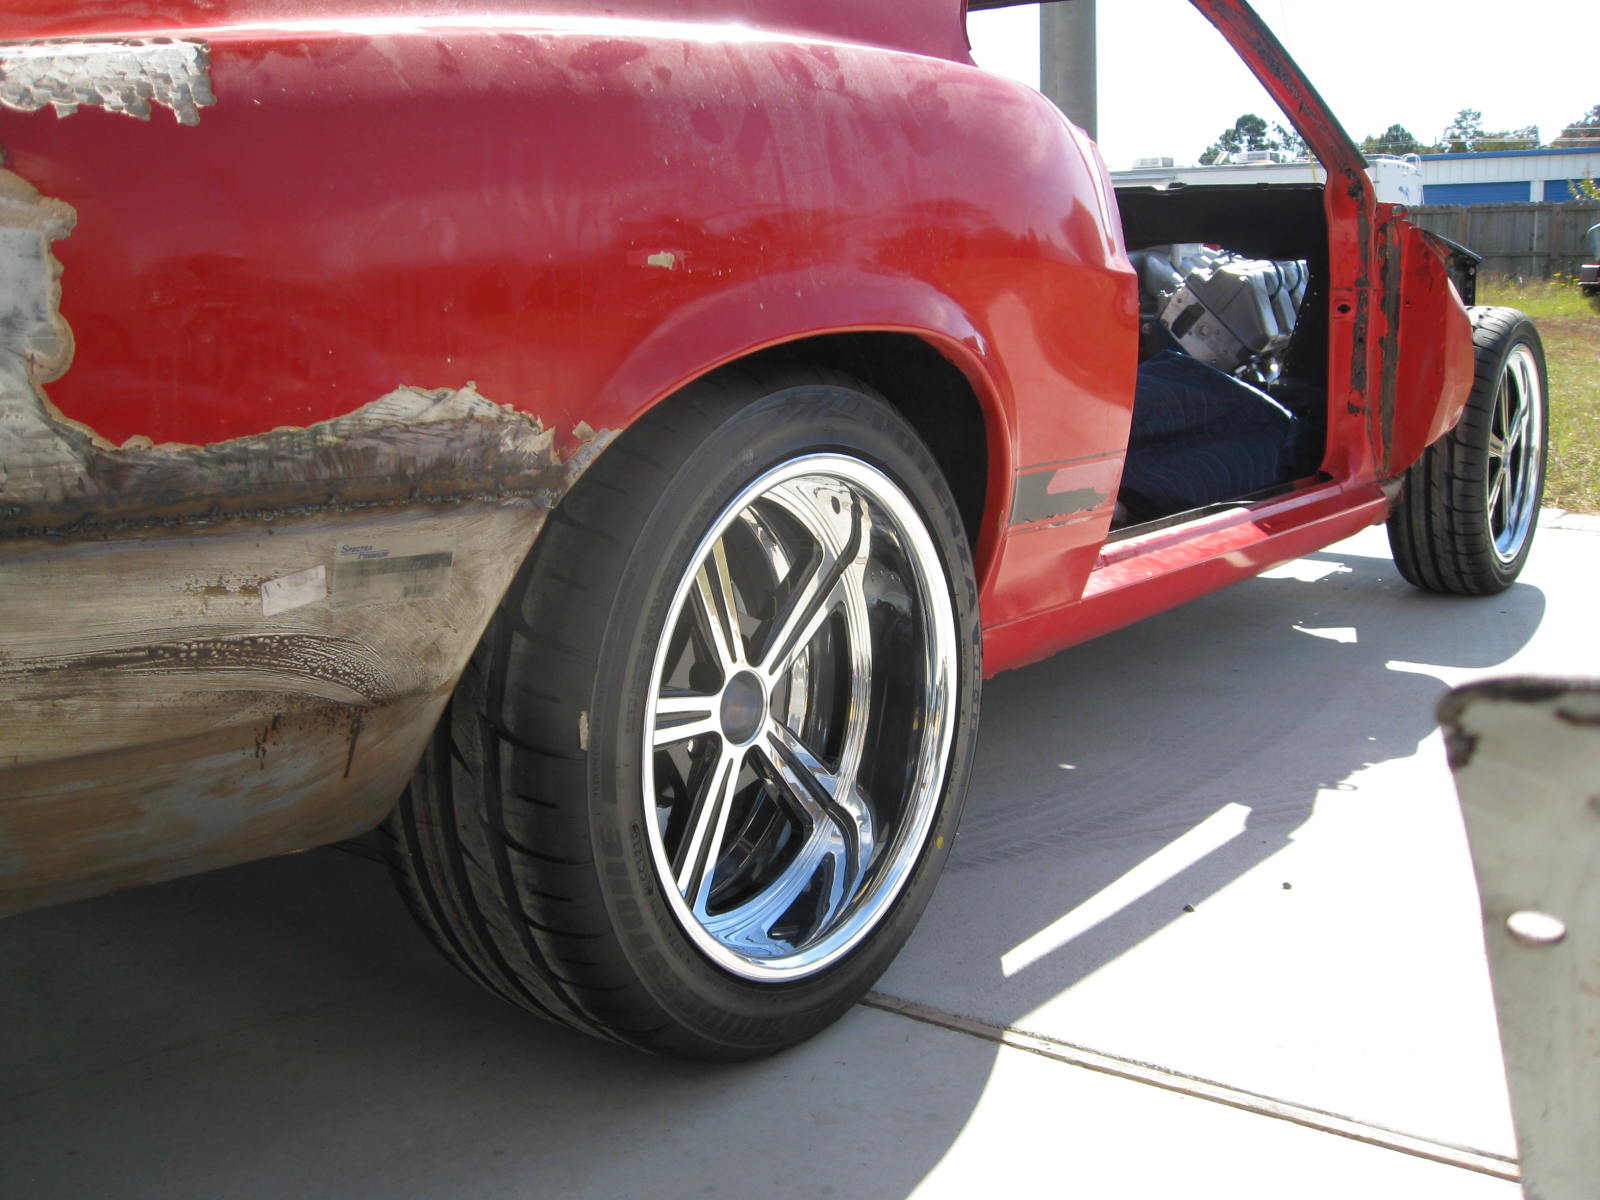
As you can see here, this shot shows the wheels/tires mounted on the car. Remember, not much weight on the car yet and I have to adjust the coil-over shocks/springs for proper final ride height.
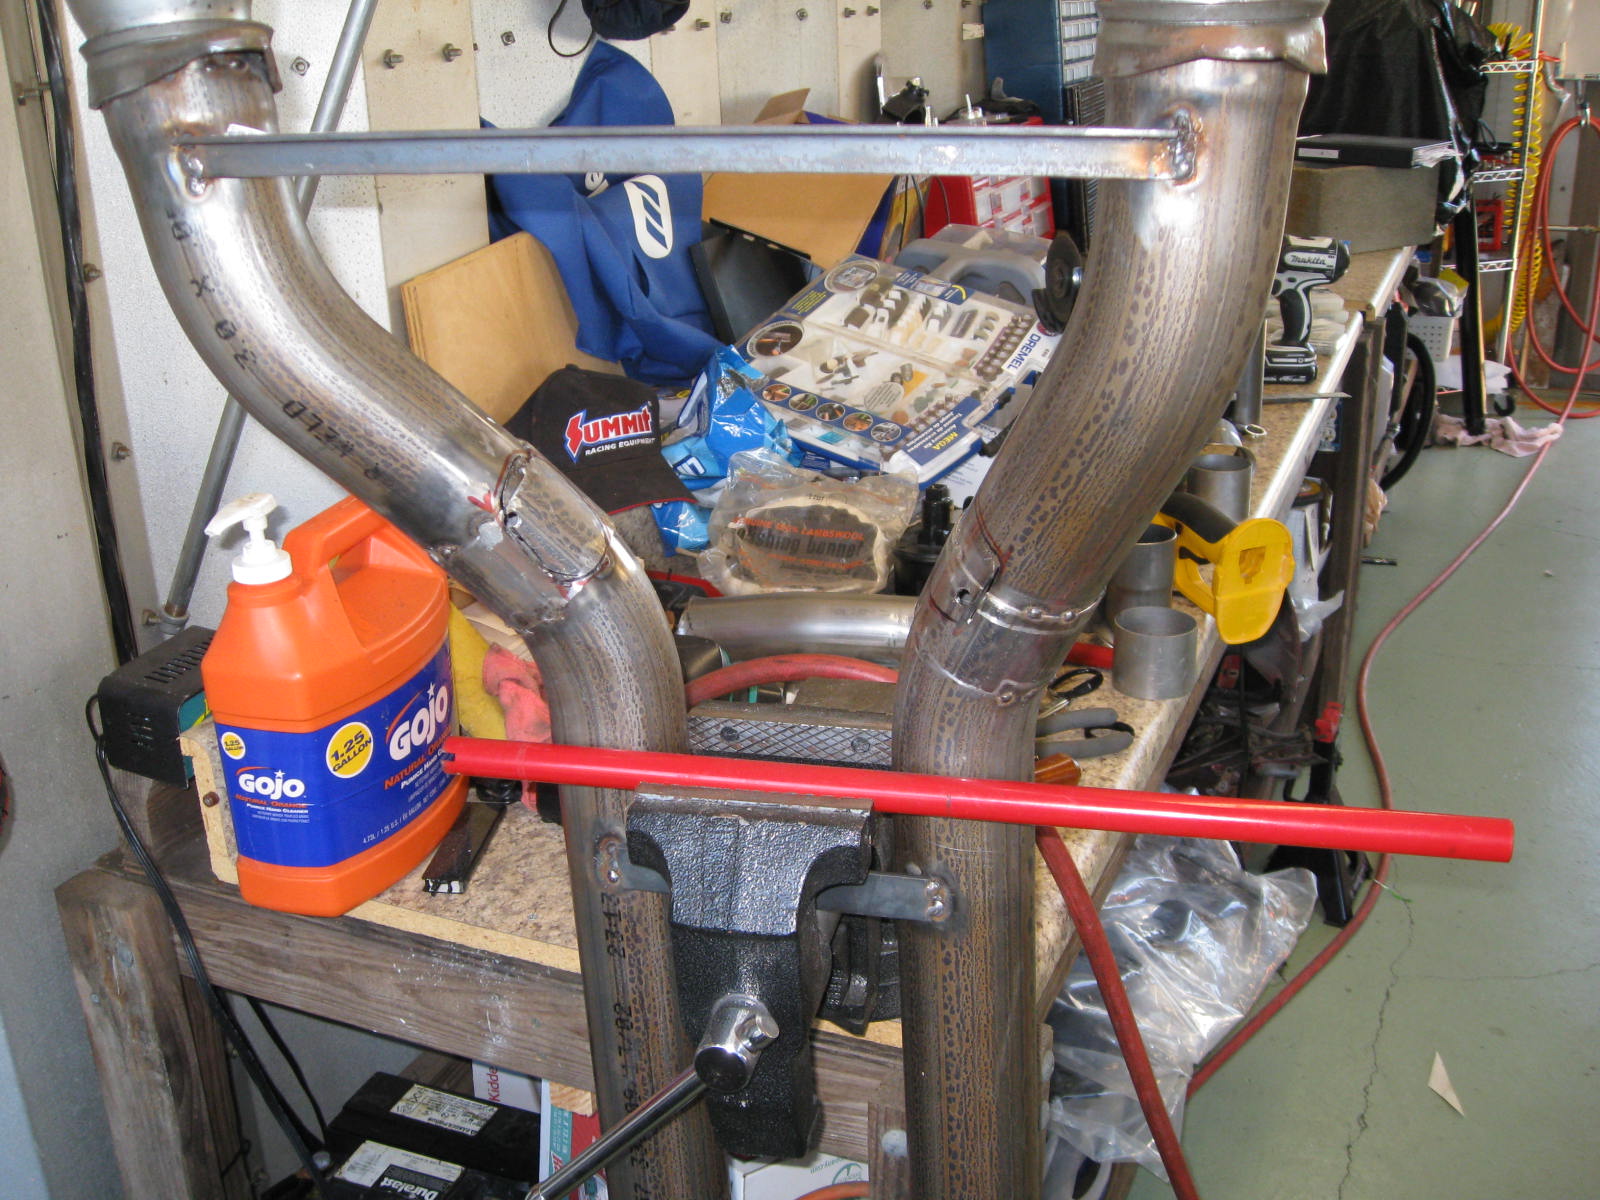
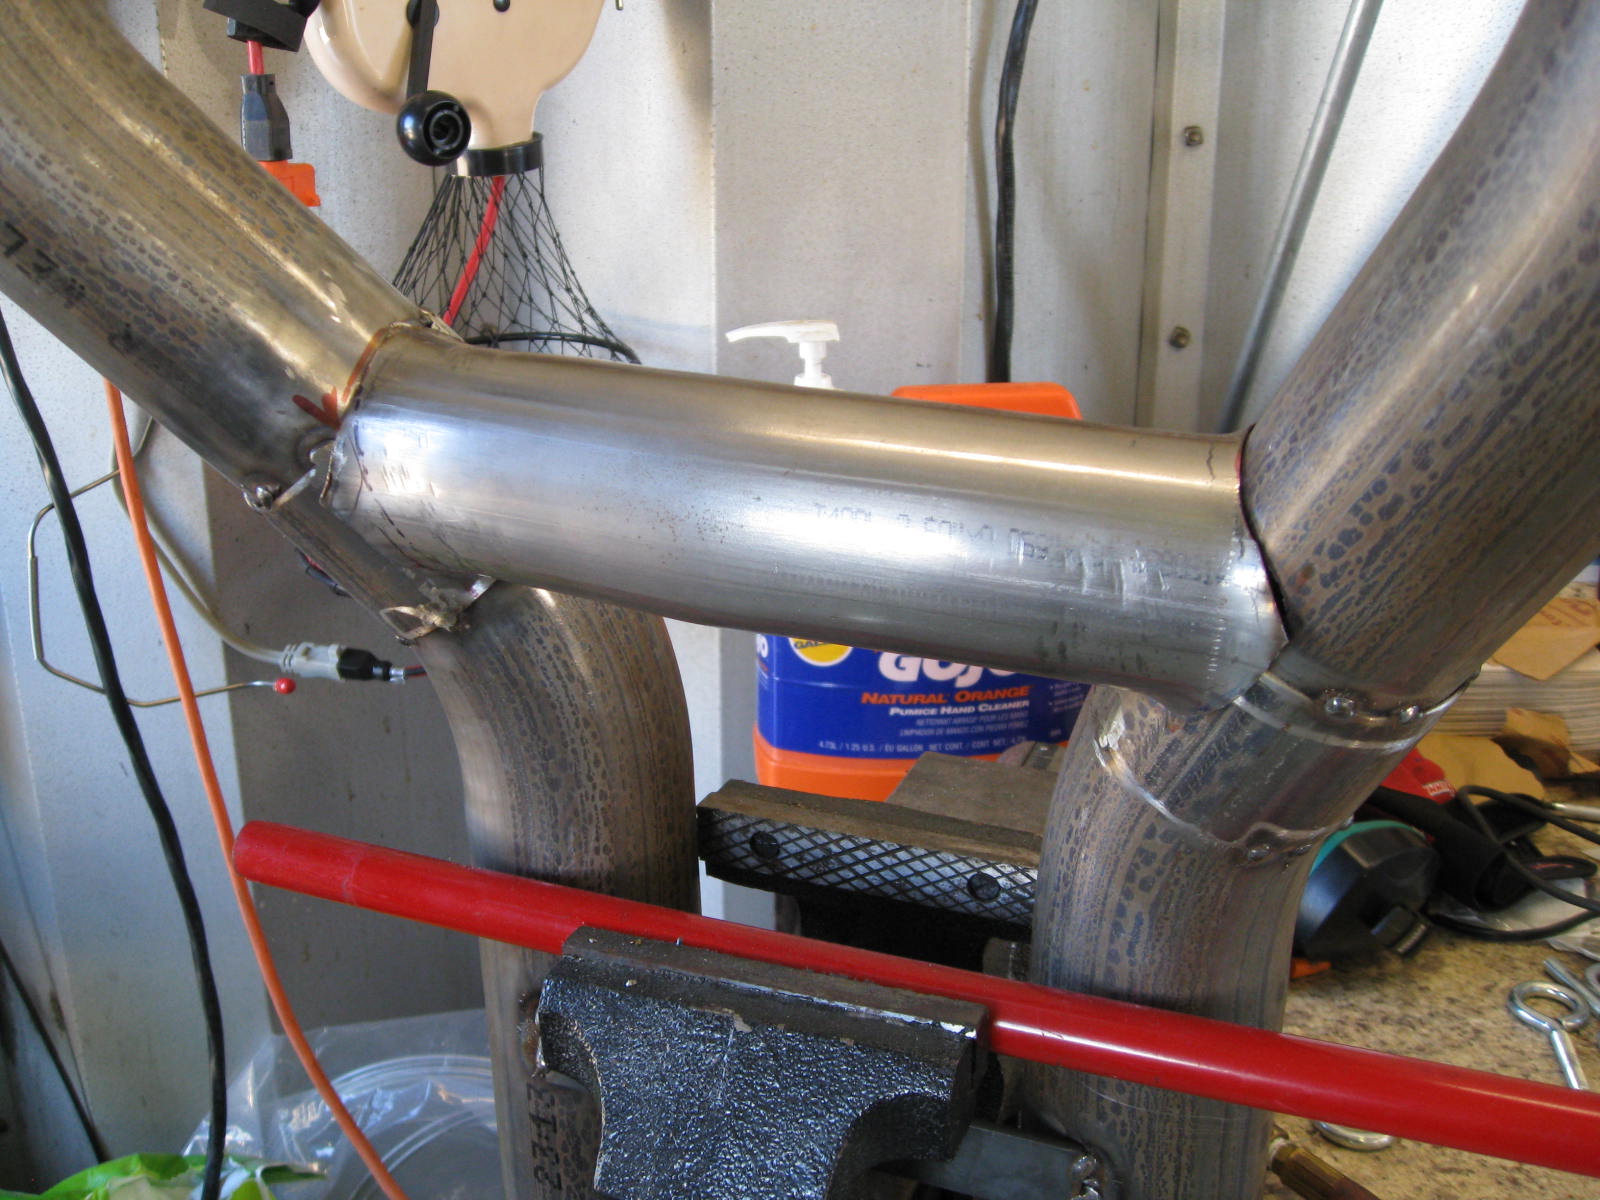
After fitting the exhaust, I removed and now have to do some cutting for the H pipe. This exhaust system is custom made from 3″ stainless steel. It really polishes up well and will look good when completed.
After cutting the holes, the “H” pipe is fitted and tack welded. Note: all the tacks are MIG welded using SS weld wire. I’ll later TIG weld with SS weld rod.
With the Boss 9 heads and intake, a big 1050 Dominator carb; well lets say not much room left for an air cleaner. I even had a custom made air cleaner that would fit a Dominator carb, gave the maximum 2.5″ drop and will fit a 18″ K&N X-Stream filter. If you look closely, the top is a K&N 16″ X=Stream. Since 16″ is the max size, I had to have made an adaptor to allow the transition from 16″ to 18″. Even with these steps, the air cleaner still raises ~4″ about the hood.
I had to make a mock-up of the air cleaner to give my body man so he could simulate the engine/air cleaner being in place. This is required to fit and custom make a hood scoop. Not the 16″ K&N X-Stream top. With wood mock-up would be the actual round air filter.
This shot show the actual air cleaner installed on the carb without the top. As you can see, the top is very close to the carb top.
After installing the wheels and tires, I had to roll the fender lips in. This gave me another ~3/4″ of room in the wheel wells. With the wider wheels and tires I went with, this was needed.
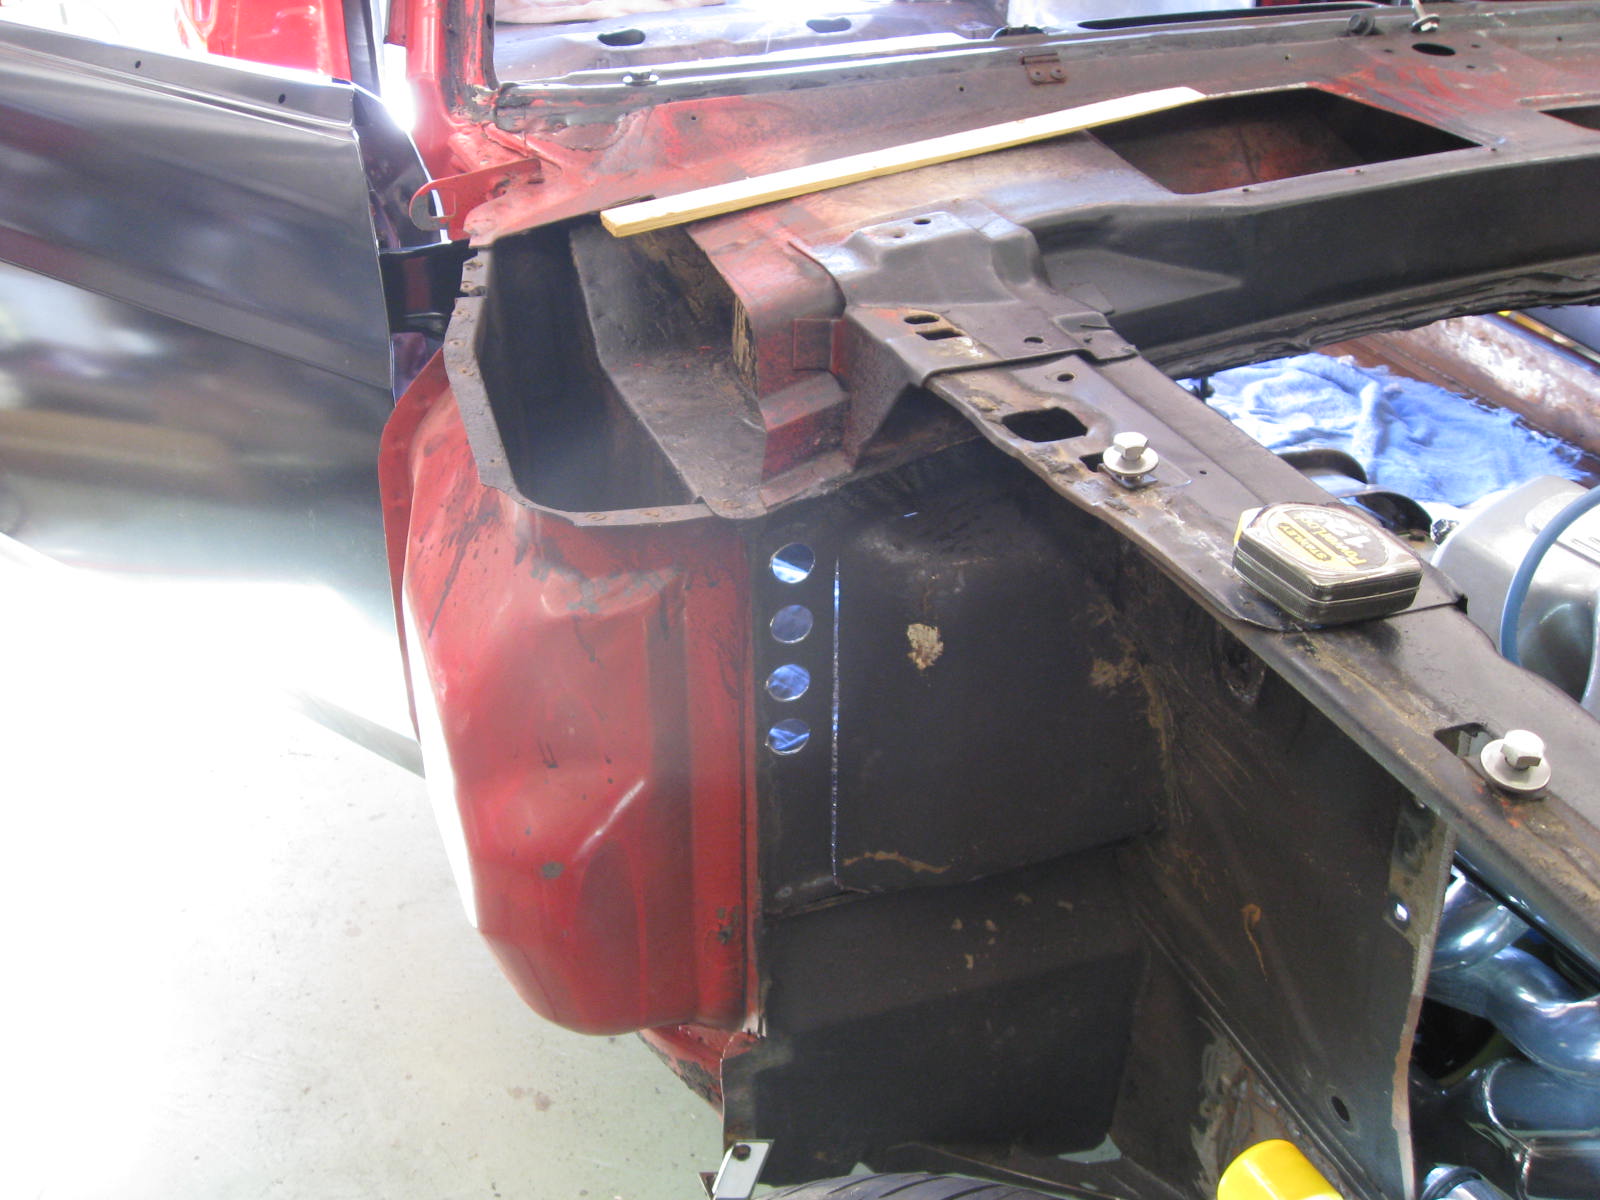
Since I’m finishing off the engine bay, I want to run as much hose and wire out side of the engine bay to keep it as clean and neat as possible. Here, I’m drilling 4 hole for the two A/C and two heater hoses to enter/exit the engine bay. These hoses will run in the left wheel well.
In this shot, you’ll see the 4 holes needed for the A/C and heater hoses to enter the firewall. I’ll install the required AN male to male fittings in all these holes during installation.
I’m completing fabricaciton of the P/S and Oil coolers mounting points. This ended up being a perfect place for the mounting as it doesn’t interfer with air flow to the radiator and is just behind the opening in the front valance, under the bumper.
I filled the front and rear side light openings for the clean look. I also filled the antenna opening on top of the front left fender.
To help prepare for the “finished” engine bay, I fabricated a flat firewall. You might recall from an earlier post, the firewall had to be removed to allow room for the engine. The the car is at body and paint, all seams and ribs will be filled and smoothed. The engine bay will be the car’s exterior color.
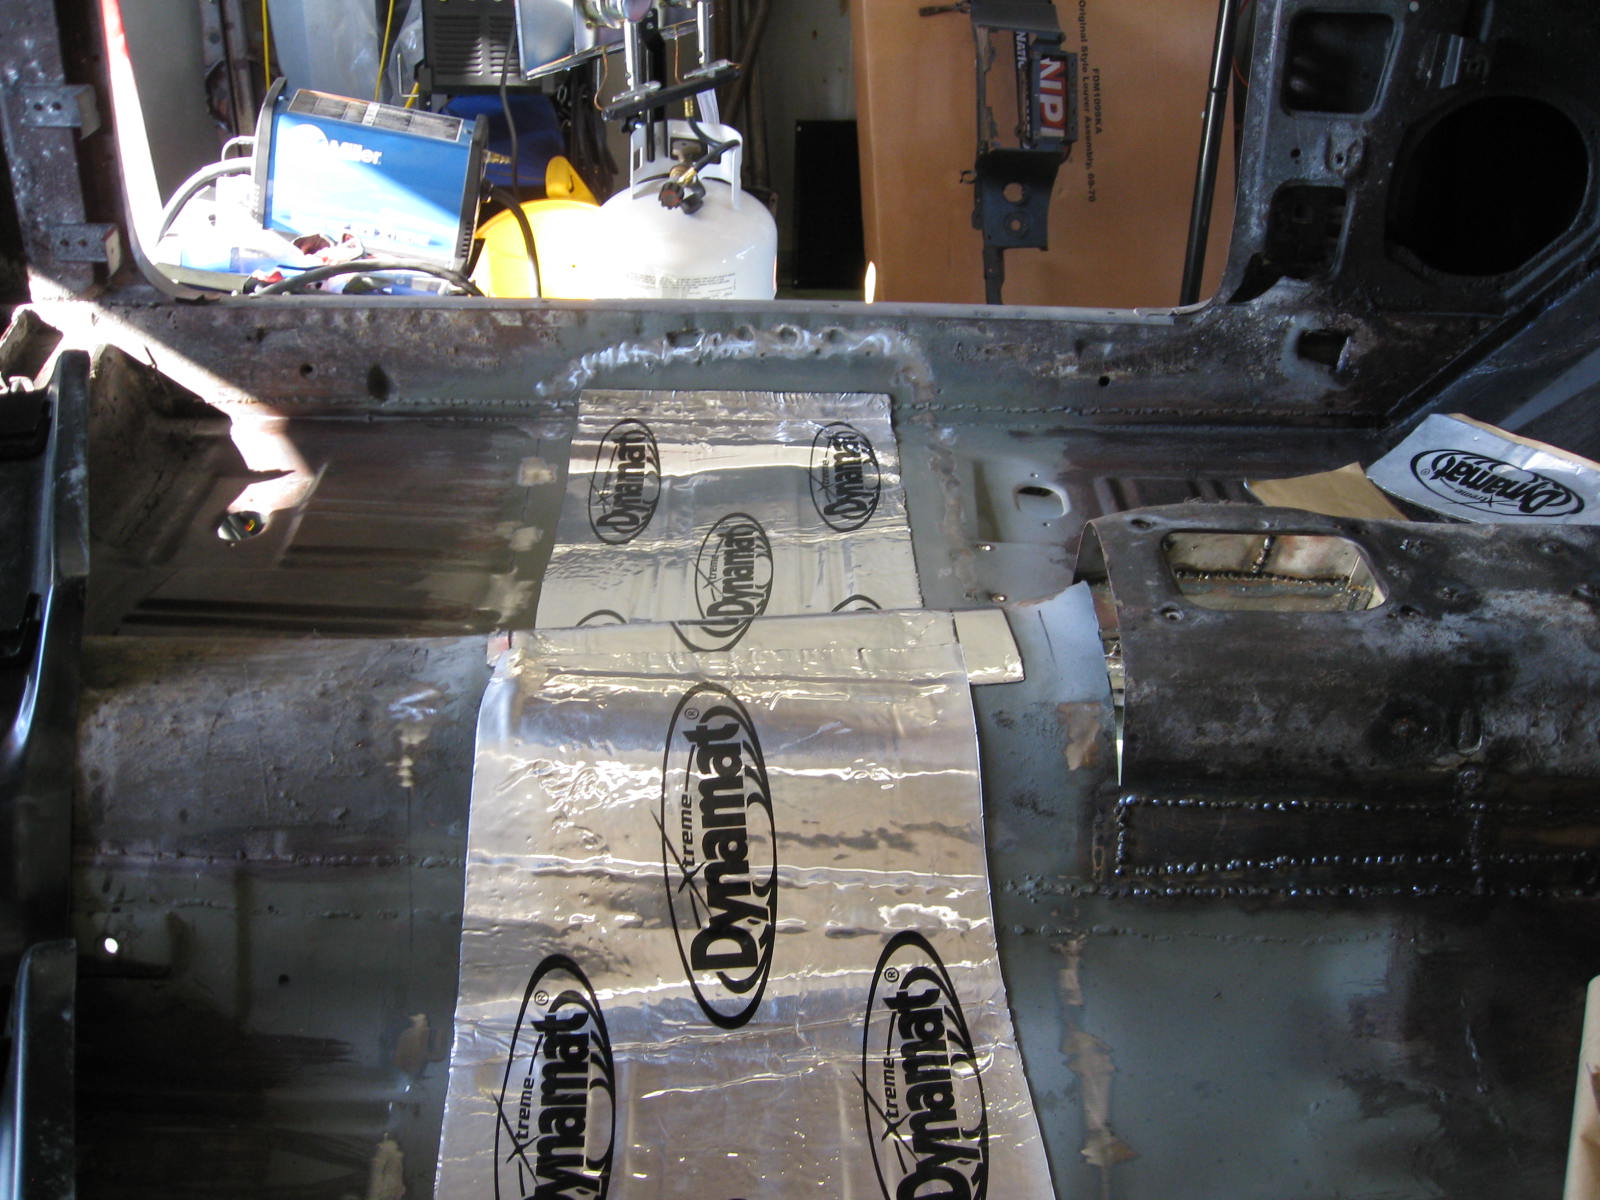
Before installing the seat frame, I install the Dynamat. I plan to do the entire car, but this has to go in now, as the seat frame/pan is welded in place.
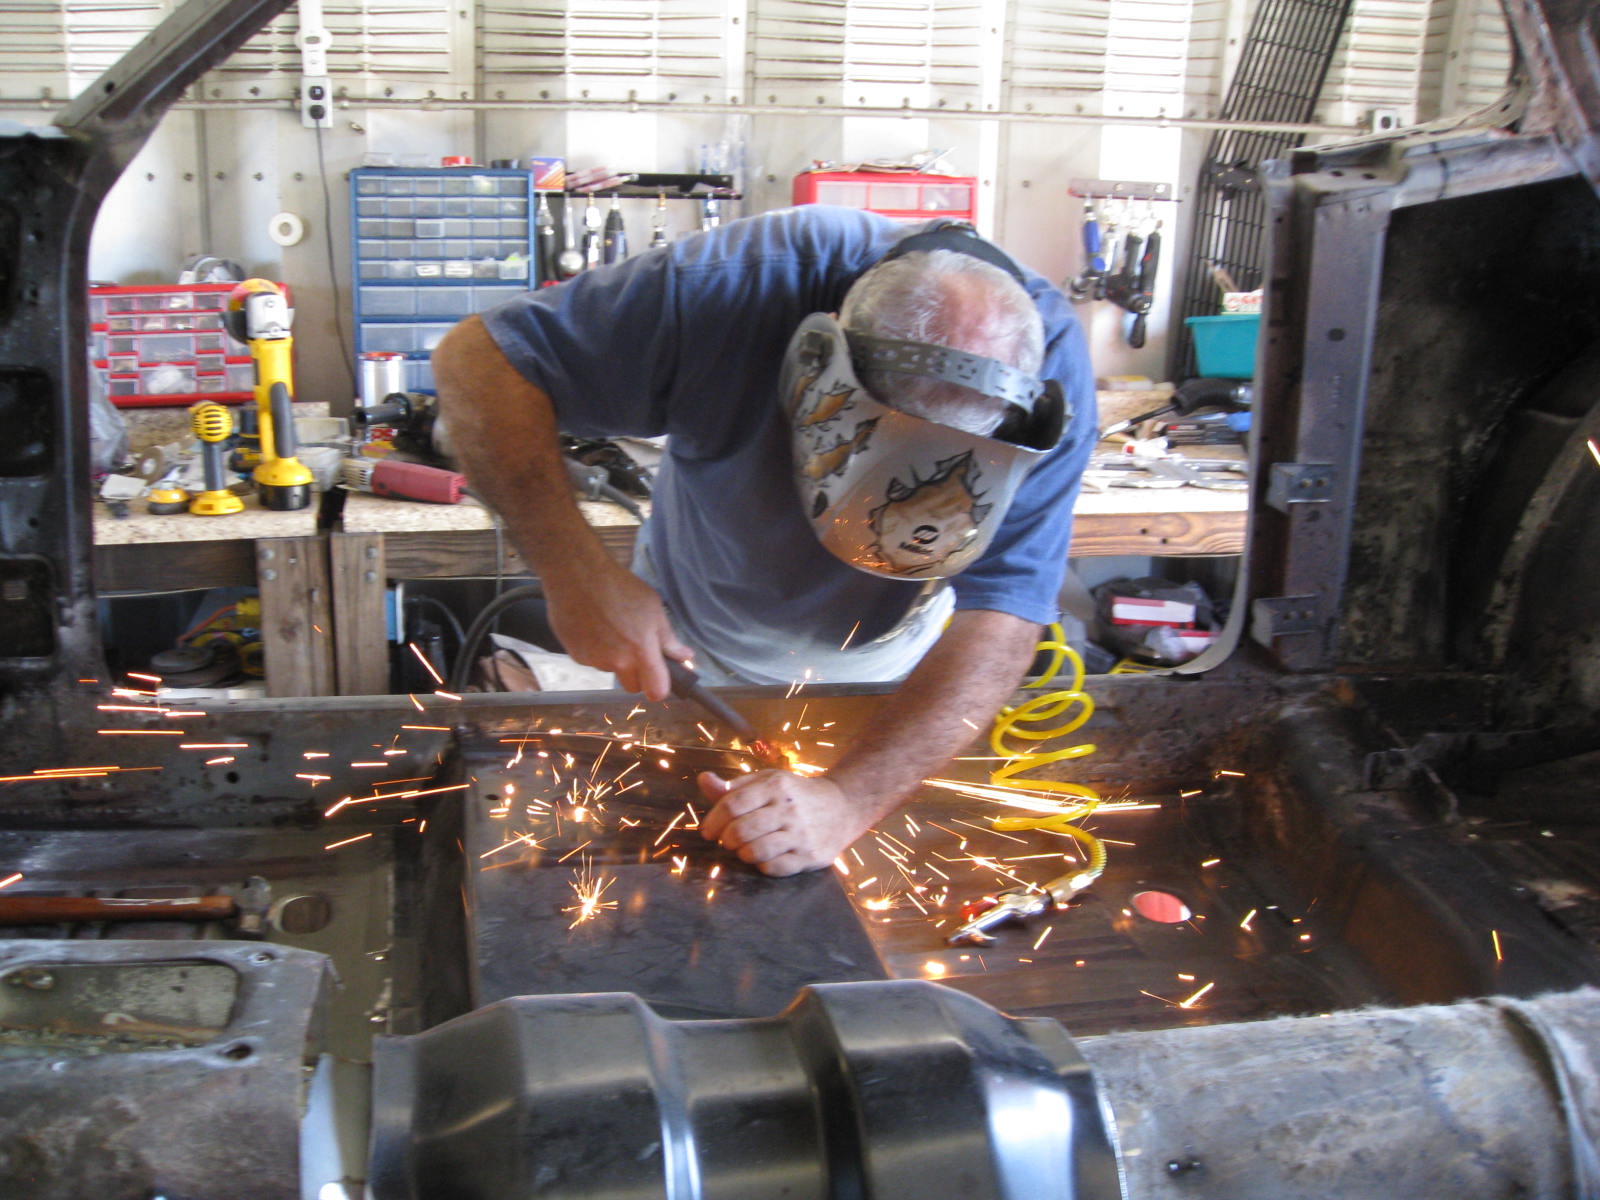
Welding in the seat frame in this shot. As you can see, I went with a convertible seat frame that provides the extra support around/over the tunnel hump. Later, I’ll transition the raised tunnel (that was required to clear the transmission) to the seat frame.