When asked what are the favorite cars we have driven, a certain Grabber Blue Mustang prepped by Ford Performance with a twin-screw blower always comes to mind, even more than a decade after driving it. Stock except for a stone-simple, non-charge-cooled supercharger pullied for a mere 5 pounds of boost, it doesn’t sound like much. However, augmented by a set of 4.10 rear gears and a short-throw shifter atop its manual transmission, it was a blast to drive.
Acceleration was instant and plenty strong. Sure, it didn’t have 700 horsepower at the tires, but given street rubber and some semblance of sanity you’d never notice. It was simply snap-eager, a daily driver that loved to party. And it was this combination of daily accessibility coupled with a nice power hit that won us over.
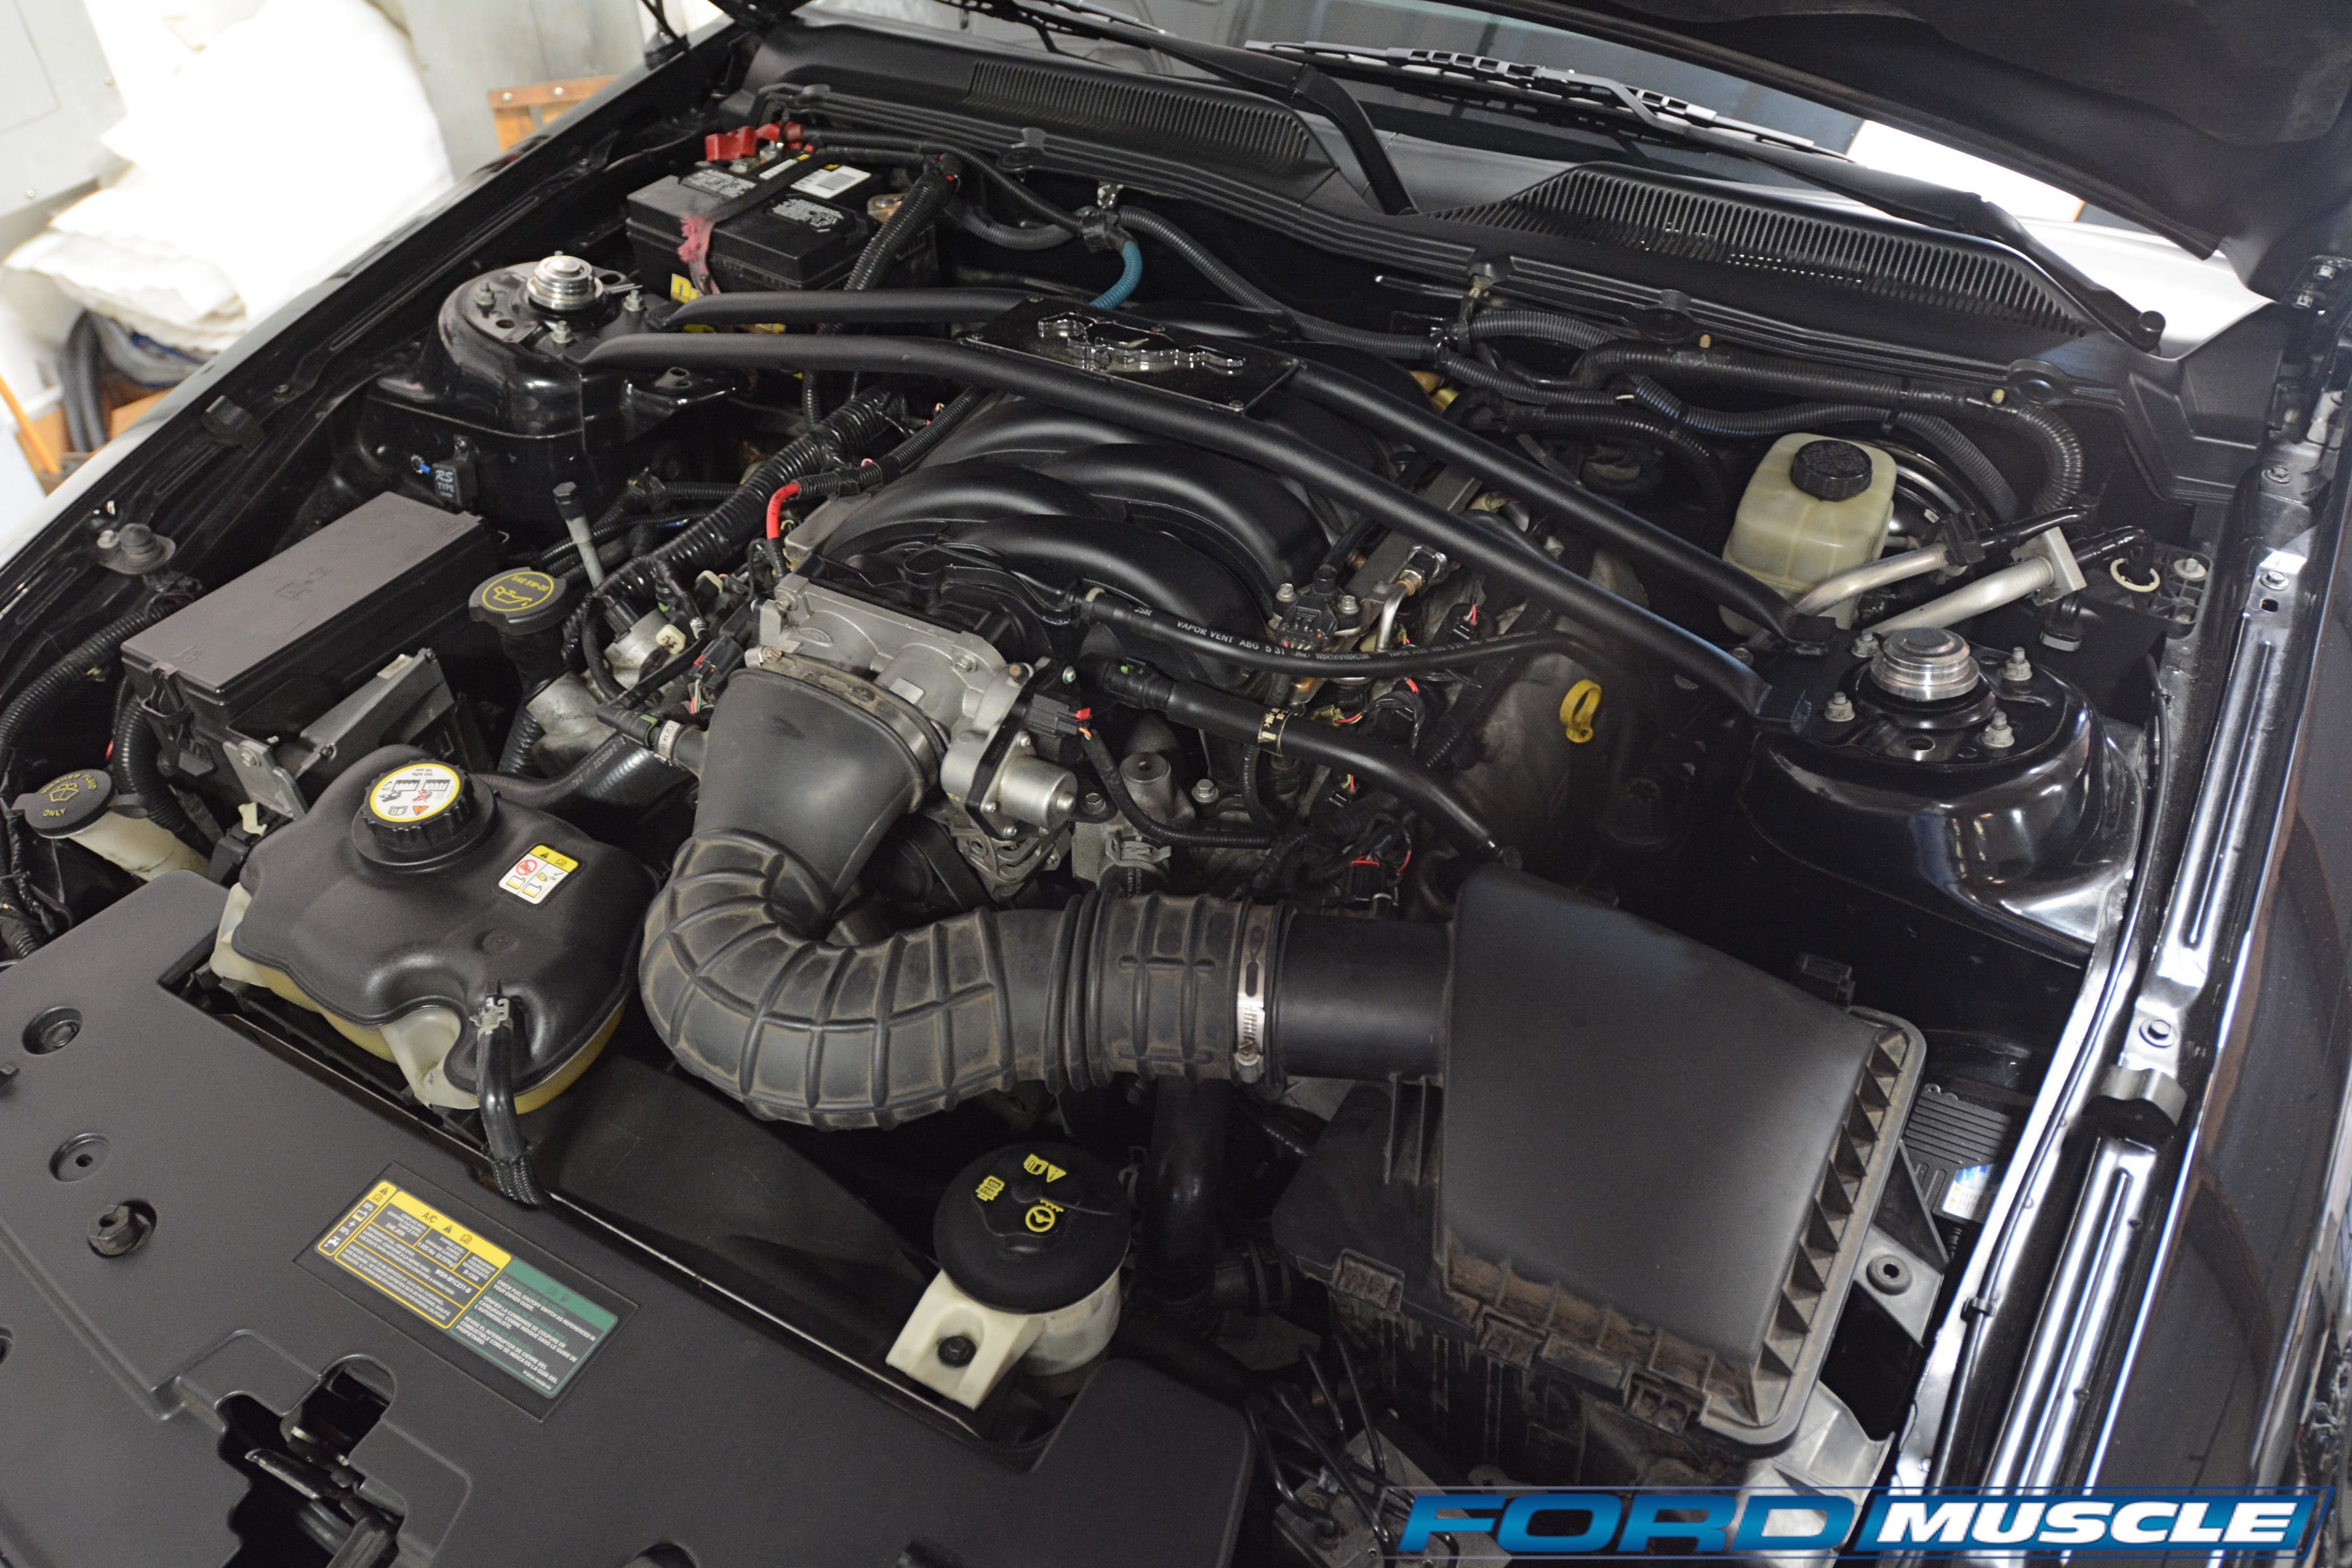
Melissa’s 4.6-liter engine actually had a few bolt-ons, but Ricardo returned it to dead stock for our baseline power pulls.
As such, when Ricardo Topete at GTR Performance said he had a customer wanting to put a Kenne Bell atop the Three-Valve 4.6-liter in a 2006 GT we were on it. This time the transmission is an automatic with stock 3.31 cogs out back, so the power delivery will roll in a little more than with a manual, but the whole idea is strikingly similar: a daily-friendly, real-world Mustang with fun power.
Even better, the charge-cooled, Kenne Bell twin-screw promised far more power than the aforementioned 5-psi kit could, so this one should be even more fun.
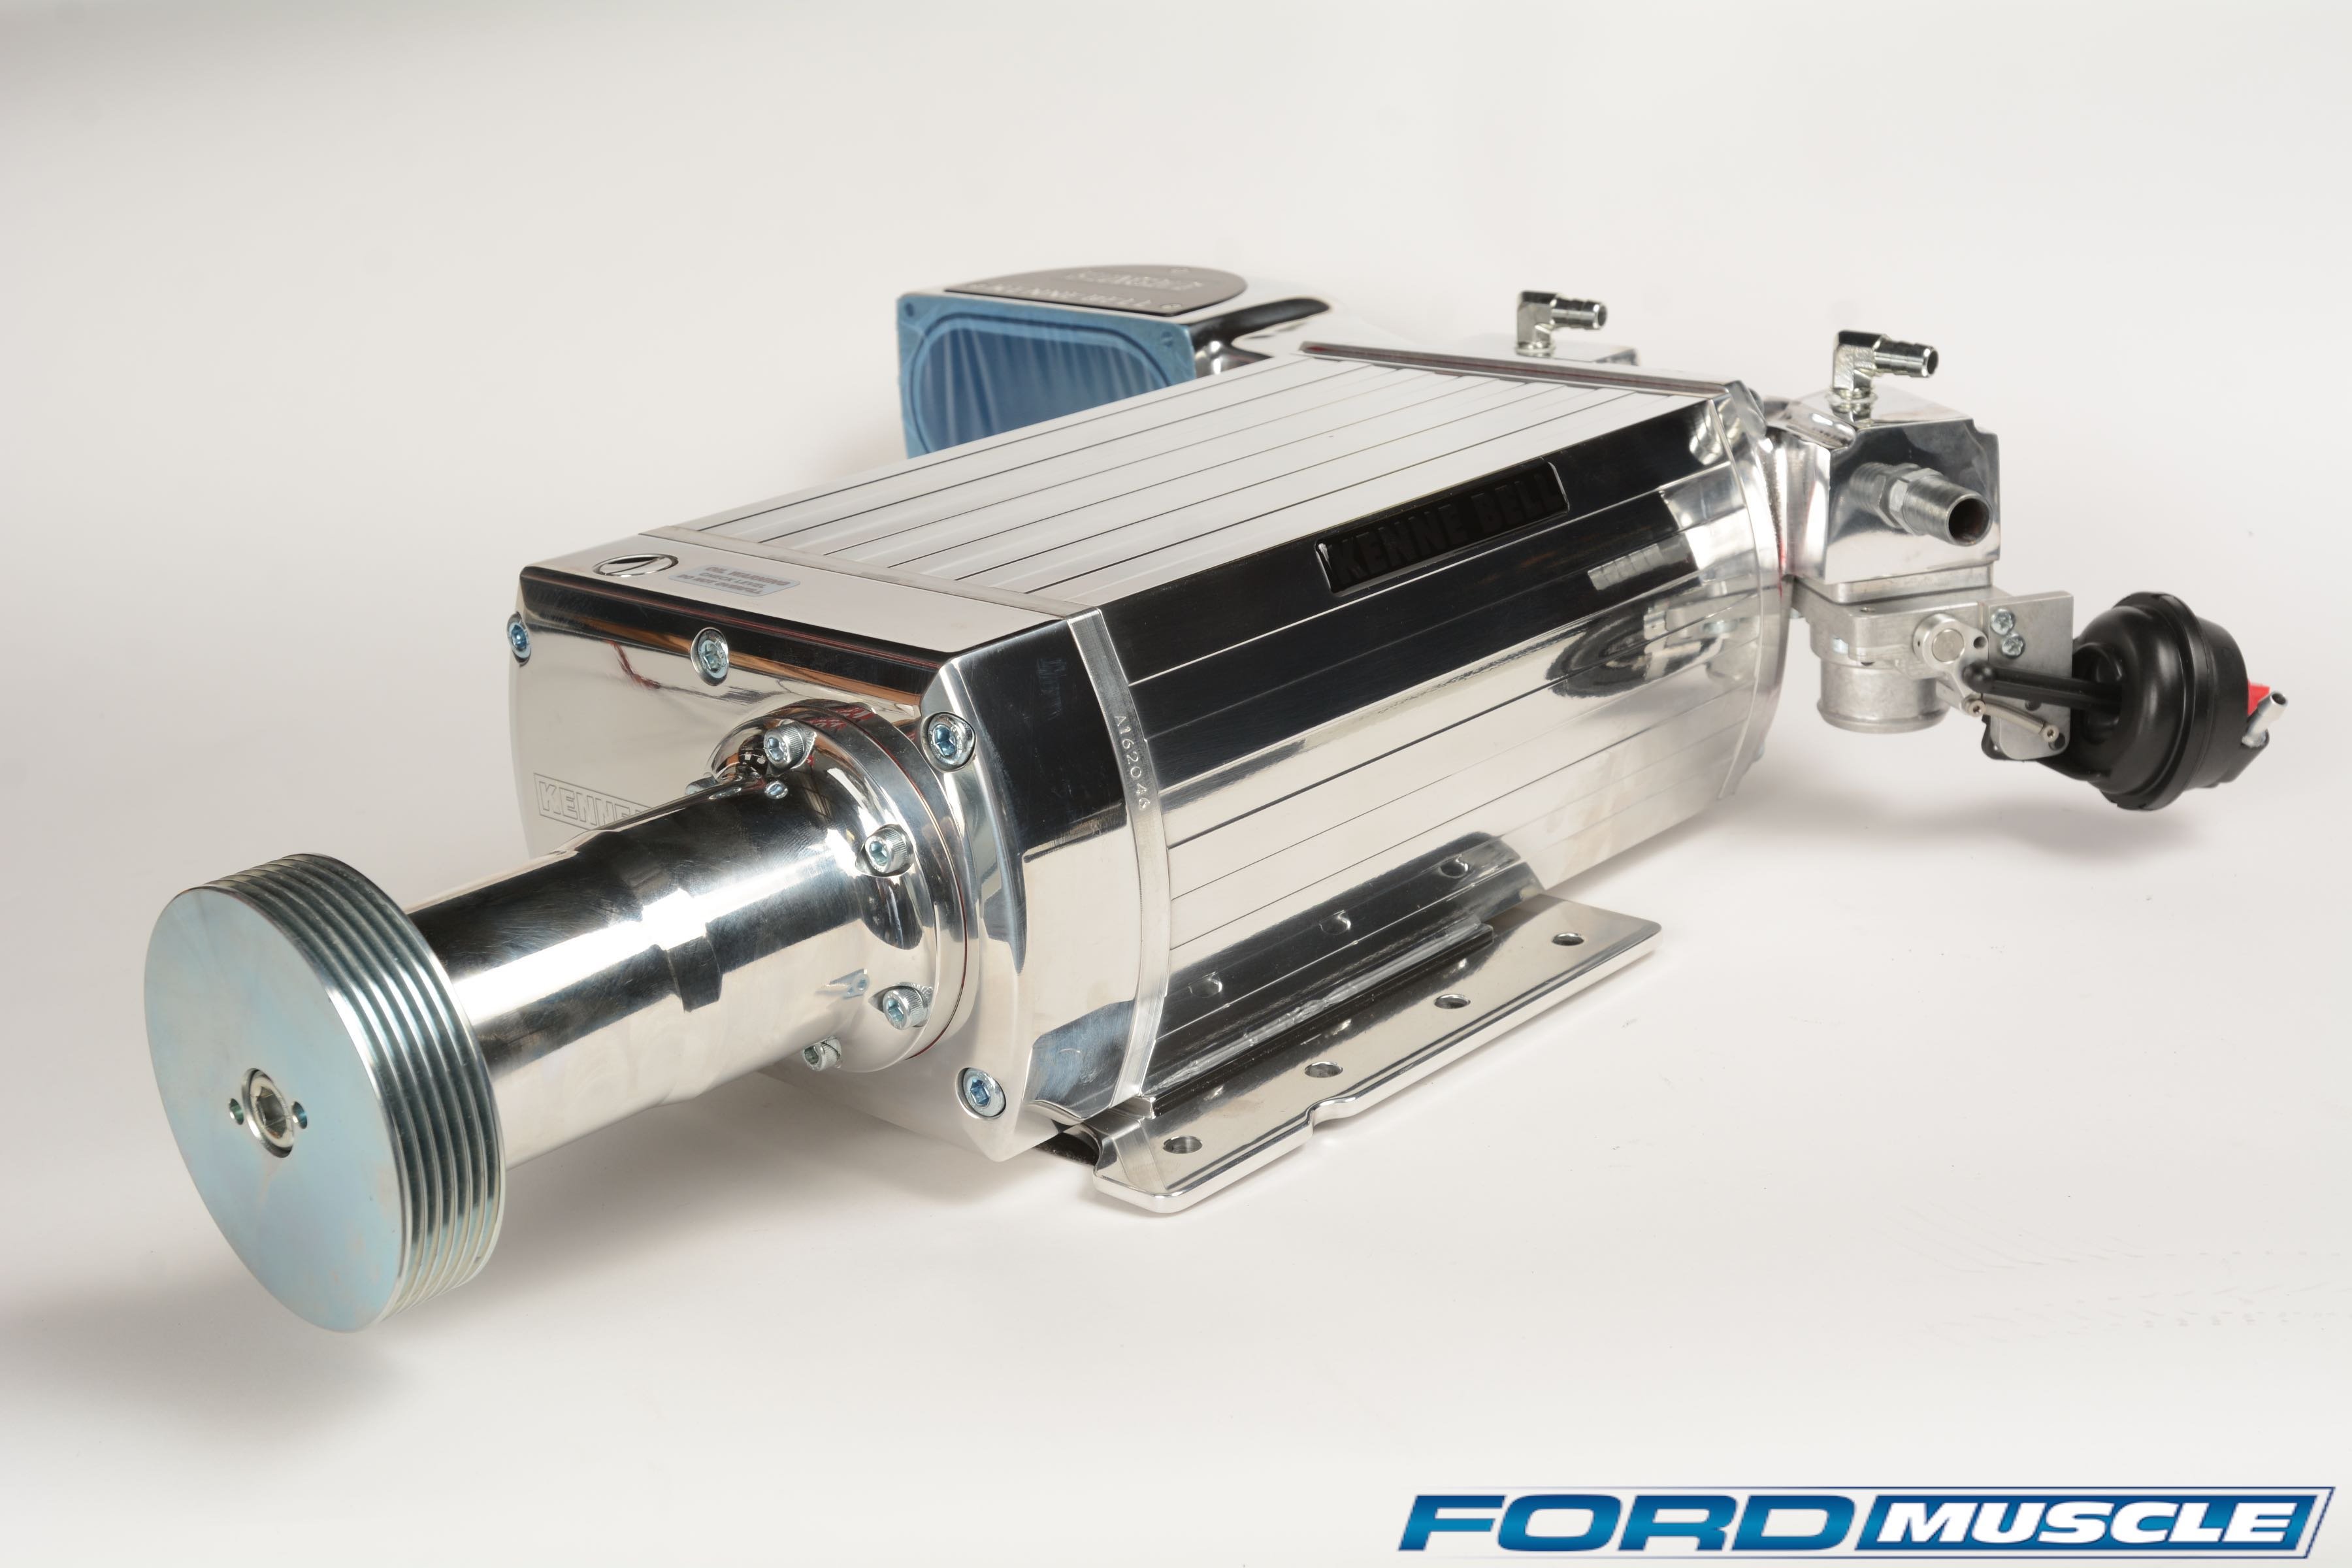
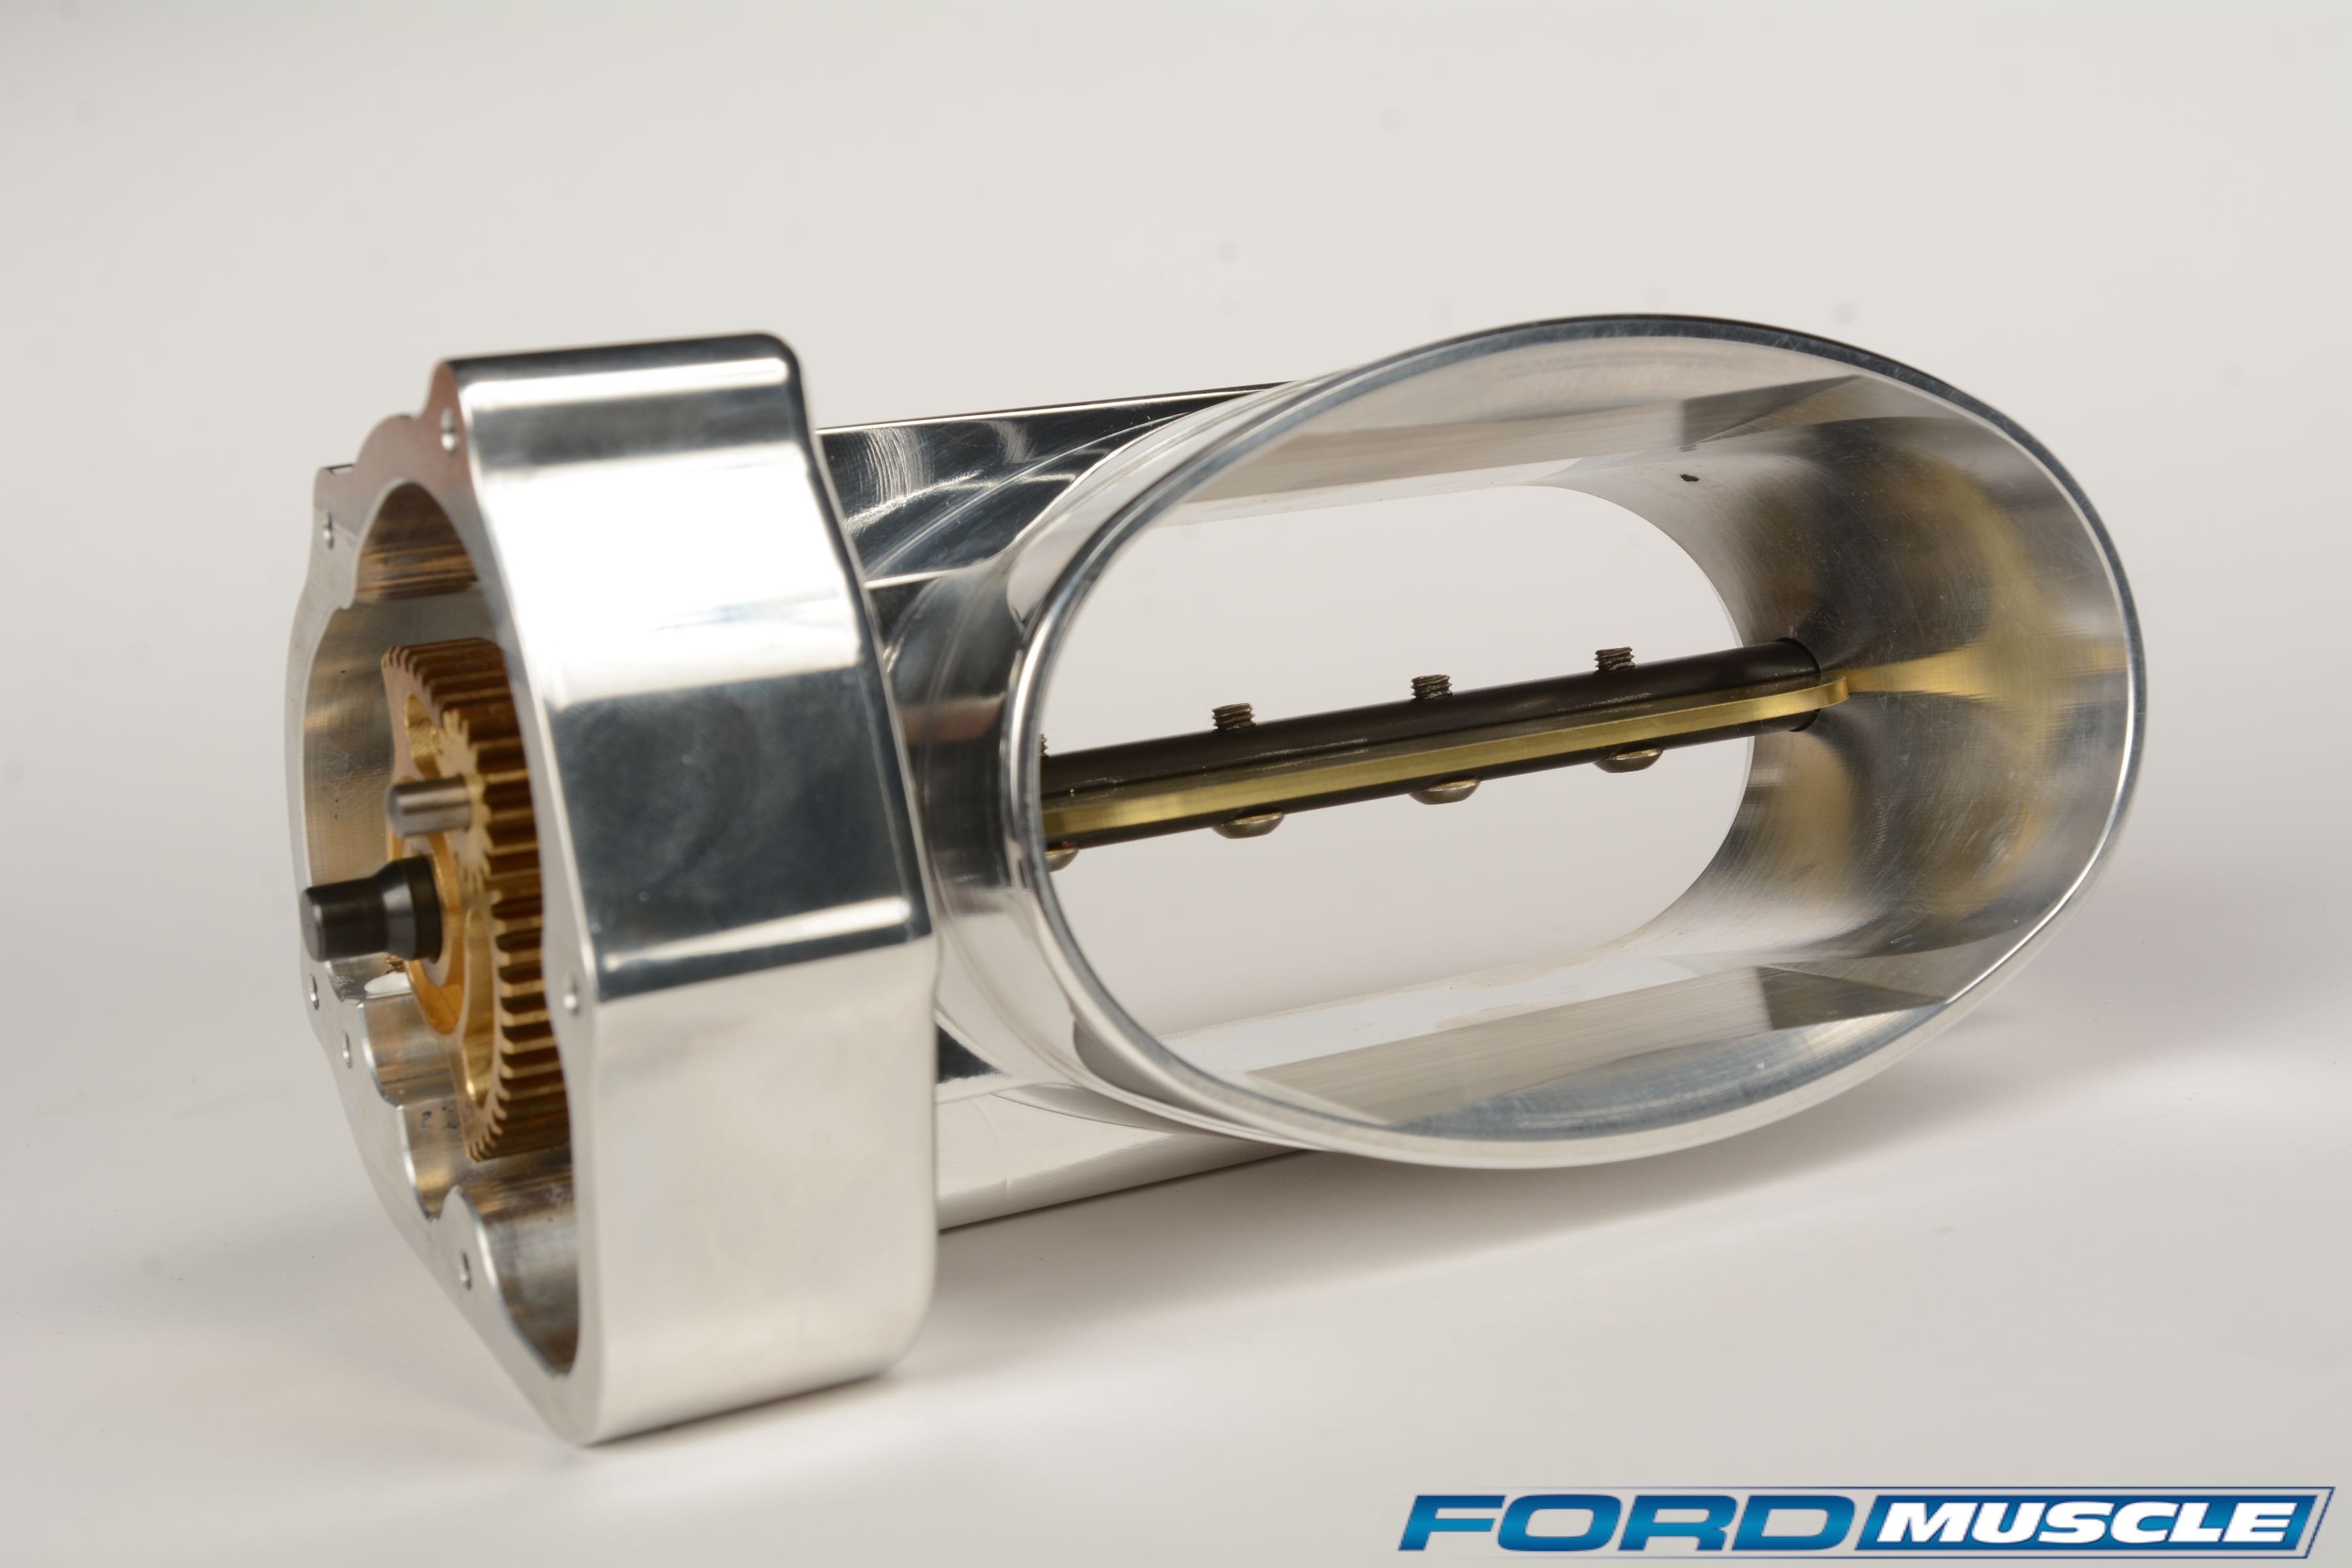
Kenne Bell’s 2.6-liter blower is perfect for street use. Combined with the Stage 2 throttle body it can be pullied to make all the power the stock Three-Valve internals can handle (675 rear-wheel horsepower on race gas) and it grunts out superb torque even at polite boost levels. The 2.6-liter blower — shown here upside down to reveal the outlet port — is sized and shaped for optimal output up to 15 pounds of boost or so. Above that Kenne Bell offers the larger 2.8H Mammoth supercharger for dedicated track cars.
Of course, it’s worth a moment here to give thanks to the Three-Valve. If it weren’t for the Four-Valve Coyote, its Three-Valve modular cousin would get a lot more of the love it deserves. Overshadowed by the newer Coyote, RoadRunner and Voodoo Four-Valves, it surprises many to hear this 4.6-liter remains a best seller for many aftermarket parts manufacturers such as Kenne Bell. But it’s no surprise to us.
Available in huge numbers at fire sale prices the 2005-2010 Mustangs are still mainly clean, cars without excessive mileage so they don’t require a bumper-to-bumper restoration like their antiquated predecessors, love those Fox, SN-95, and New Edge cars as we may. Furthermore, their S197 chassis and powertrain potential is excellent as well. We doubt there is a more capable, available and affordable pool of project cars extant.
Project Black
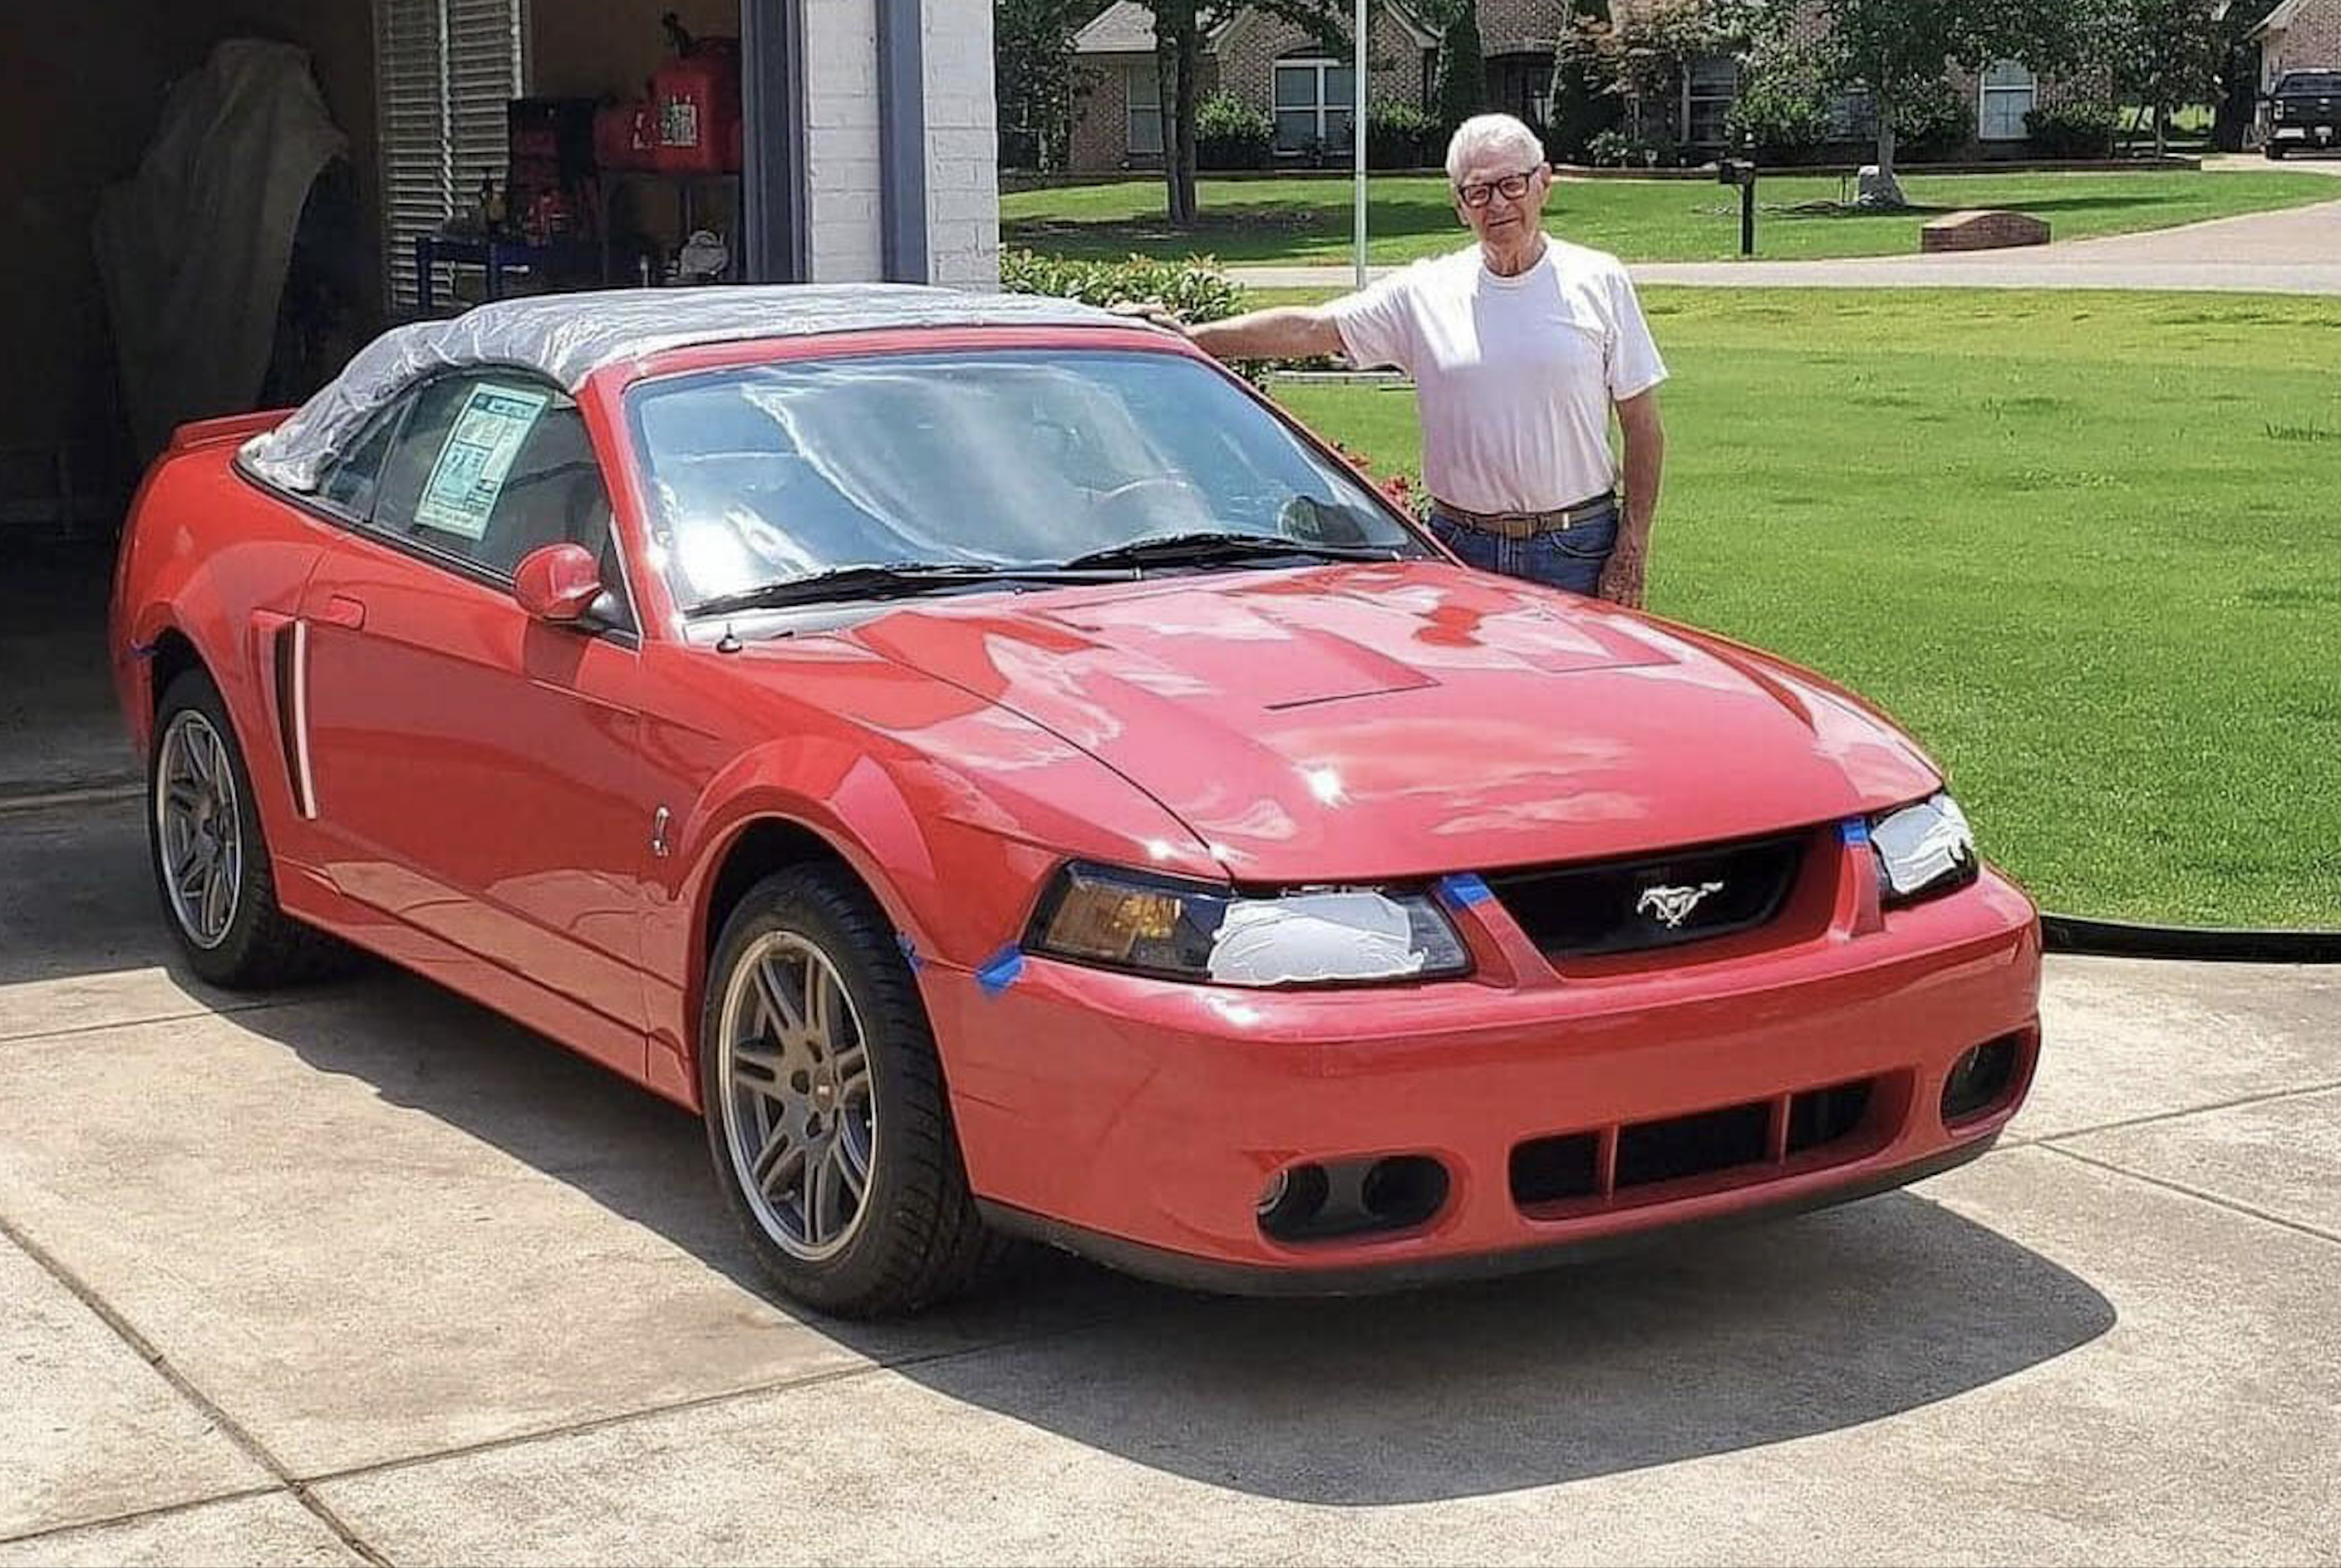
Our project 2006 GT stands out in two ways. For one, it’s exceptionally clean. Meticulously detailed at all times, it’s a fine representative of the breed and reflects well on its owner, Melissa Repreza. As Ricardo Topete, Wrench-In-Chief at GTR points out, “She’s more into her car than most of my male customers,” and considering this is her third Mustang and the attention she lavishes on it, we’re fully agreed.
Melissa enjoyed her GT as both her daily driver, and more lately, a weekend treat. Cruising and car shows have been her main activities, but she did confess a growing urge to take the car down the strip after eyeing Ricardo baseline her car at Auto Club Speedway. In such ways speed junkies are made!

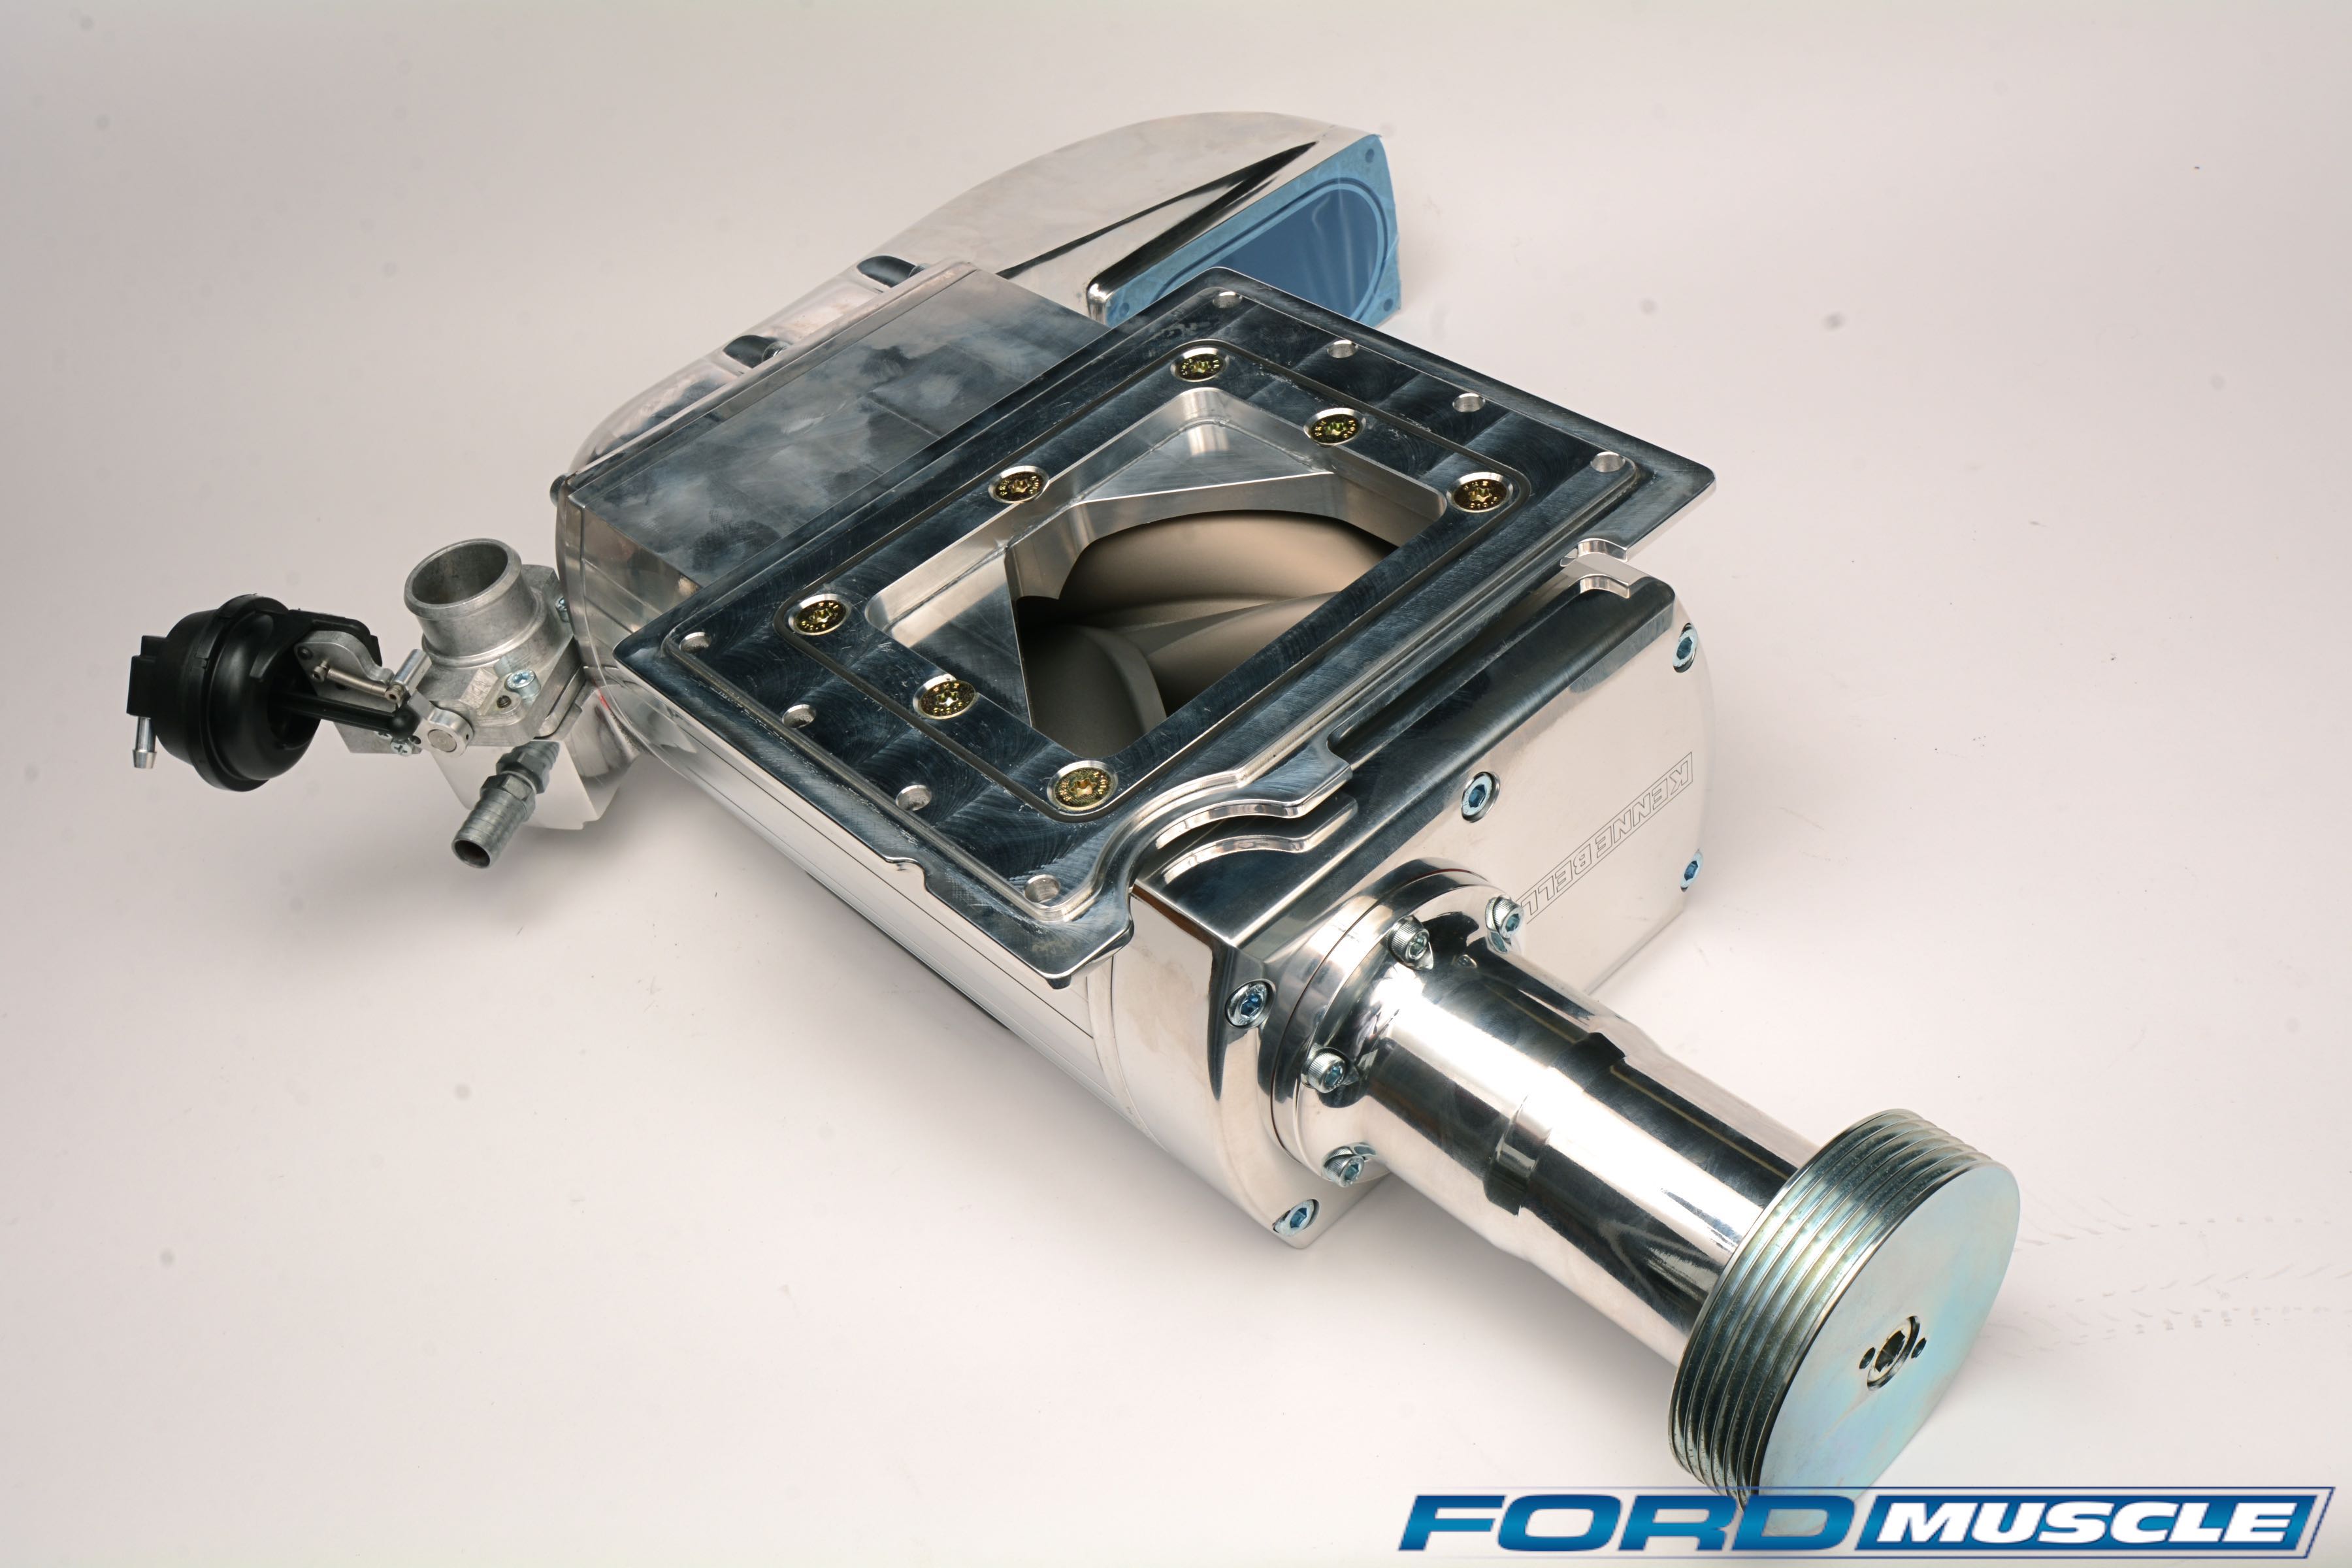
Standard Kenne Bell Three-Valve kits use the stock Ford throttle body, but by adding a larger inlet casting to the rear of the supercharger (seen here) and a 130mm throttle body the blower breathes easier and makes a minimum of 21 more rear-wheel horsepower. Here’s the big, Stage 2 130mm billet throttle body yawning for the camera. It features precision brass gears and electronic motor control, which must be swapped from the stock throttle body. The more boost you plan to run, the better the returns from this $500 upgrade. Melissa’s Stage 2 2005-2009 Mustang kit includes this 90mm mass air meter as part of the deal.
With about 100,000 miles on the odometer—not that you’d ever guess from the beautiful paint and clean interior—Melissa’s ride remains mechanically sound and ready for a power adder. Almost to prove the point, as well as document our starting point, Ricardo saw 281 rear-wheel horsepower from the black GT on his Dynojet — a solid number from an automatic-trans car.
Ricardo also ran the car down the nearby Auto Club Speedway’s quarter mile in 13.895 seconds at 101.69 mph. For consistency he borrowed a set of big-and-little DOT drag rubber from Kenne Bell (GTR Performance and Kenne Bell are two different companies, but they just happen to be located within 300 yards of each other). Its eighth-mile posting was 9.050/80.34 mph.
Twin Screwed
When Melissa asked what she could do to step up her Mustang, Ricardo was quick to recommend Kenne Bell’s supercharger. The kits are complete with good instructions, says Ricardo, and the power increase is excellent. The Lysholm-screw design is inherently more efficient than its slightly less expensive roots blower competition and the polished blower option is showy, a big plus for Melissa who plans on attending plenty more car shows.
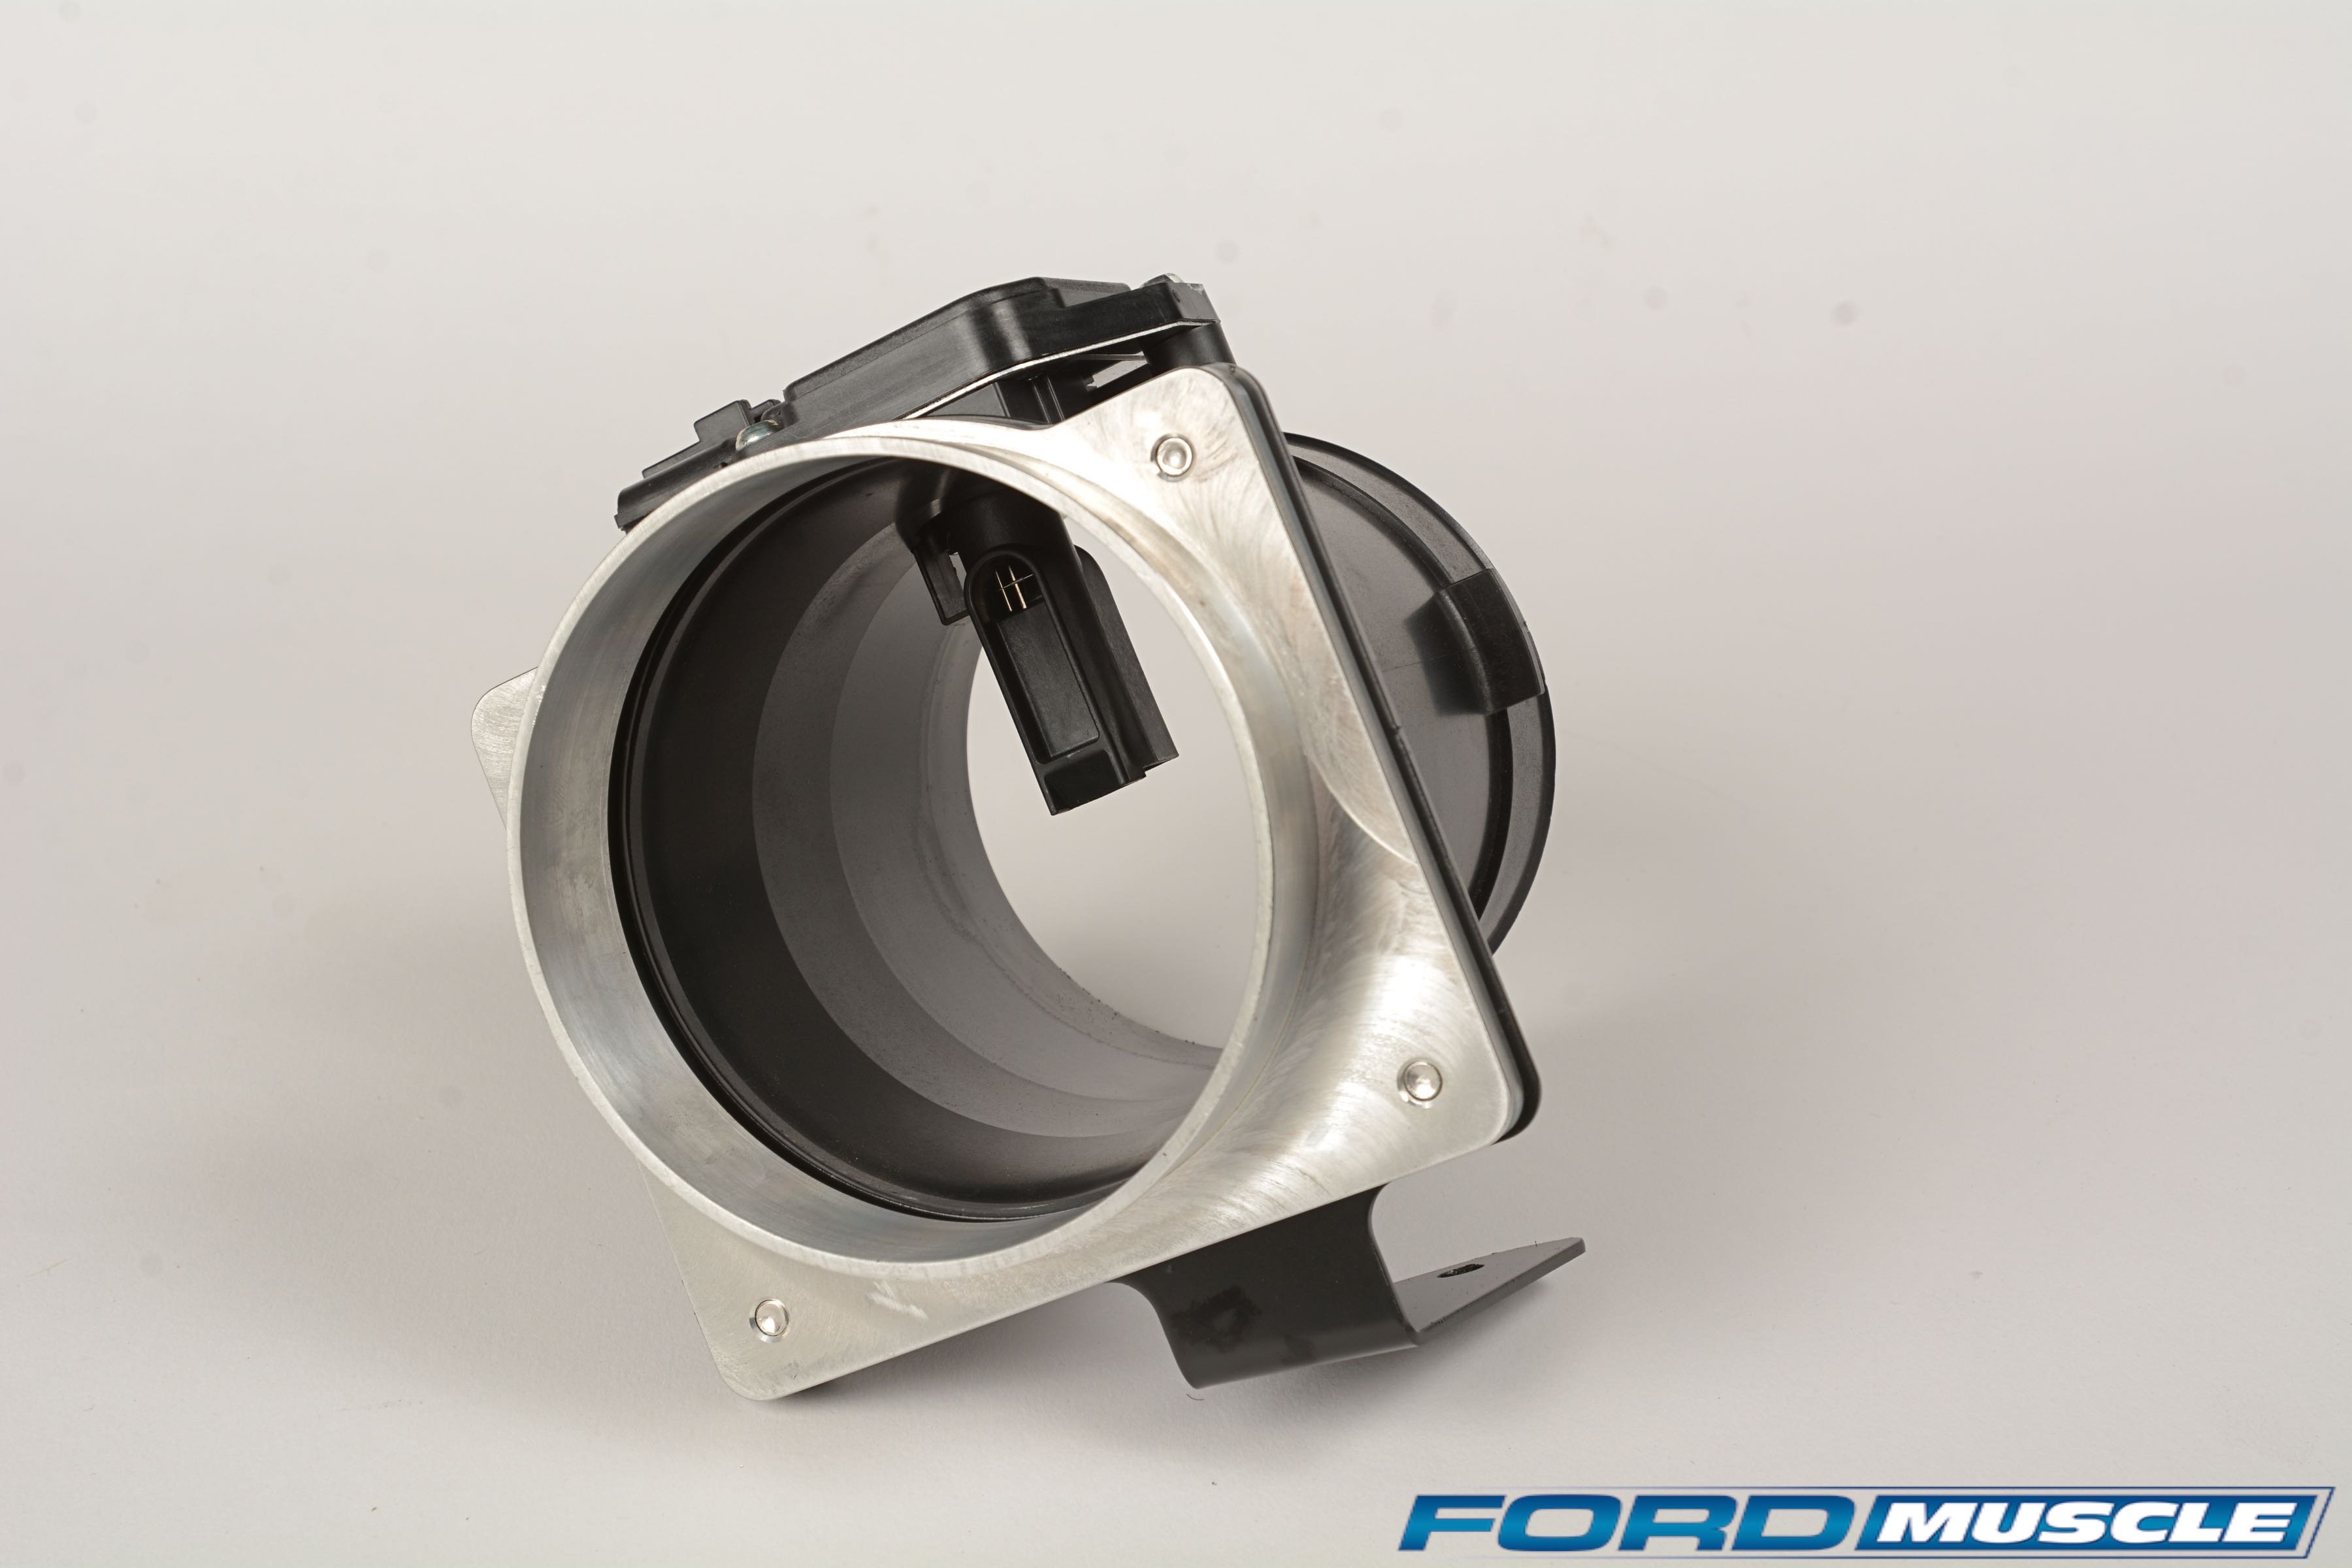
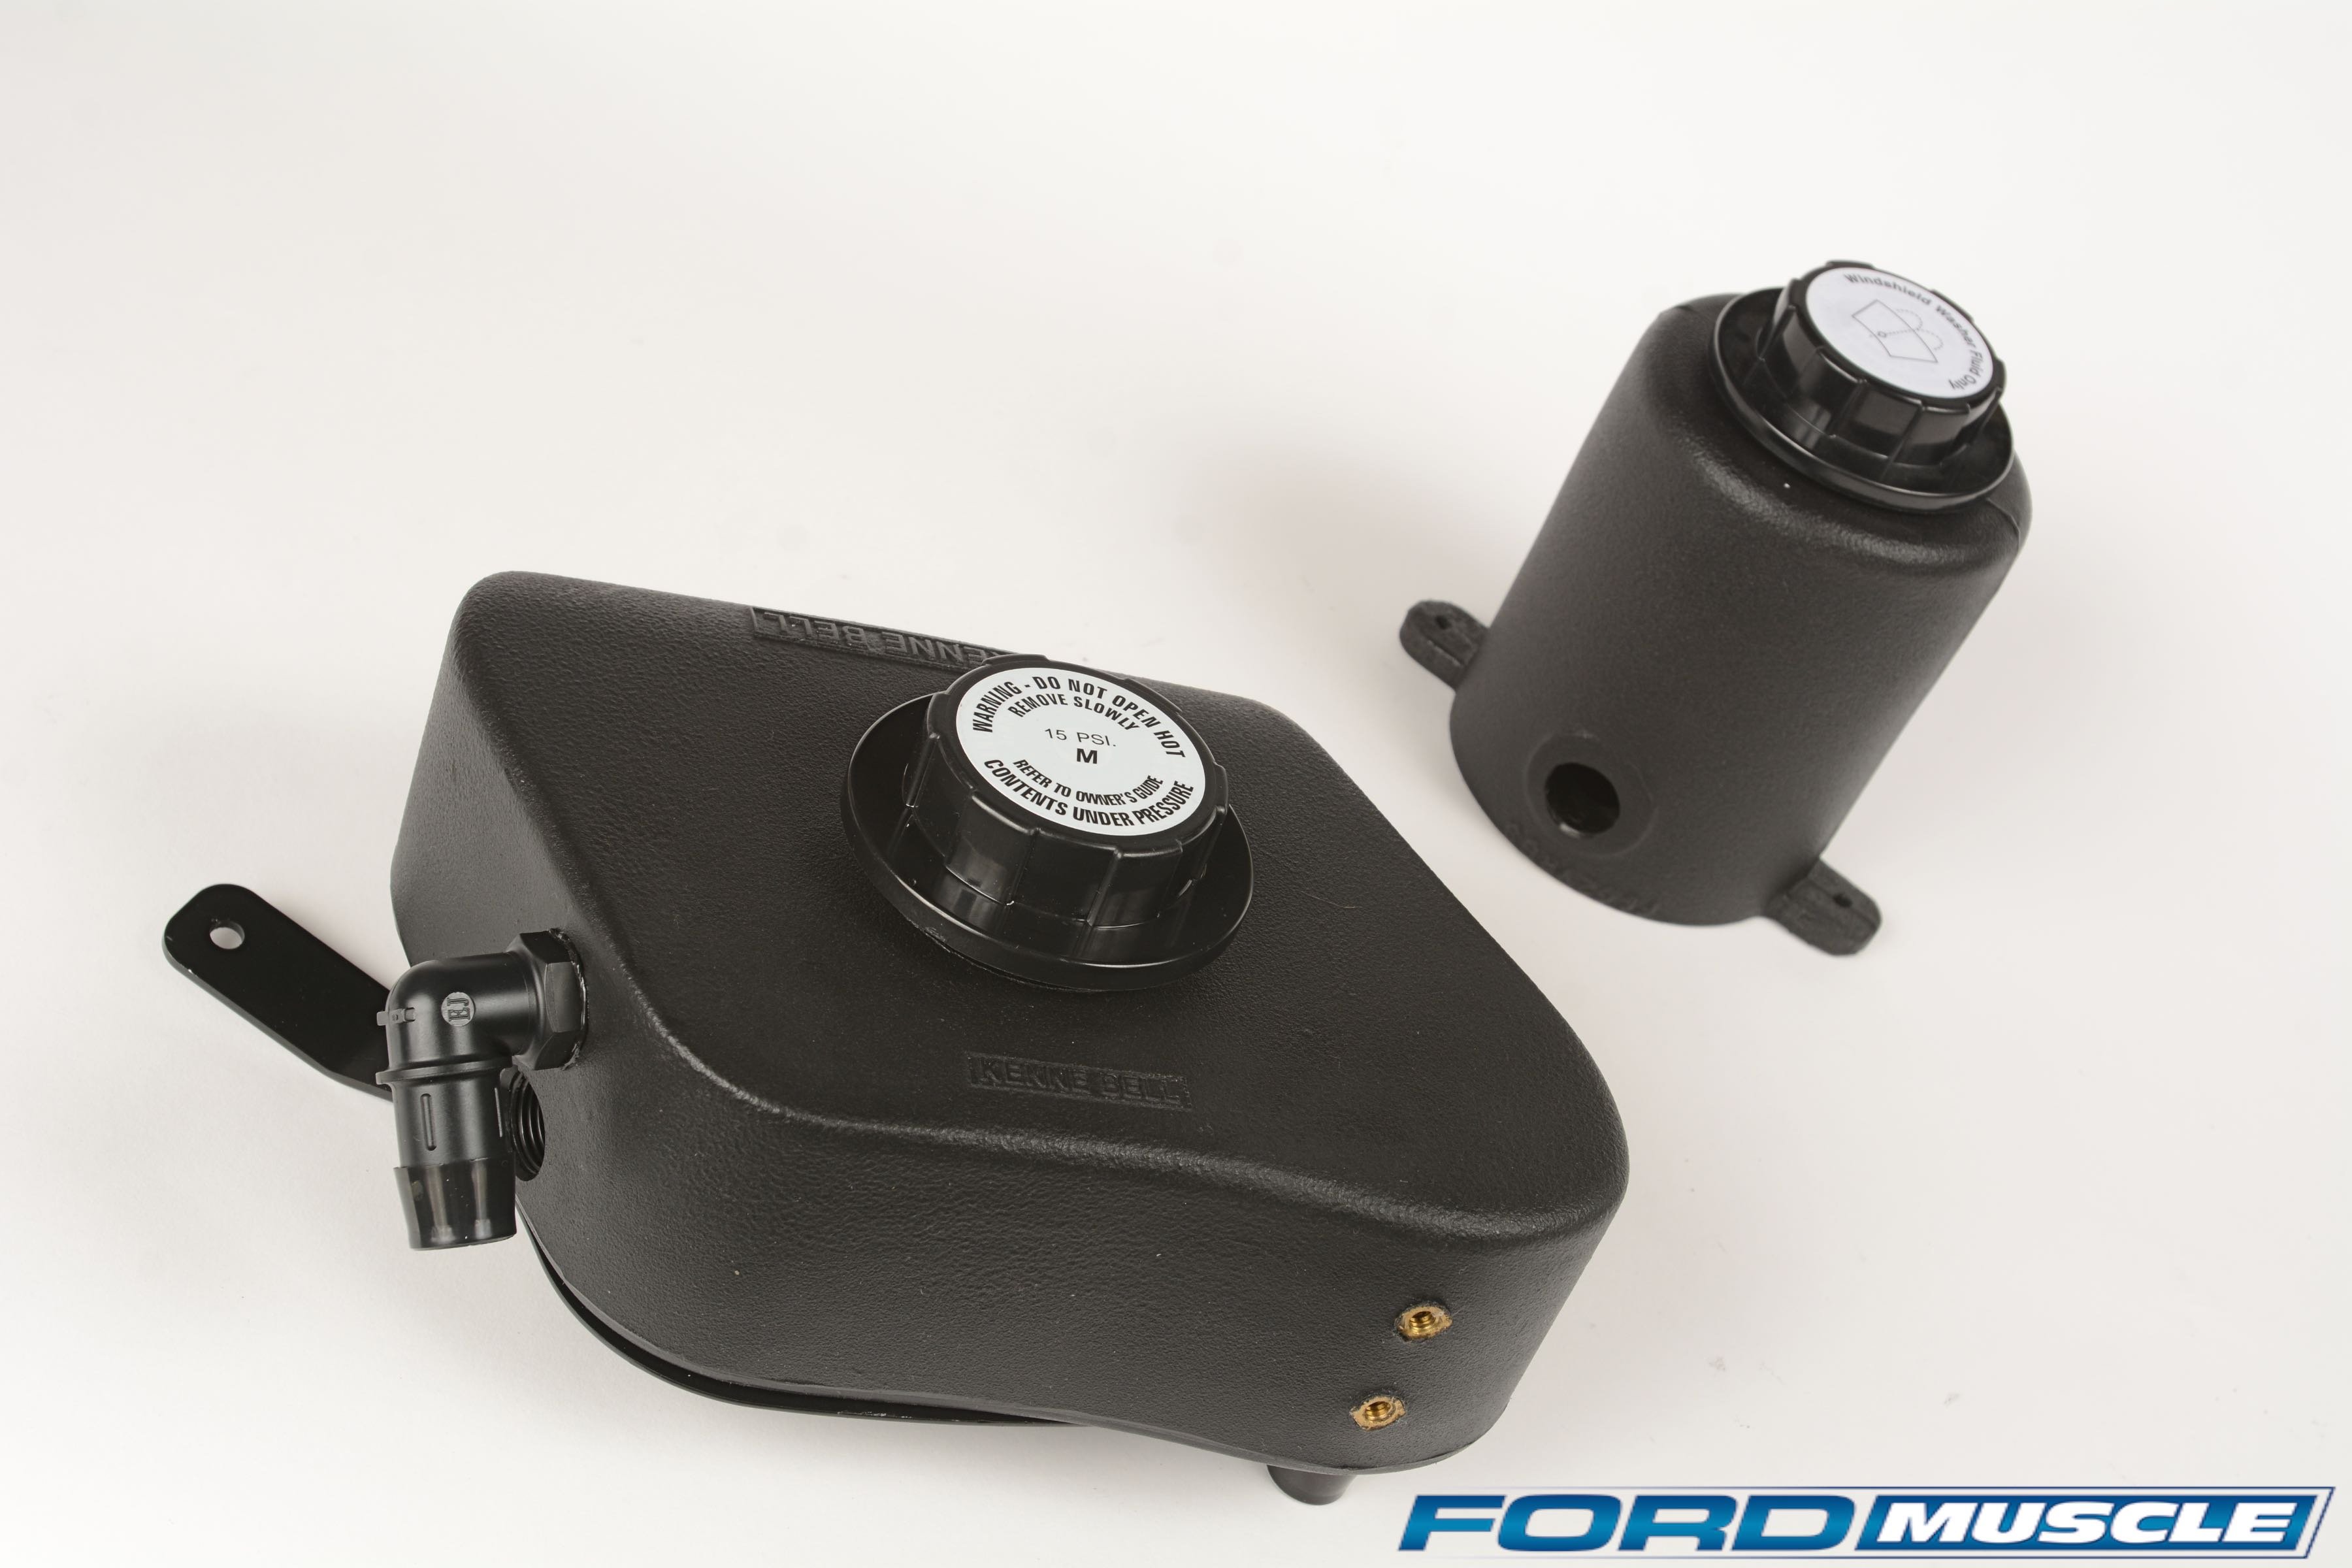
The 2010 cars differ slightly from the earlier Three-Valves and don’t need or include 90mm mass air housing in the Stage 2 kit. A notable characteristic of the Three-Valve engines is the separate coolant crossover casting spanning the front of the engine valley. Kenne Bell kits include this revised coolant crossover to provide more clearance for the intercooled KB lower intake manifold. Another concession to packaging are replacement engine coolant and power steering pump reservoirs. Both are black, roto-molded plastic units.
Ultimately a supercharger is a great choice for a fun driver where maximum utility and minimum maintenance are important. The blower is clearly a big financial step; the Kenne Bell Three-Valve kit Melissa selected features the Stage 2 130mm throttle body upgrade and clocks in at $6,299 plus another $500 for polishing, but nothing else provides such a punch coupled with no long-term hassles. Ricardo is also a Kenne Bell fan because he has an excellent working relationship with them — it’s possible to run almost next door for the odd part or engineering help — and he finds their customer service habits favorable.

2006 Mustang GT Baseline Testing
Ricardo gets more use out of his in-house Dynojet chassis dyno than just about anyone we know. Melissa’s Three-Valve GT baselined at 285 rear-wheel horsepower and 285 lb-ft of torque. At the drag strip it baseline with a 13.895 e.t. at 101.69 mph.
If holding costs in check is important for your street ride, think about forgoing the polishing and the larger Stage 2 throttle body. Each of those is $500; the polish is just for show and the bigger throttle body is worth 21 to 30 rear-wheel horsepower at street boost levels, so you might notice the $1,000 savings more.
There’s no way we can reproduce the 199-page Kenne Bell instruction manual here and in the photos, but let us say the manual is definitely a step-by-step guide with a photo or diagram for each step. Kenne Bell was one of the first in the industry to provide model-specific, truly detailed, easy-to-follow instruction manuals and they remain a highlight of the brand’s offerings.
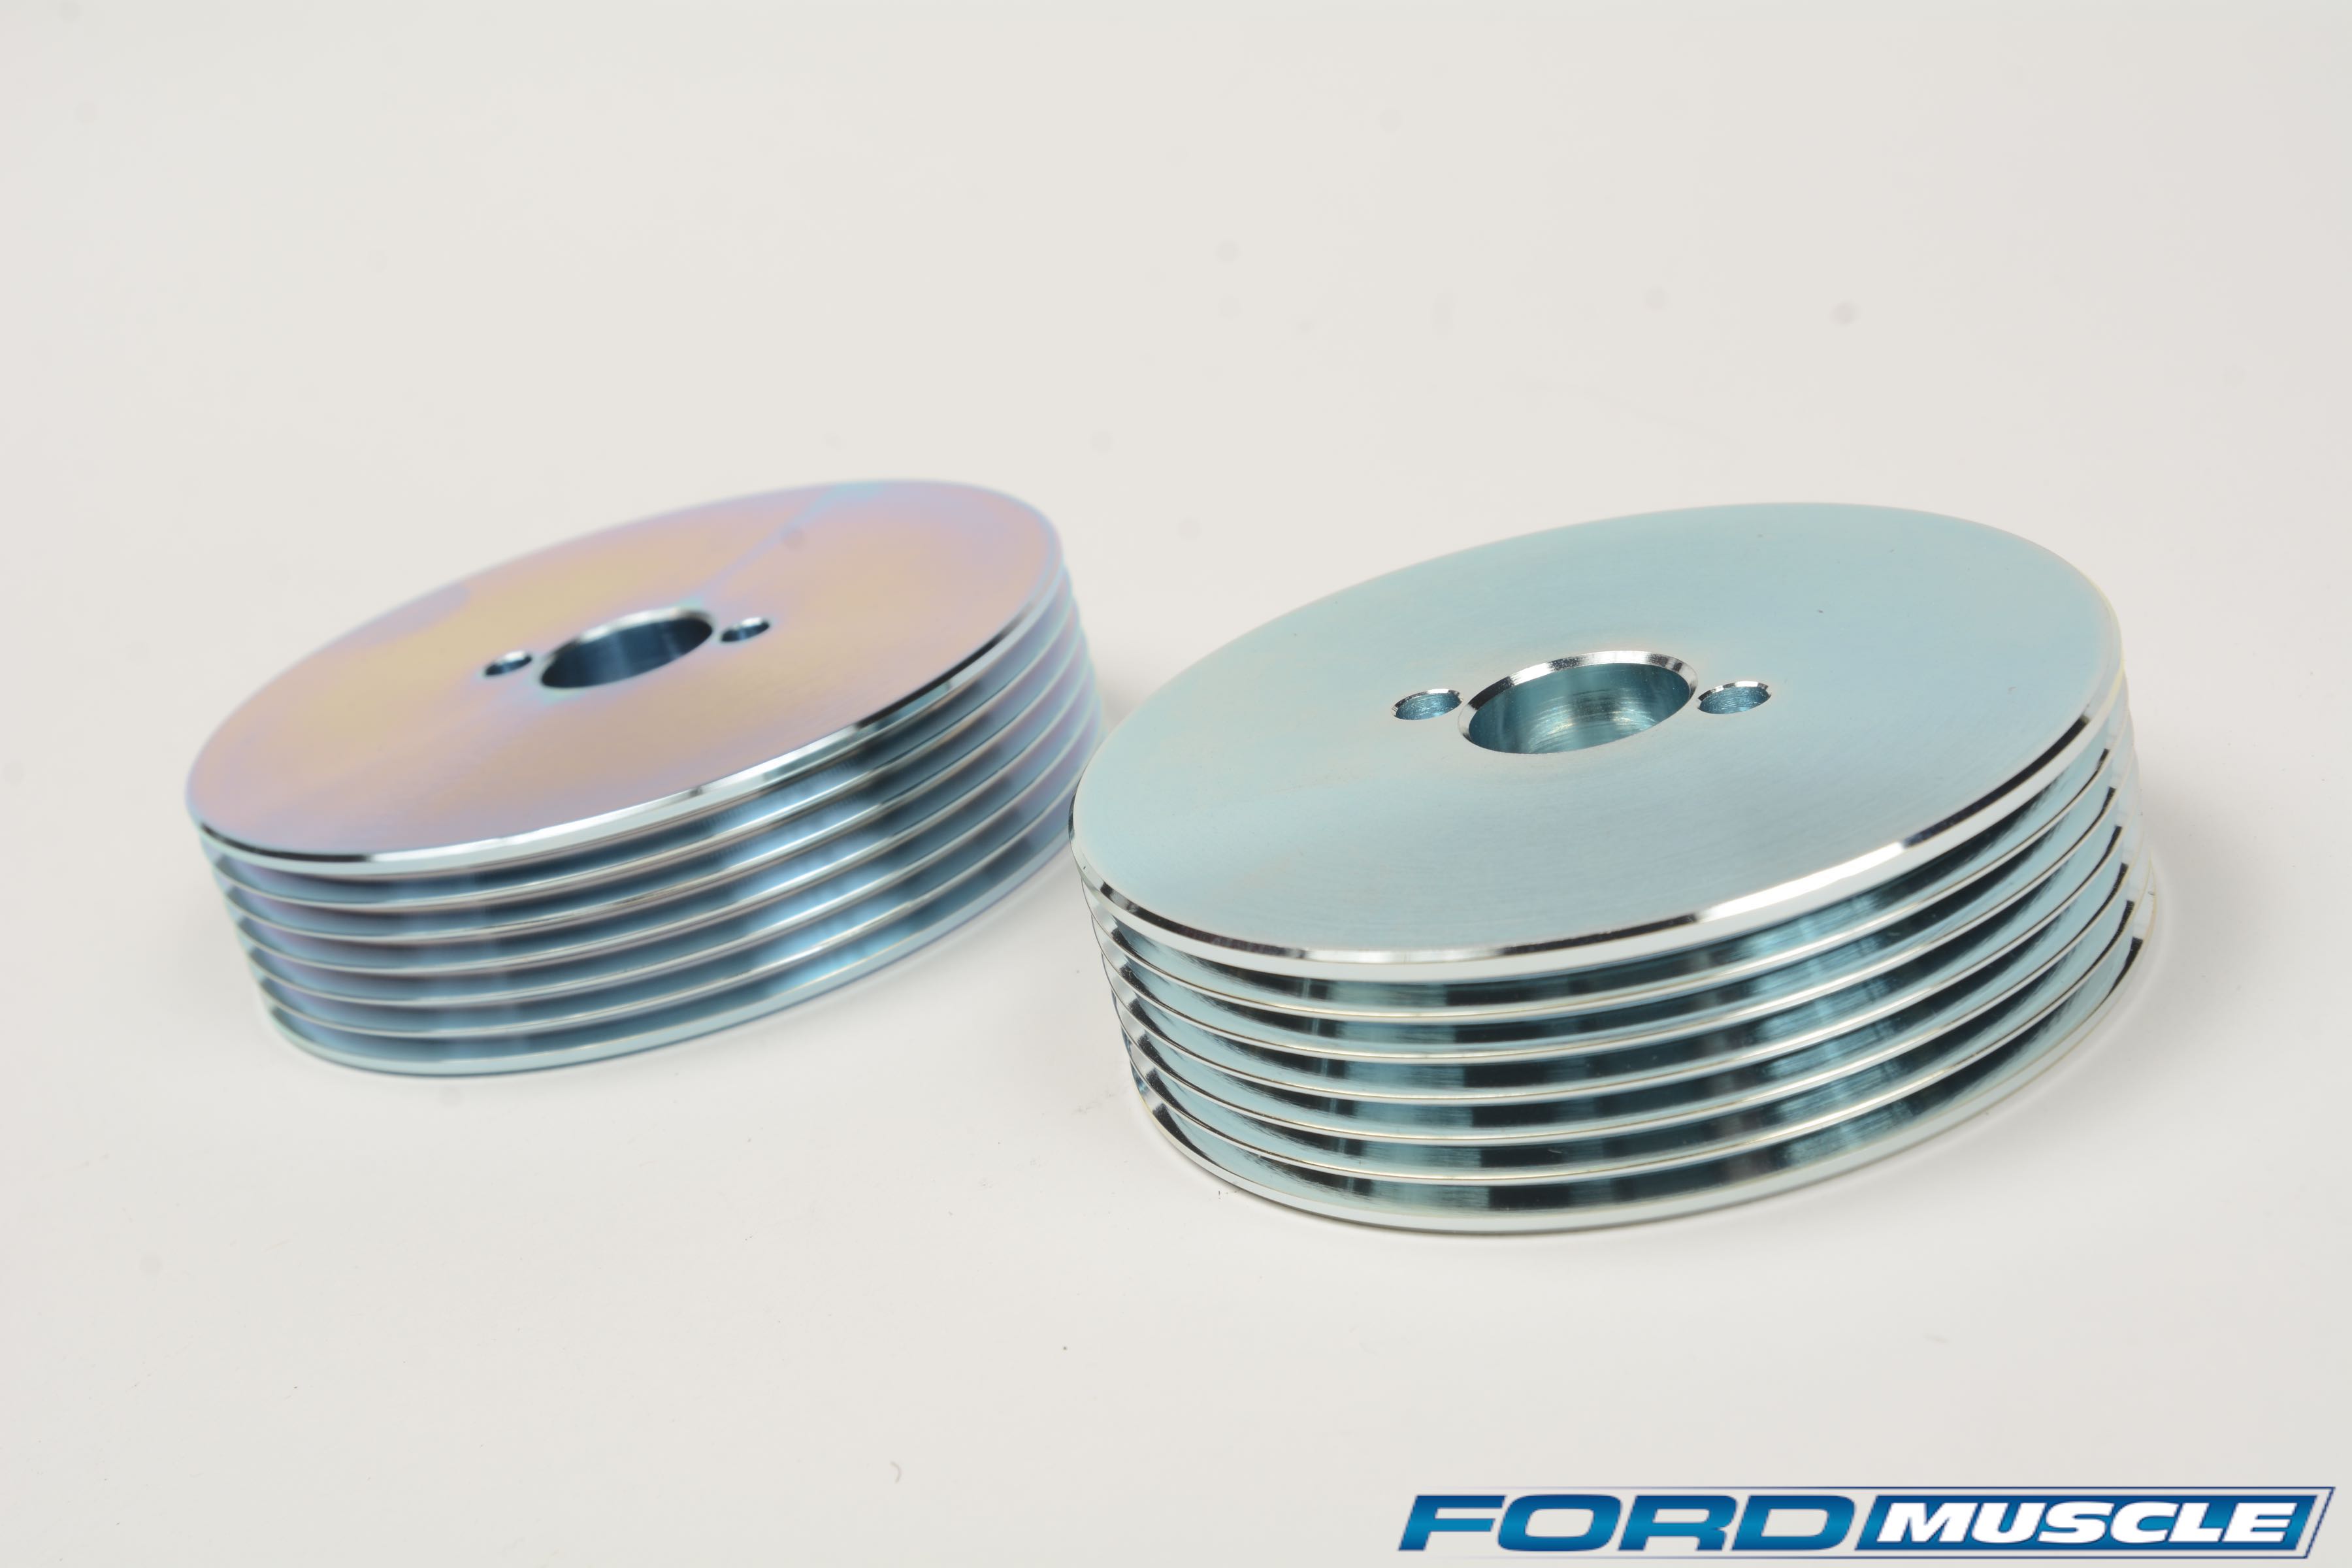
All Kenne Bell superchargers feature easily changed supercharger pulleys. Using a $25 pulley holder, these pulleys can be swapped in about three minutes. They’re the stuff when swapping between race and pump gas on street/strip cars.
And we always smile when watching Ricardo install a Kenne Bell; he’s probably installed 100 KB superchargers on Mustangs yet he still faithfully follows the instructions—more of a reminder these days — crossing off each step as he goes. The result is that he spends two full days on the job that steadily progresses with no backtracking or confusion. About the only item not included in the KB kits is spark plugs. “No supercharger kits have them,” Ricardo explained.
Detail Oriented
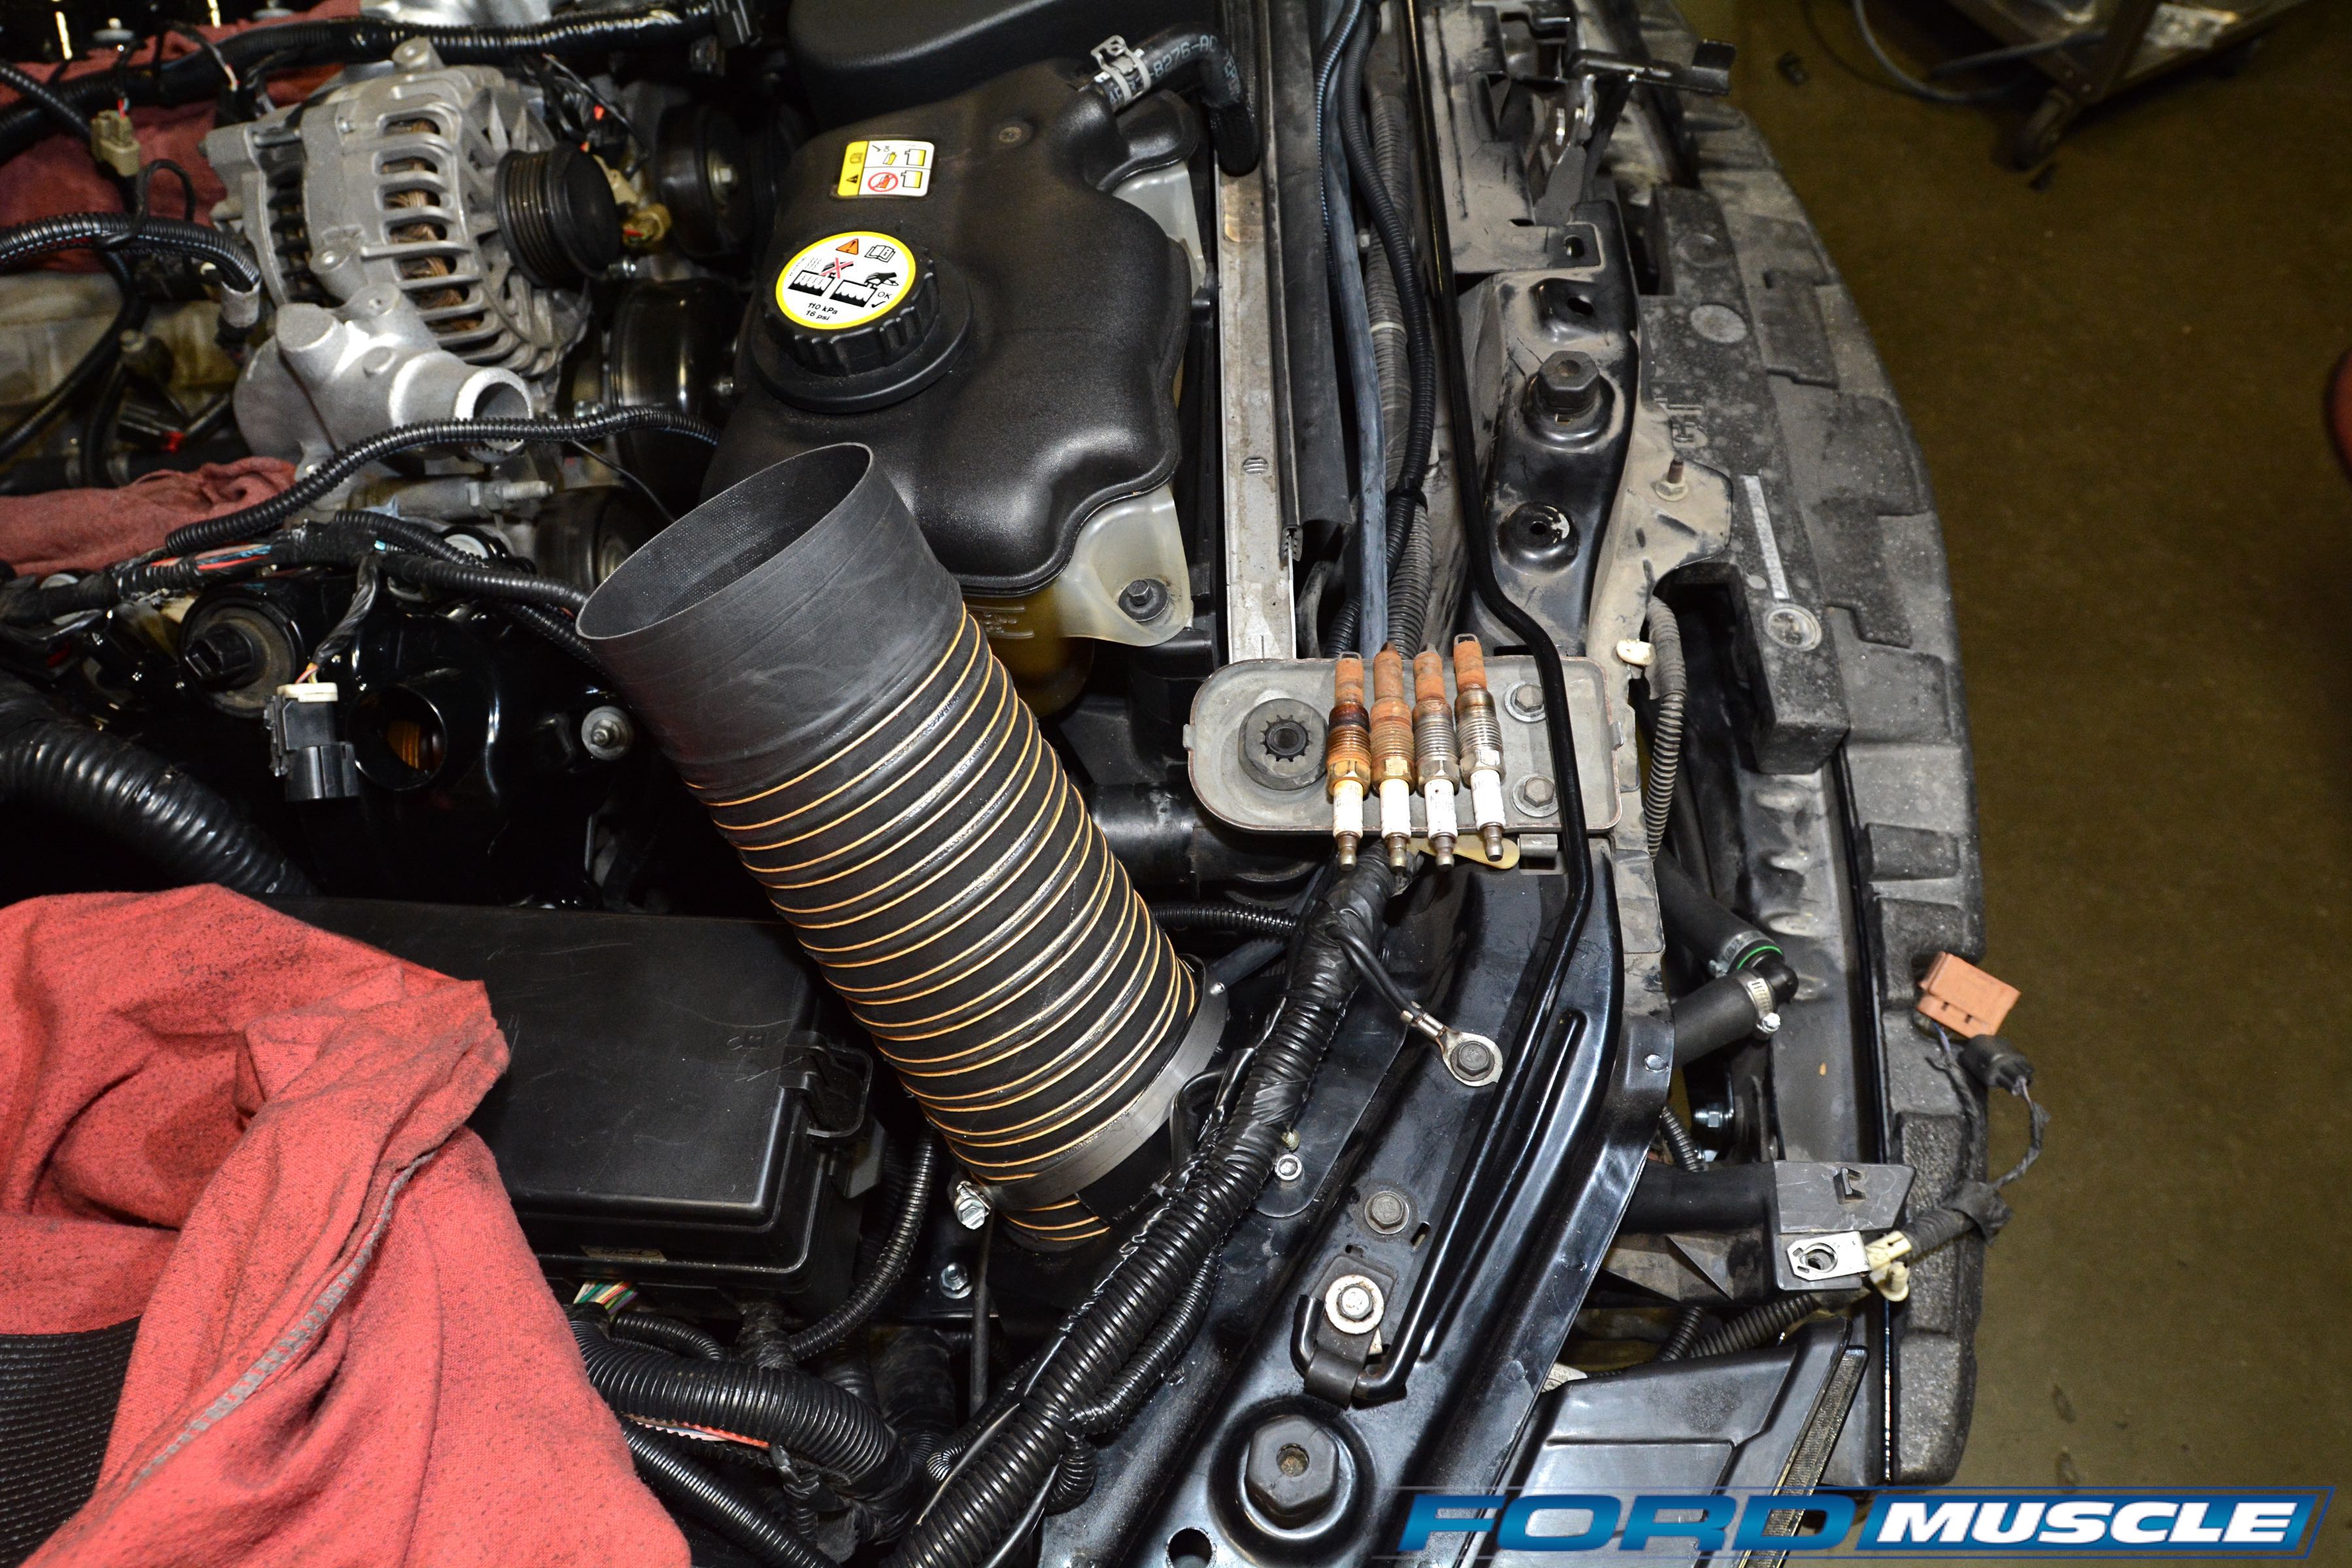
In overview, the Kenne Bell Three-Valve installation begins by stripping the top of the engine down to the valley, to be replaced by the Kenne Bell water crossover, intake manifold, and supercharger. Also on top of the engine new sparkplugs and fuel injectors are installed.
Little work is done to the front engine dress. The supercharger shares its drive belt with the rest of the engine accessories, so only a couple of idler pulleys and a longer serpentine belt must be added. The water pump, alternator, power steering pump, and A/C compressor remain unchanged. The coolant recovery tank and power steering reservoir are replaced for packaging reasons.

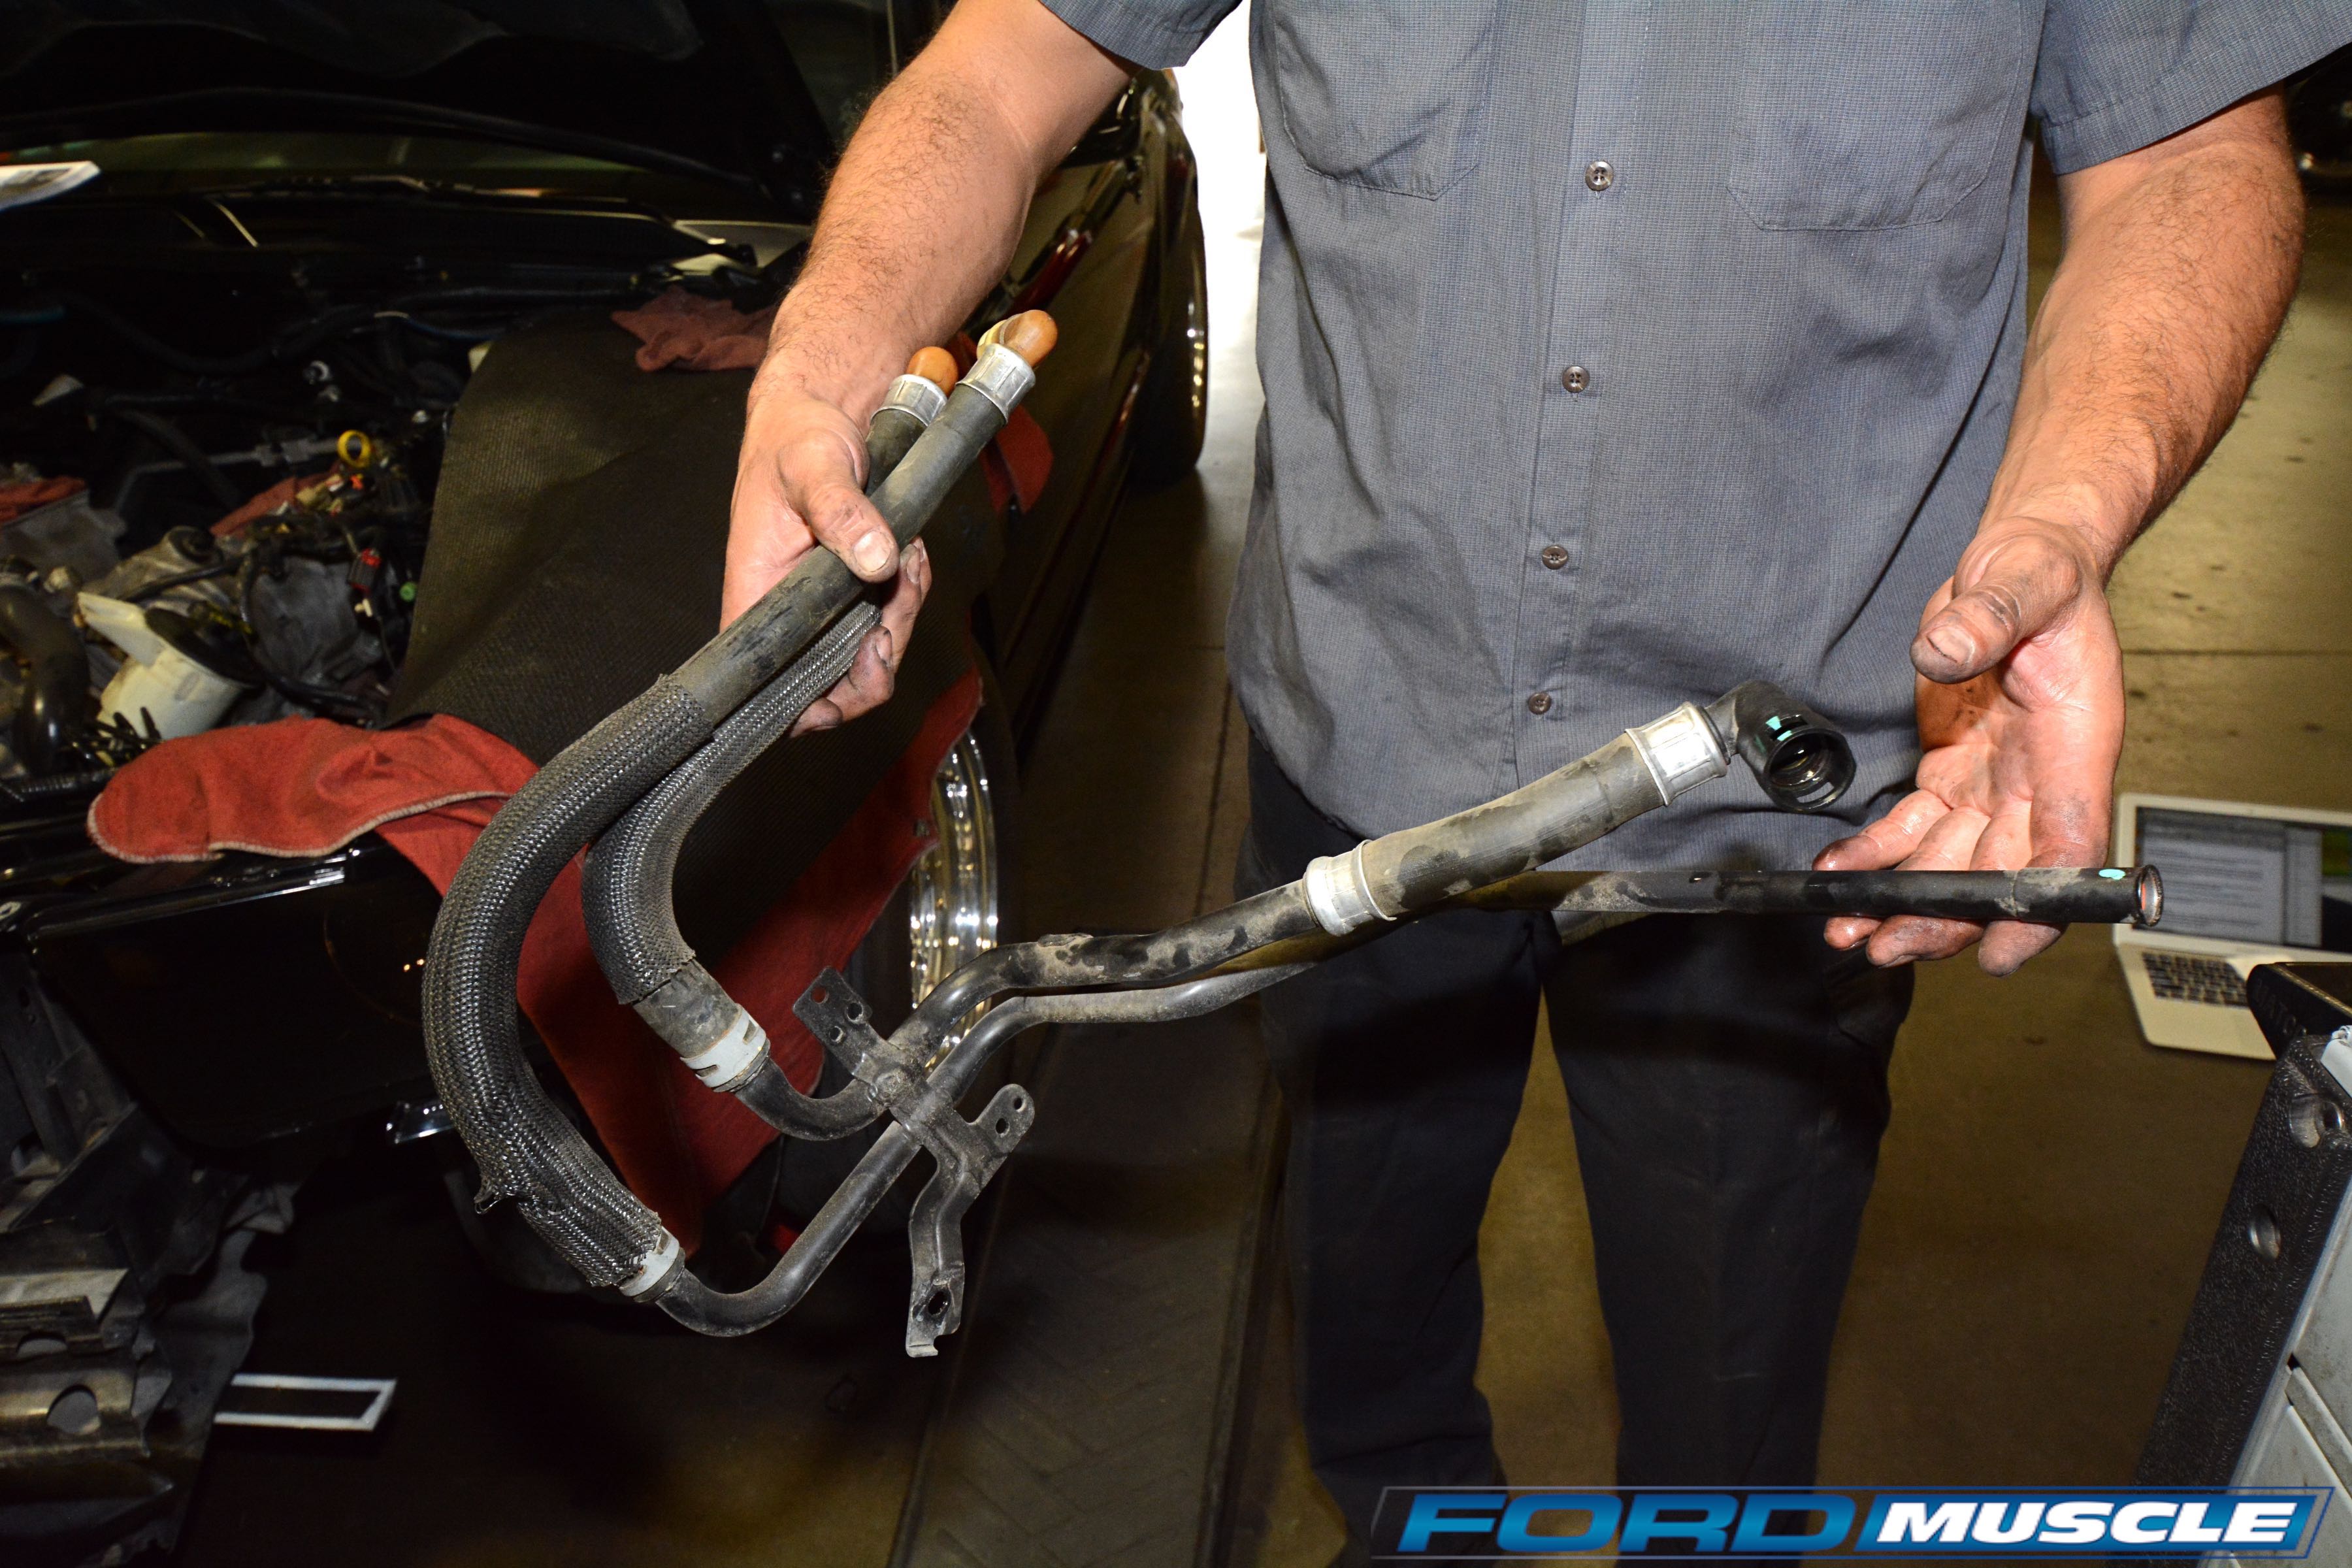
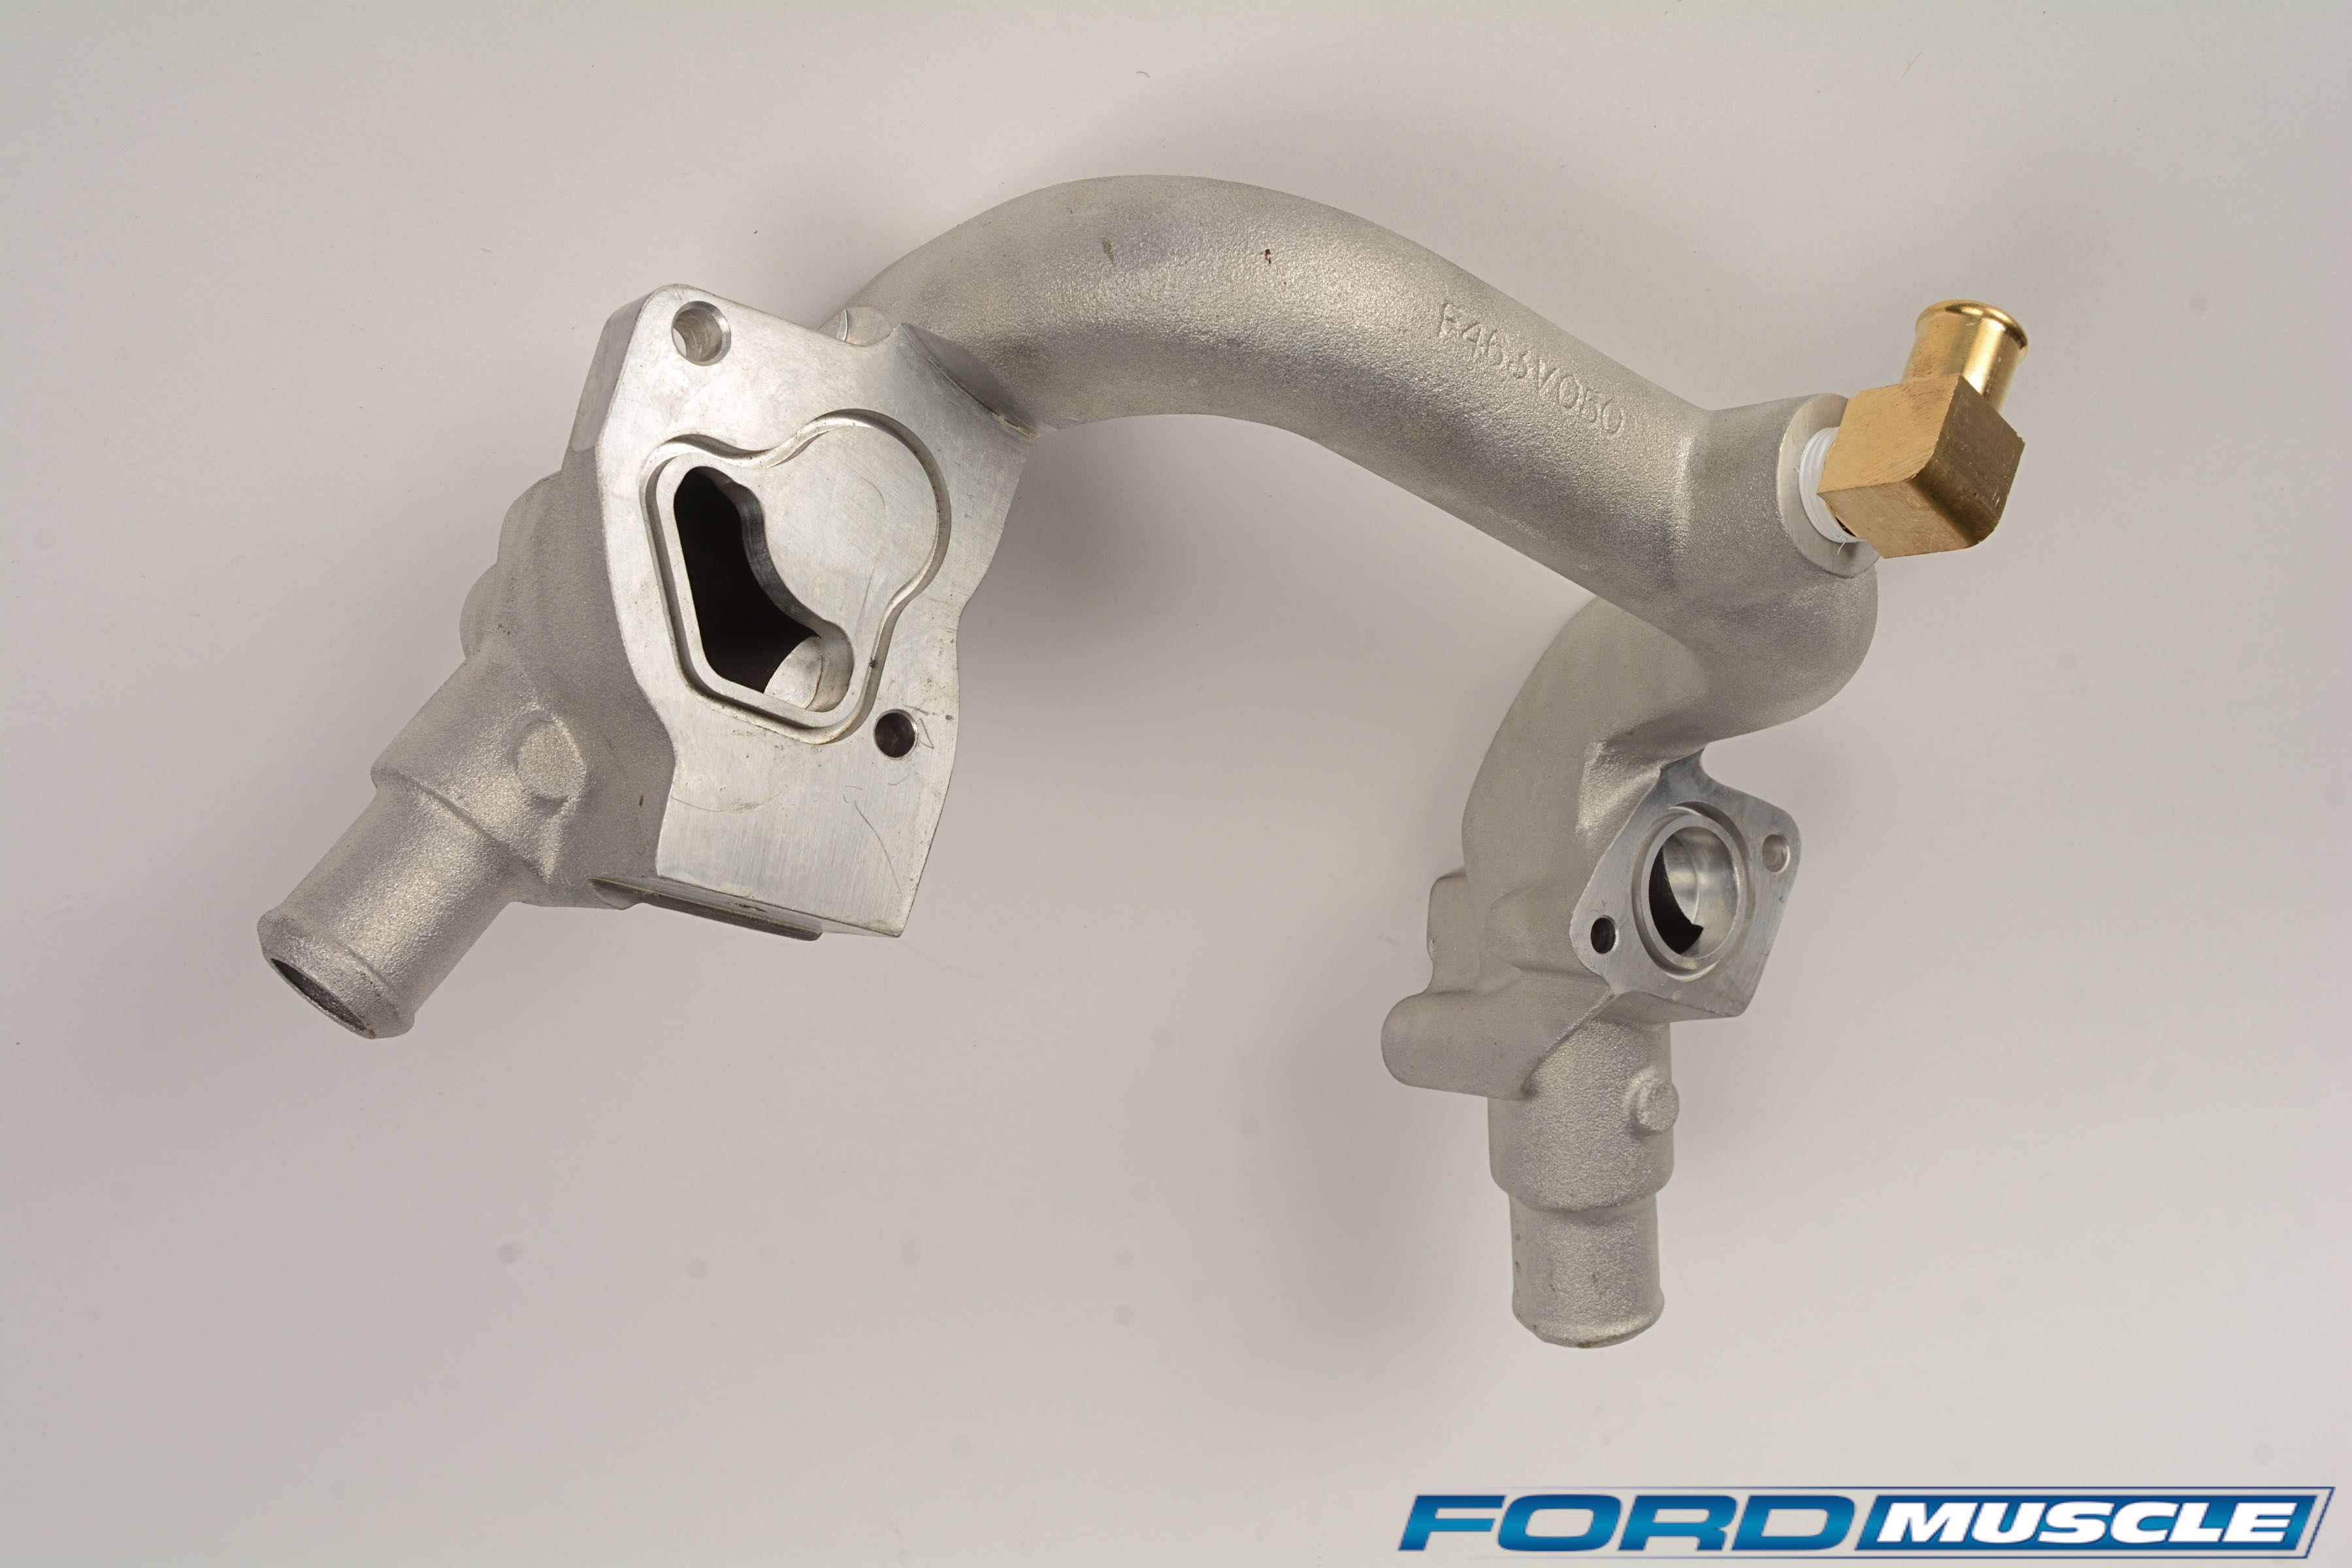
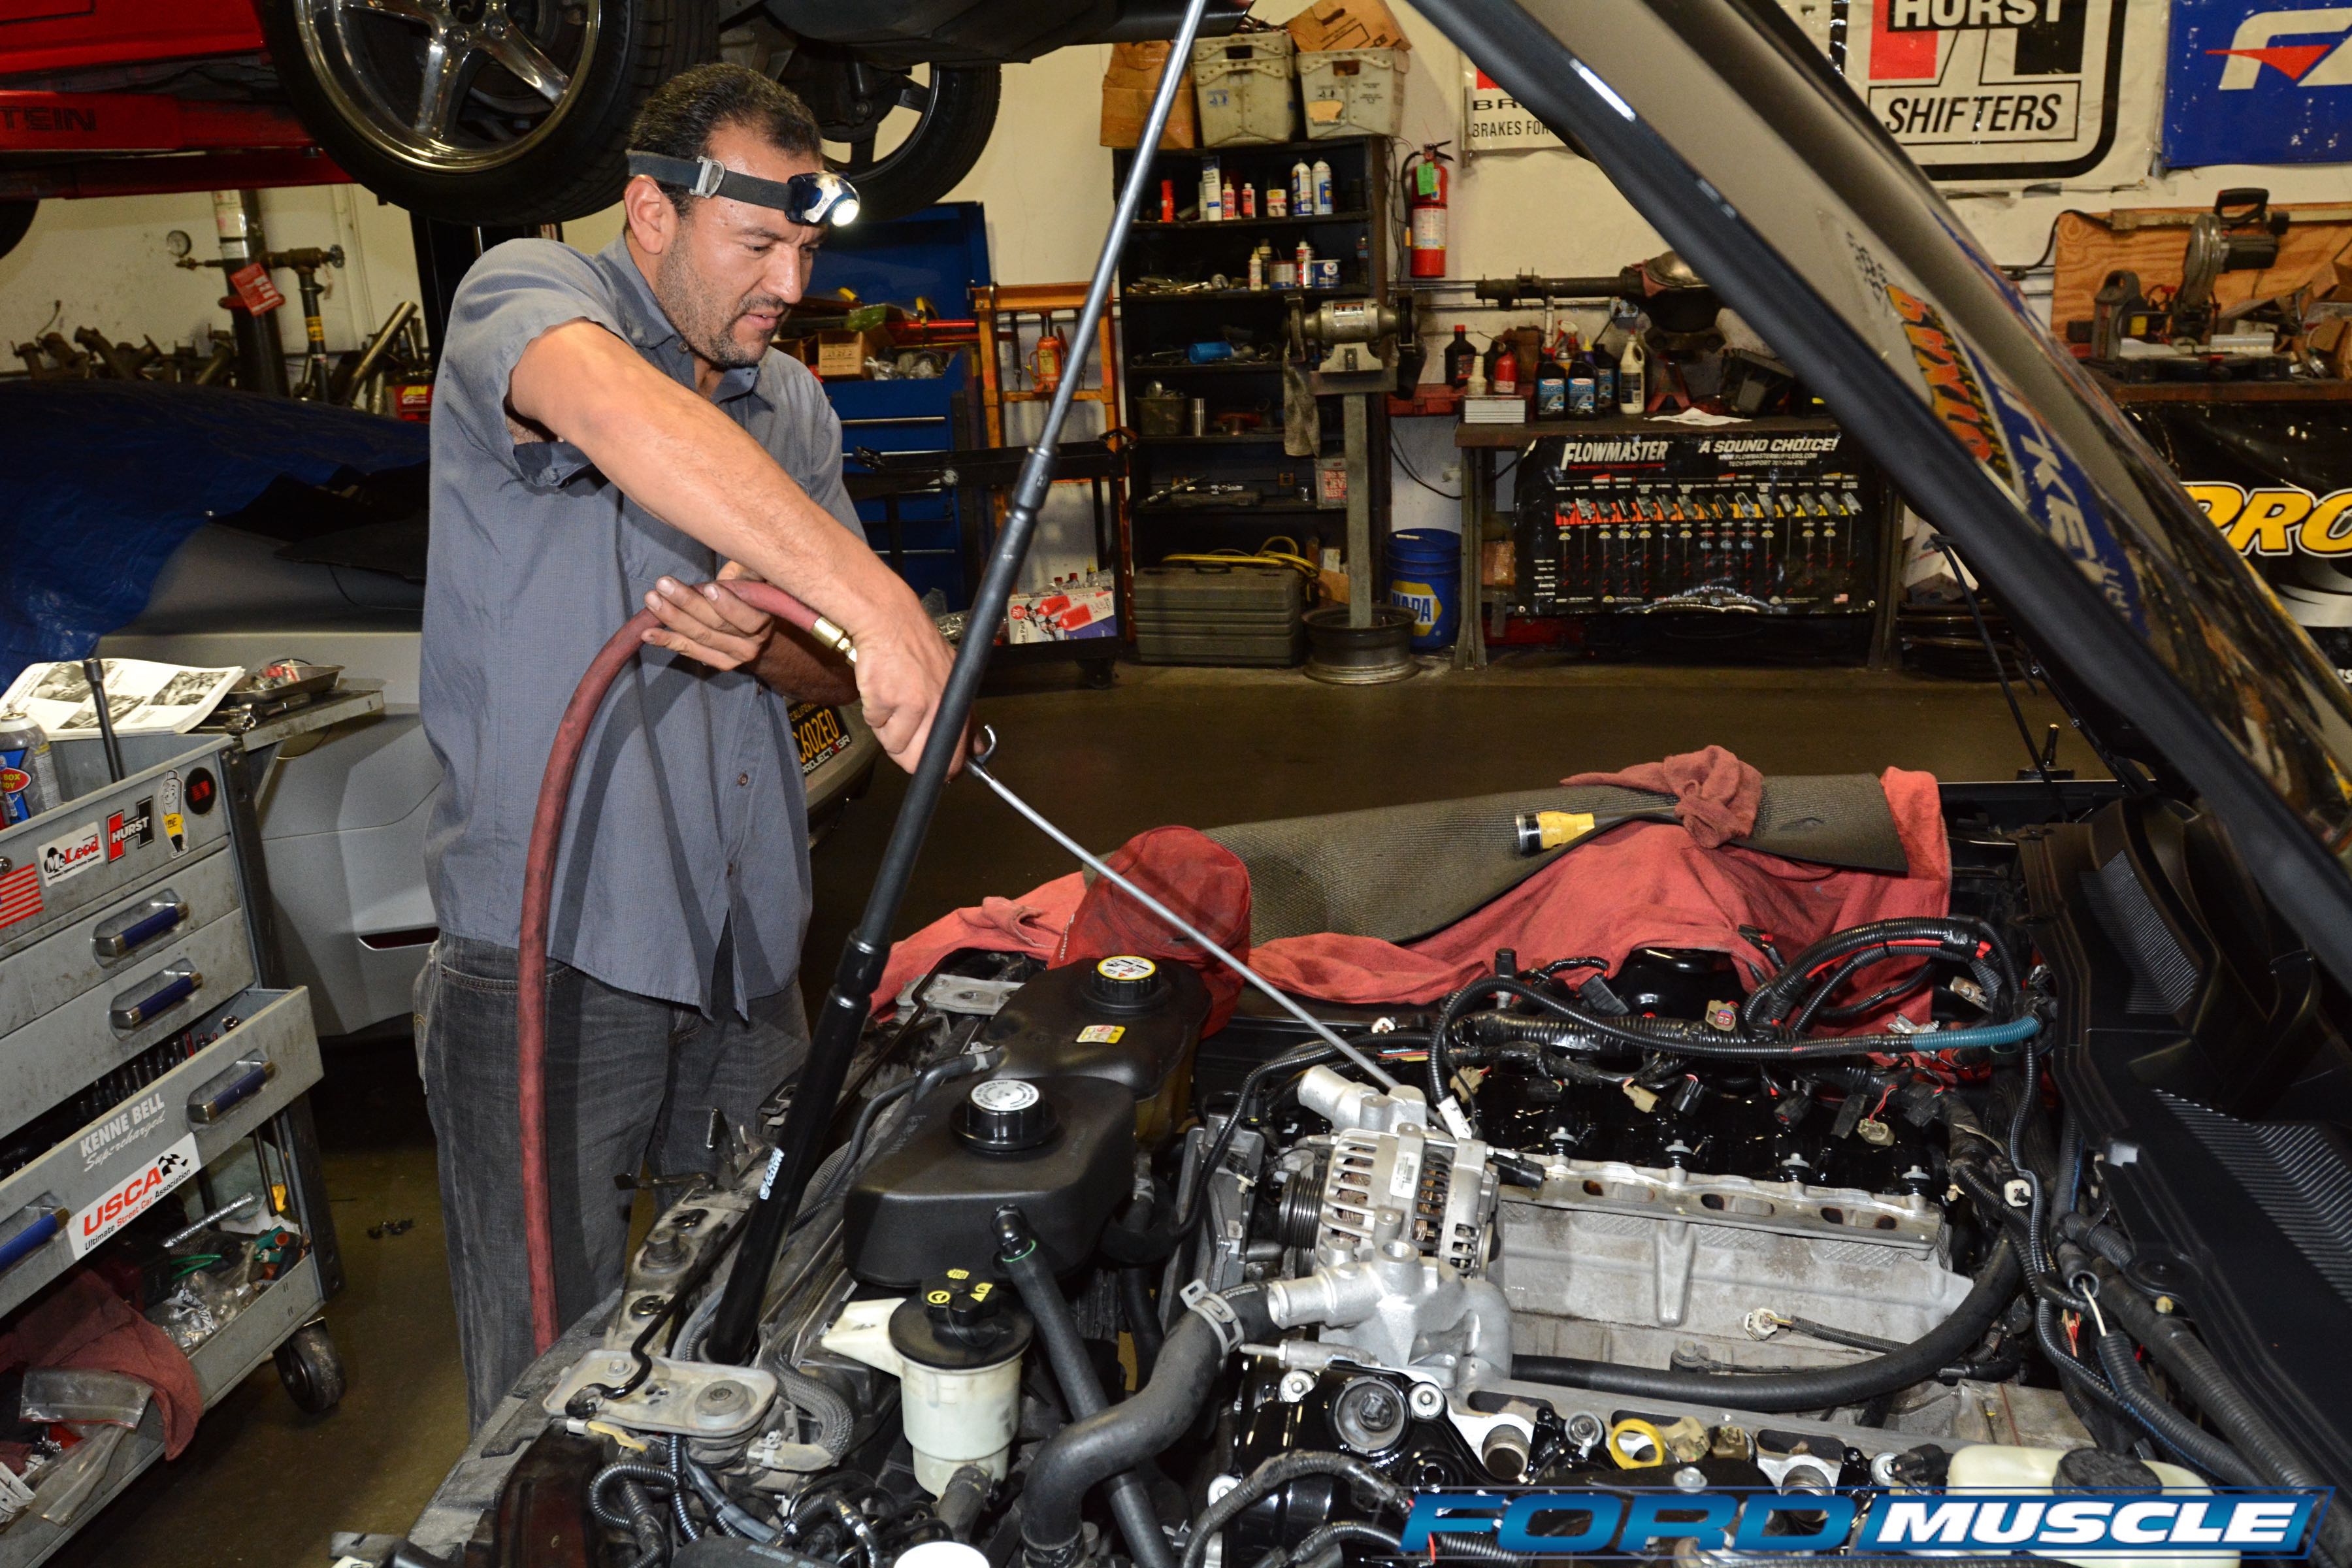
As always, supercharger installation begins by stripping the top of the engine down to the bare engine valley. That means disconnecting a bit of plumbing and injector wiring, and then unbolting the plastic intake manifold and coolant crossover. There are coolant hoses deep in the Three-Valve valley which need changing. This means gushing coolant, but don’t worry, there’s a drain hole in the back of the valley. It lets all liquids run past the flywheel/flexplate and onto the ground. Here’s the assembly of stock coolant lines from the engine valley. These are replaced with Kenne Bell parts for increased intake manifold clearance.
Because Melissa opted for the larger, 130mm Kenne Bell billet throttle body — good for at least an additional 21 horsepower — the electronic throttle body’s motor is moved from the stock throttle body to the Kenne Bell replacement. This throttle body upgrade makes the installation a Stage 2 in Kenne Bell parlance.
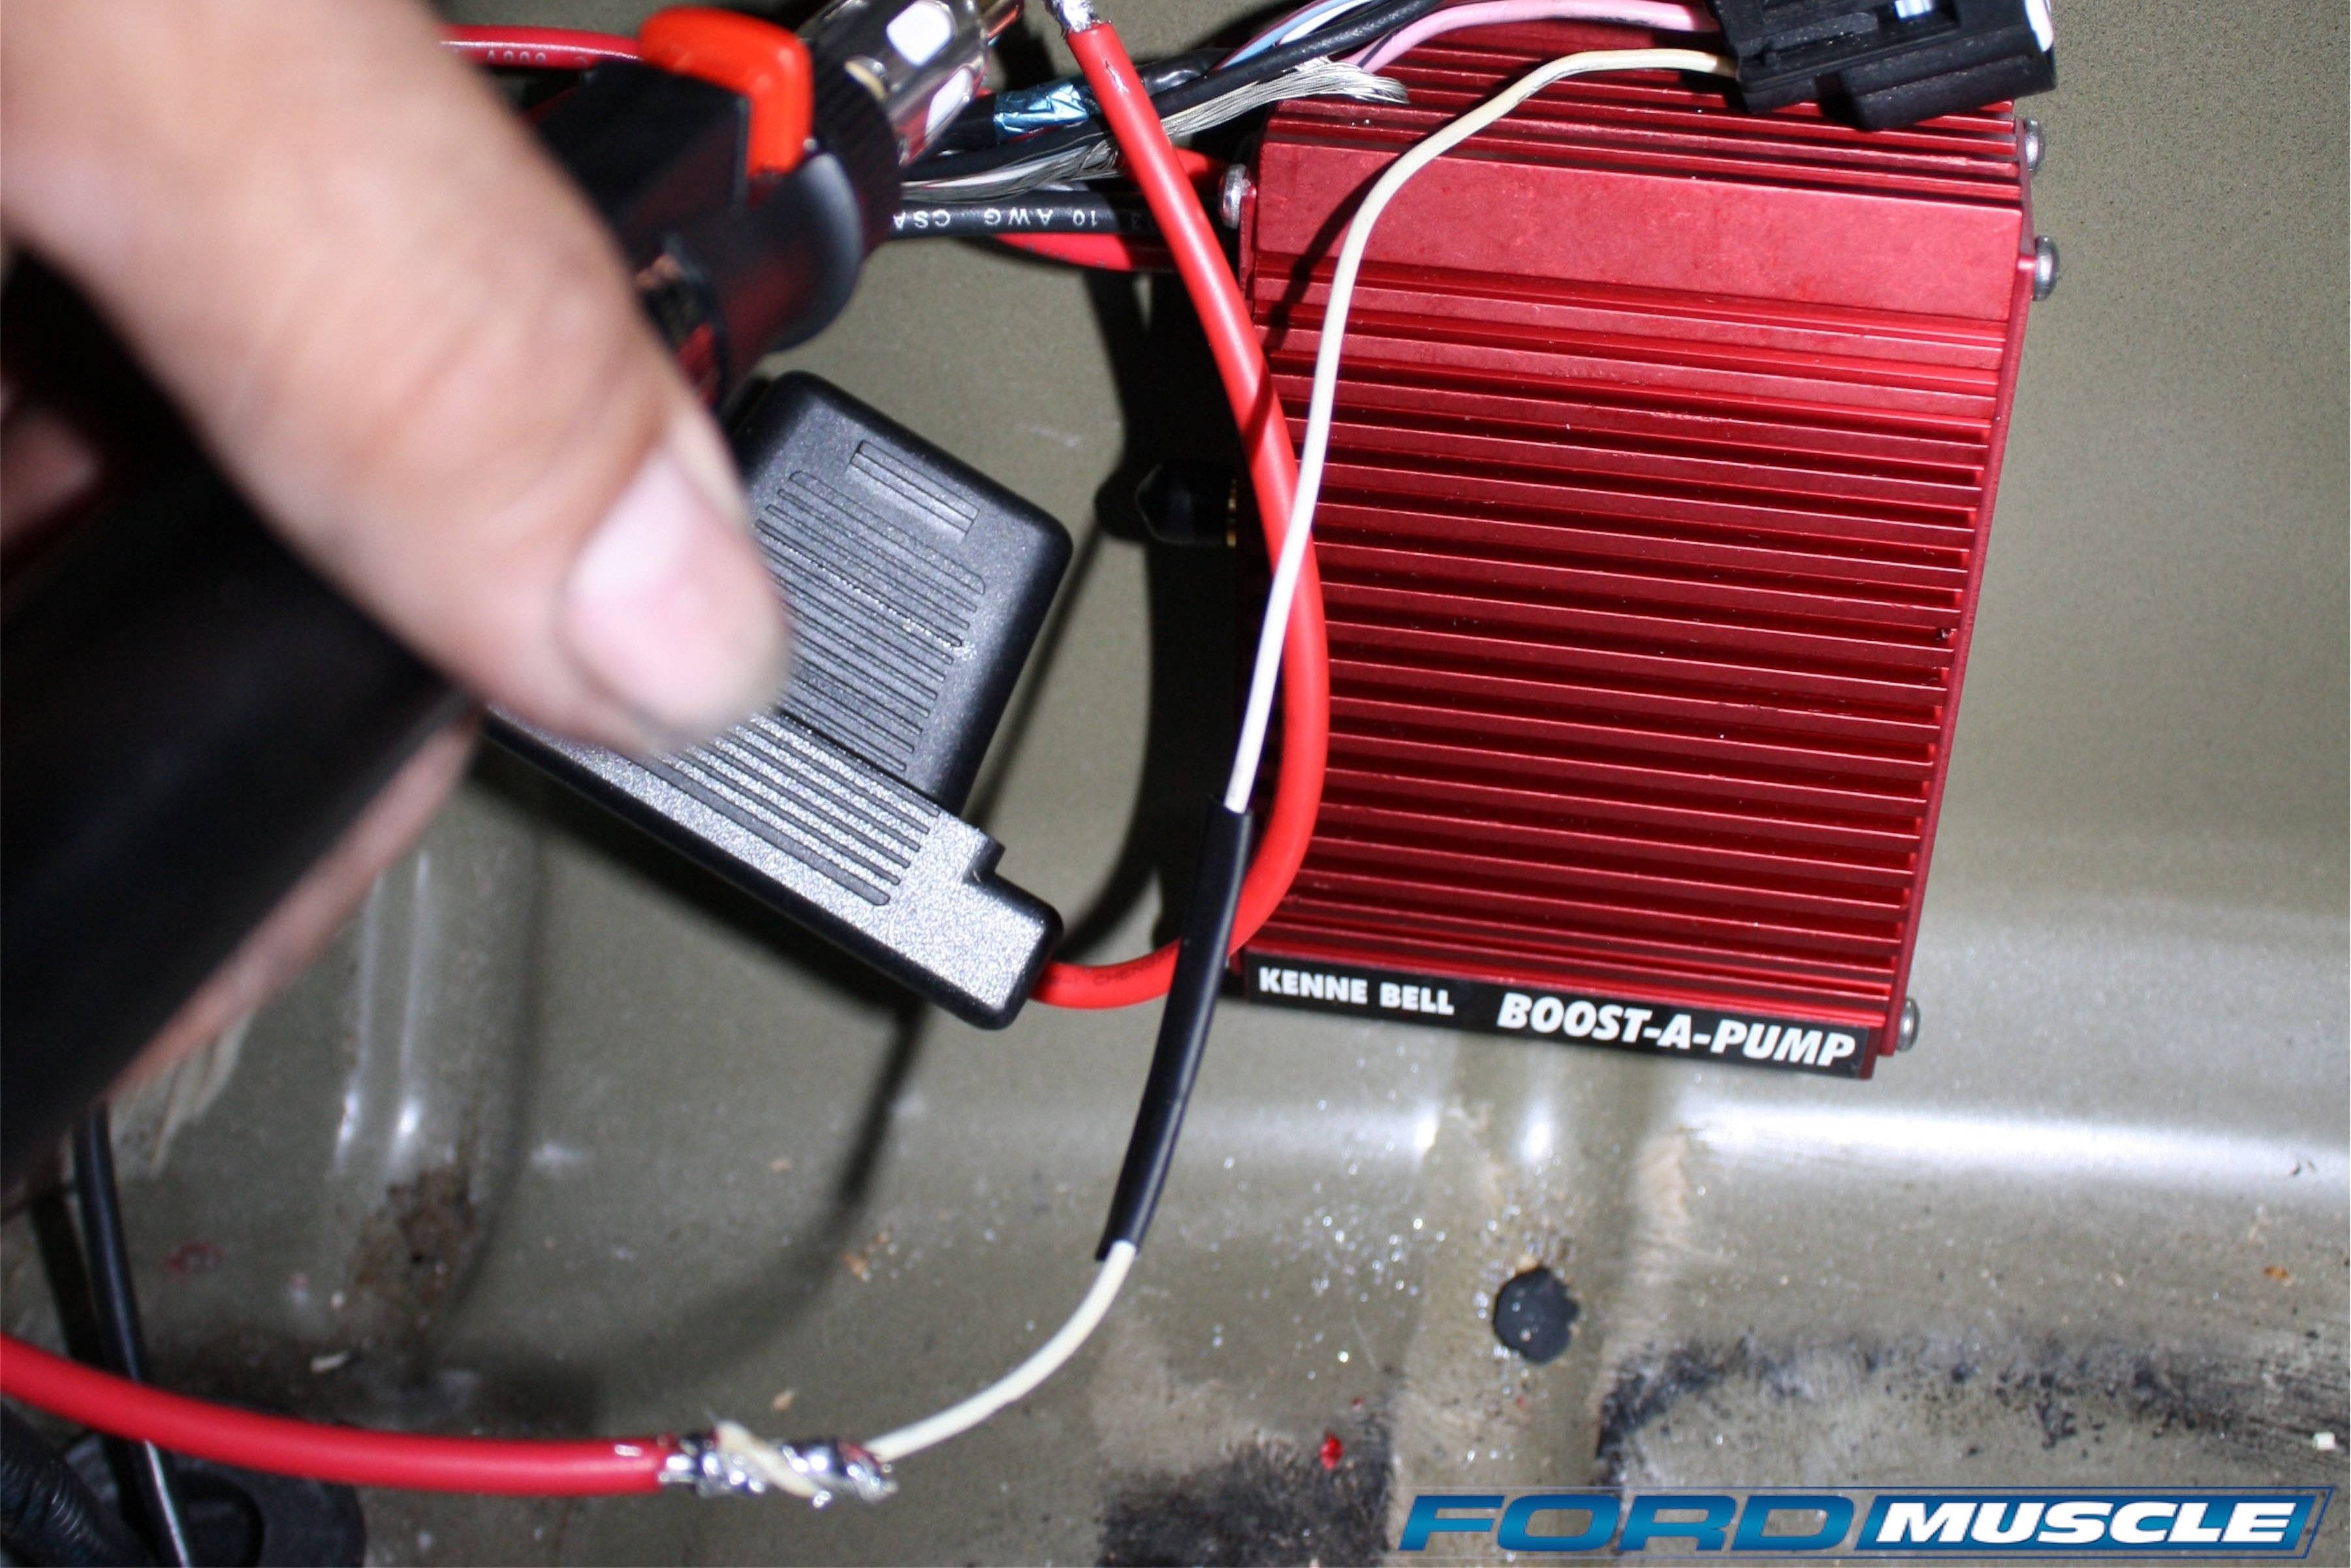
The front bumper cover is also removed so the charge cooler radiator can be hung behind the bumper along with its water pump. Back in the trunk, a Kenne Bell Boost-A-Pump is fitted to amp up the stock fuel pump. There’s no need to access the fuel pump as the BAP connections are made in the trunk.
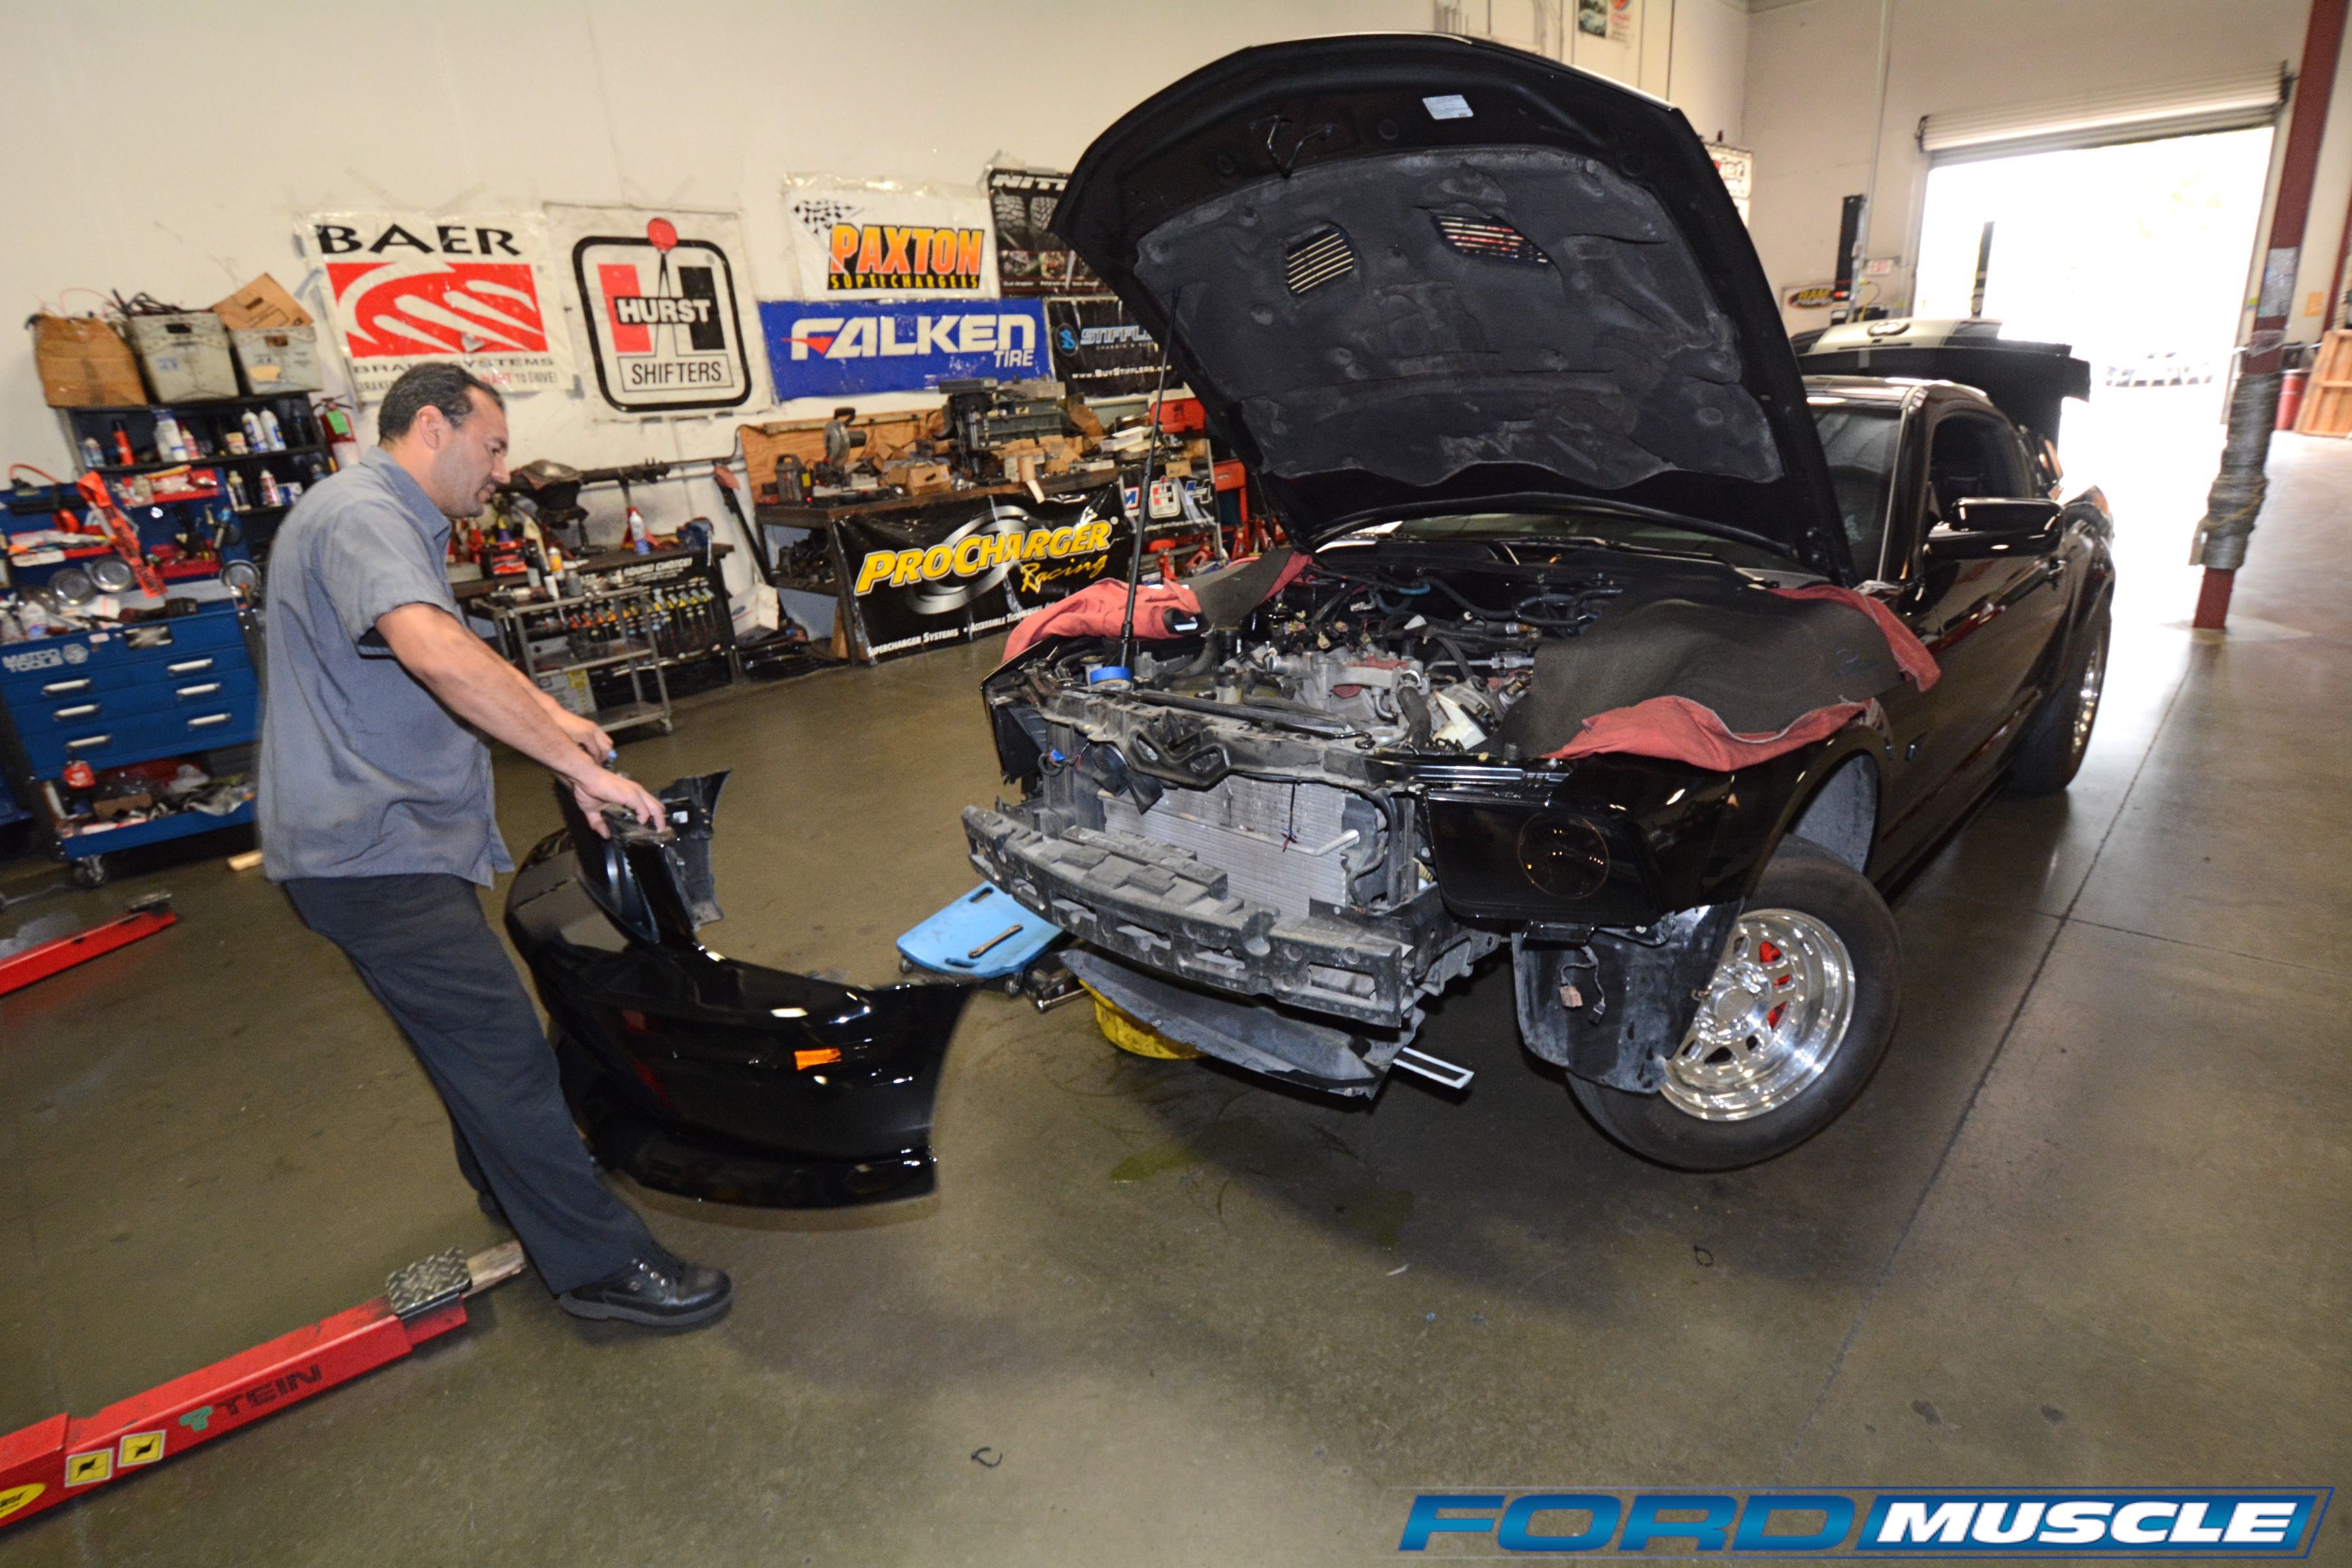
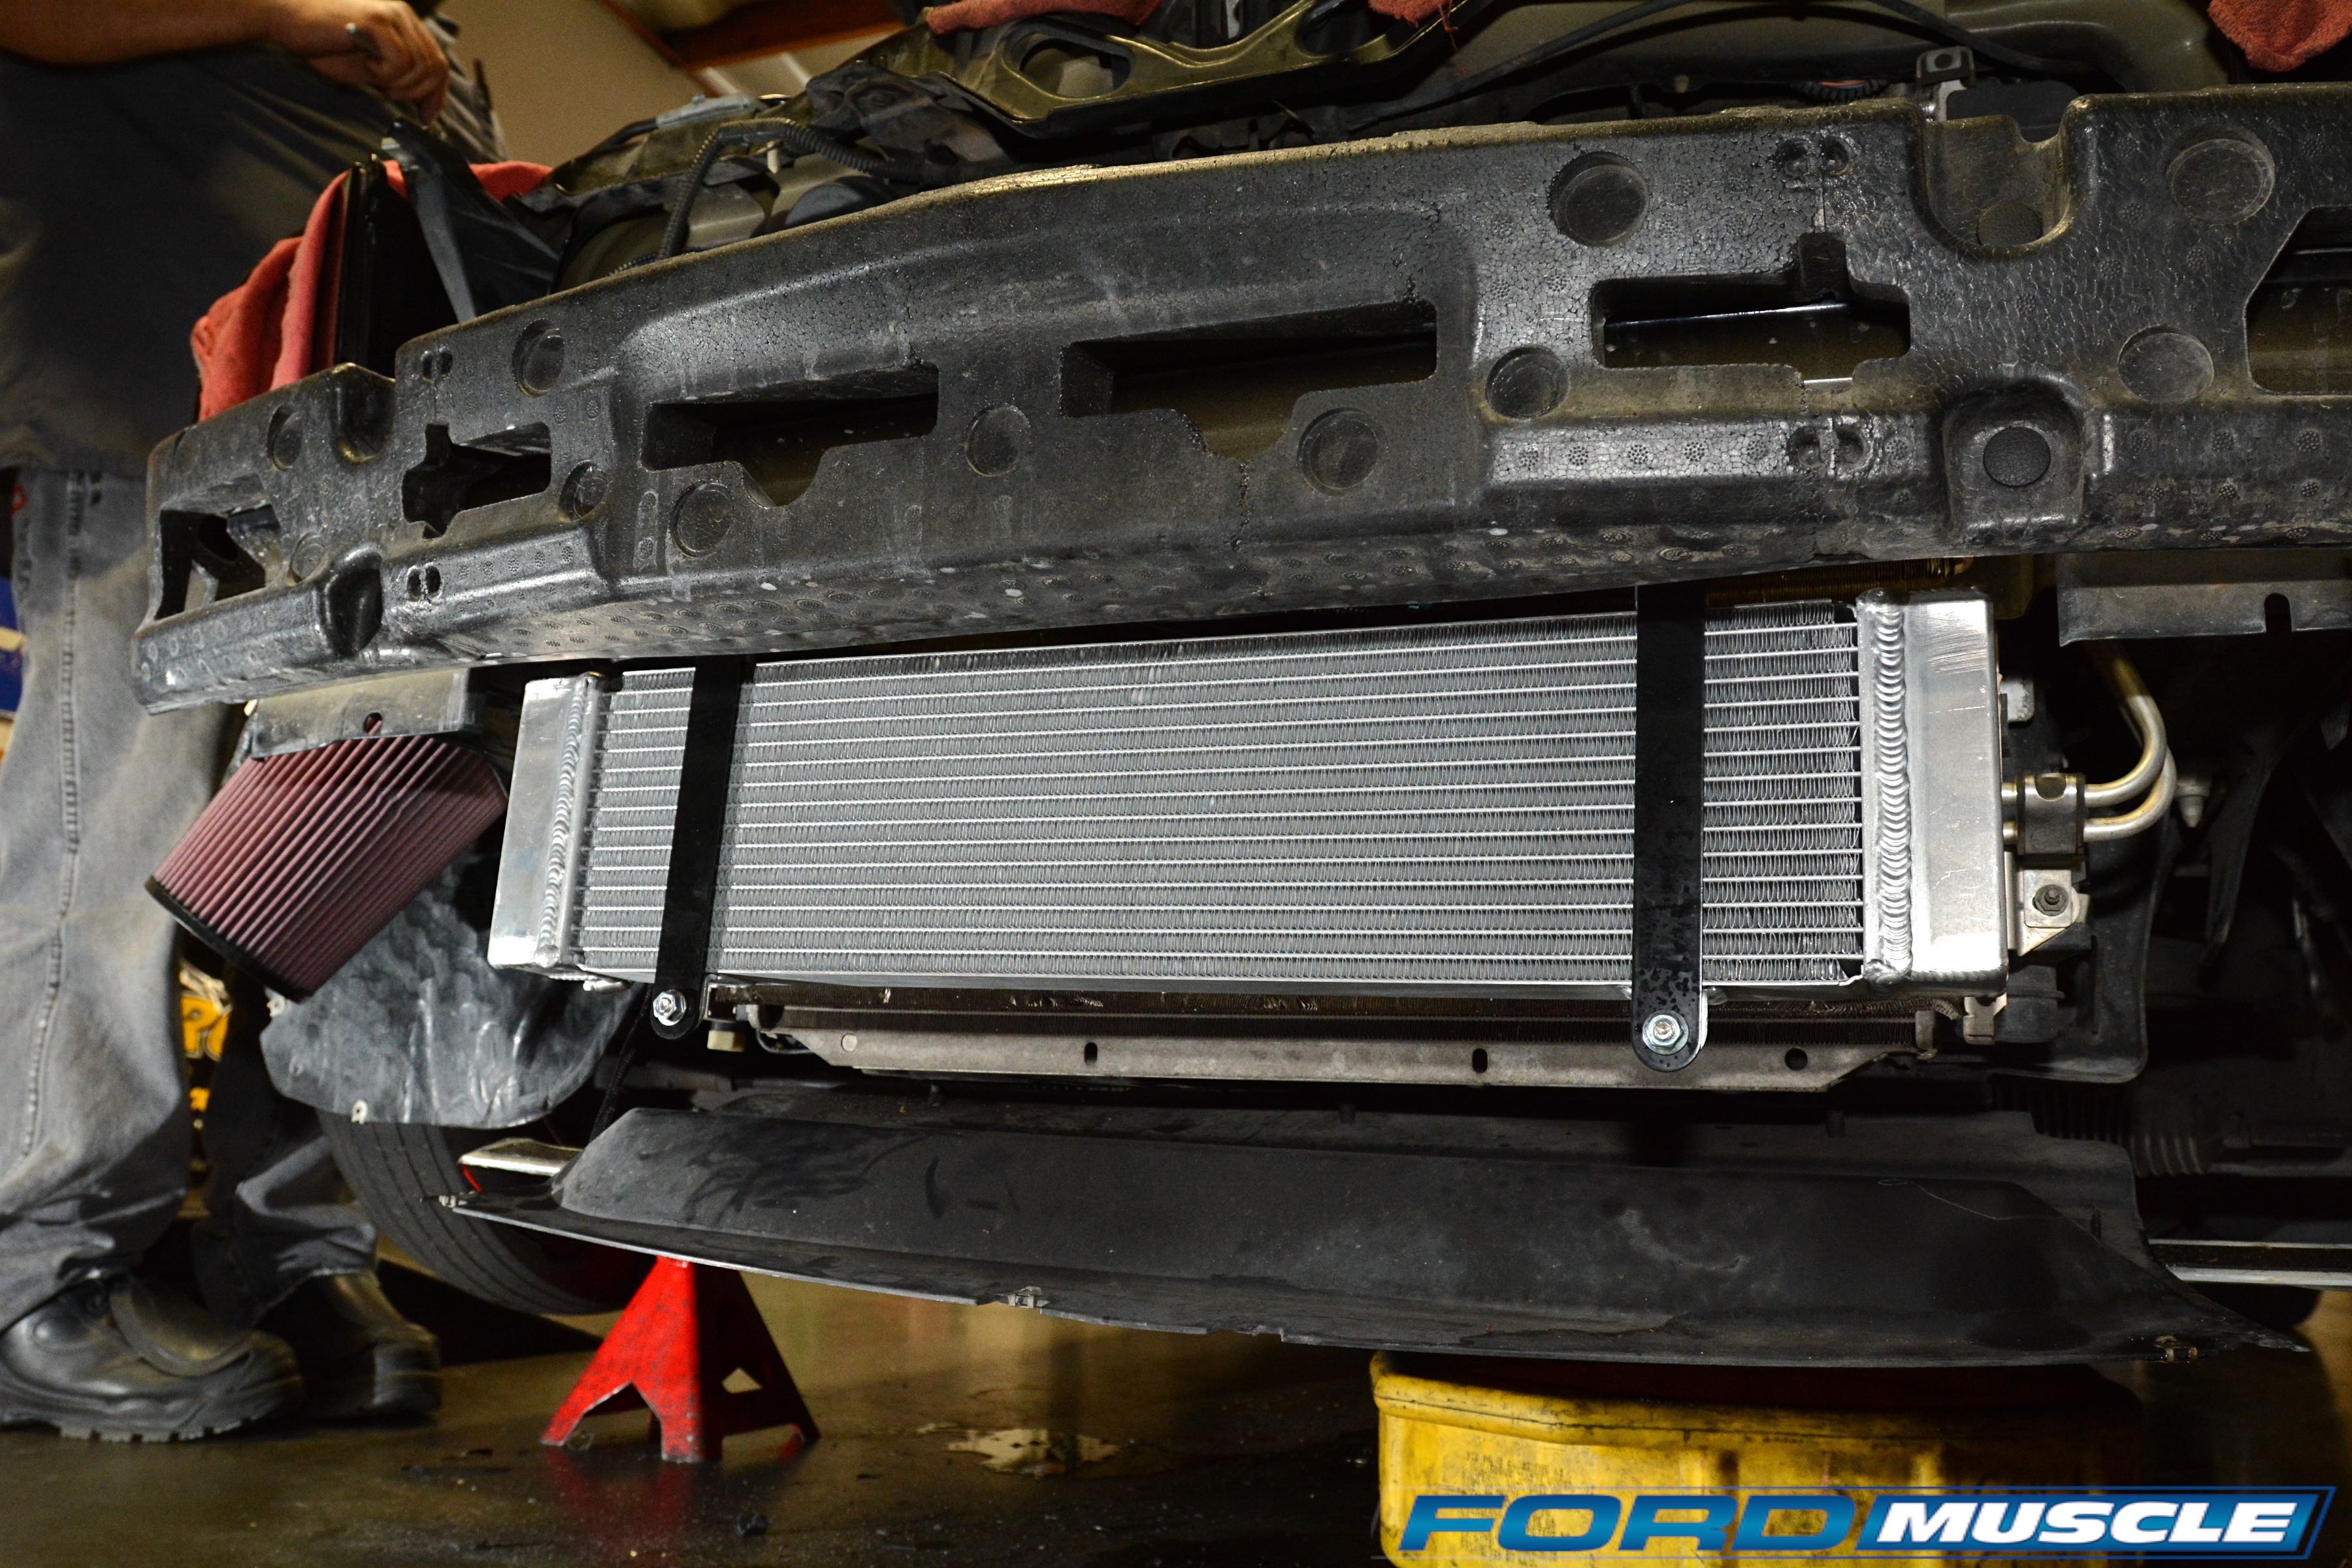
As with all charge-cooled superchargers, the front bumper cap is removed to access the charge cooler behind-the-bumper mounting. Ricardo found he had to cut the wires and install connectors to aftermarket foglights on Melissa’s car. Both the charge cooler’s radiator and electric pump are mounted to the bumper. Both the conical air filter and 90mm mass airflow housing live behind the passenger side headlight as the ducting leading up from the MAF hints here. Installation involves removing the headlight and drilling a hole in the inner sheet metal.
Electrically Kenne Bell supplies all needed wiring extensions and interfaces with plug-and-play connectors that blend right in with the stock Ford connectors. The big throttle body, Boost-A-Pump, charge cooler and so on are also included at no extra charge.
As noted, an experienced pro such as Ricardo Topete can install this kit in two long days, and we’d say a senior enthusiast working at home might be able to equal that given a roomy, well-equipped shop, no interruptions and a willingness to power through the install. But we also see this more realistically as a week-long install for the enthusiast working after hours and weekends. In any case it’s all bolt-on and plug-in work with no fabricating required. As always, you’re ahead of the herd by simply reading ahead and following the detailed instructions. It’s amazing how many people don’t, then wonder why they went wrong.
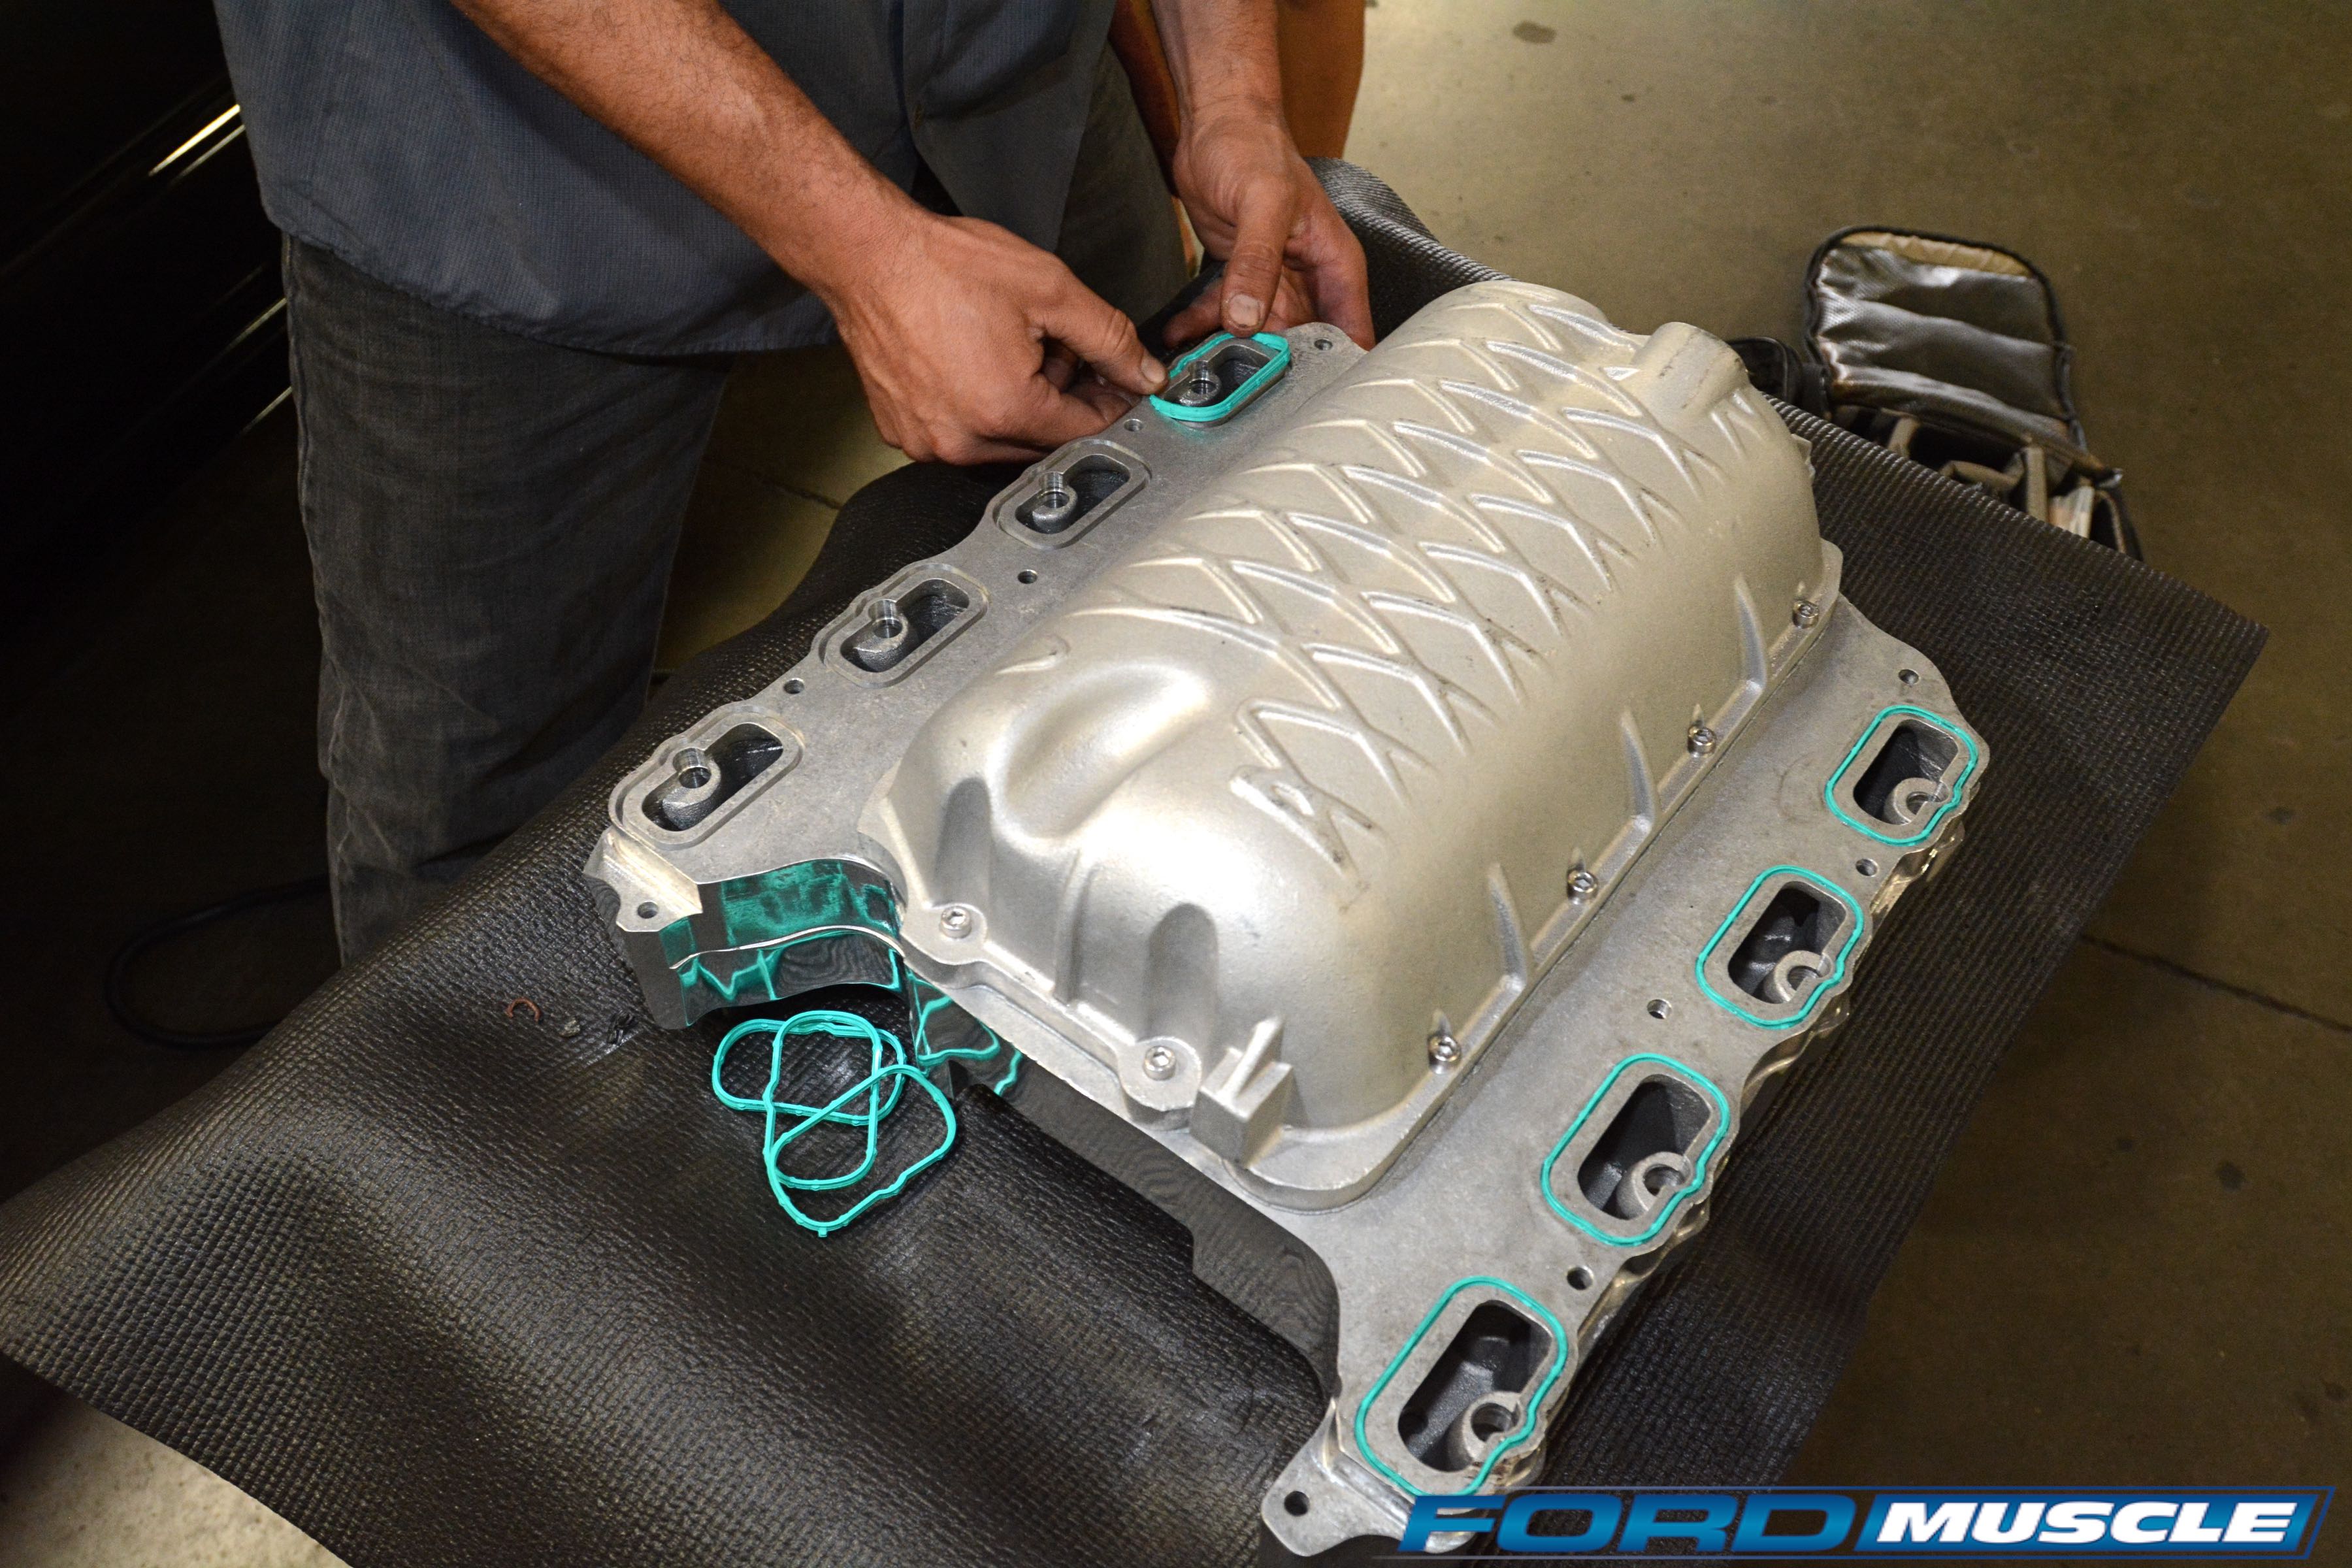
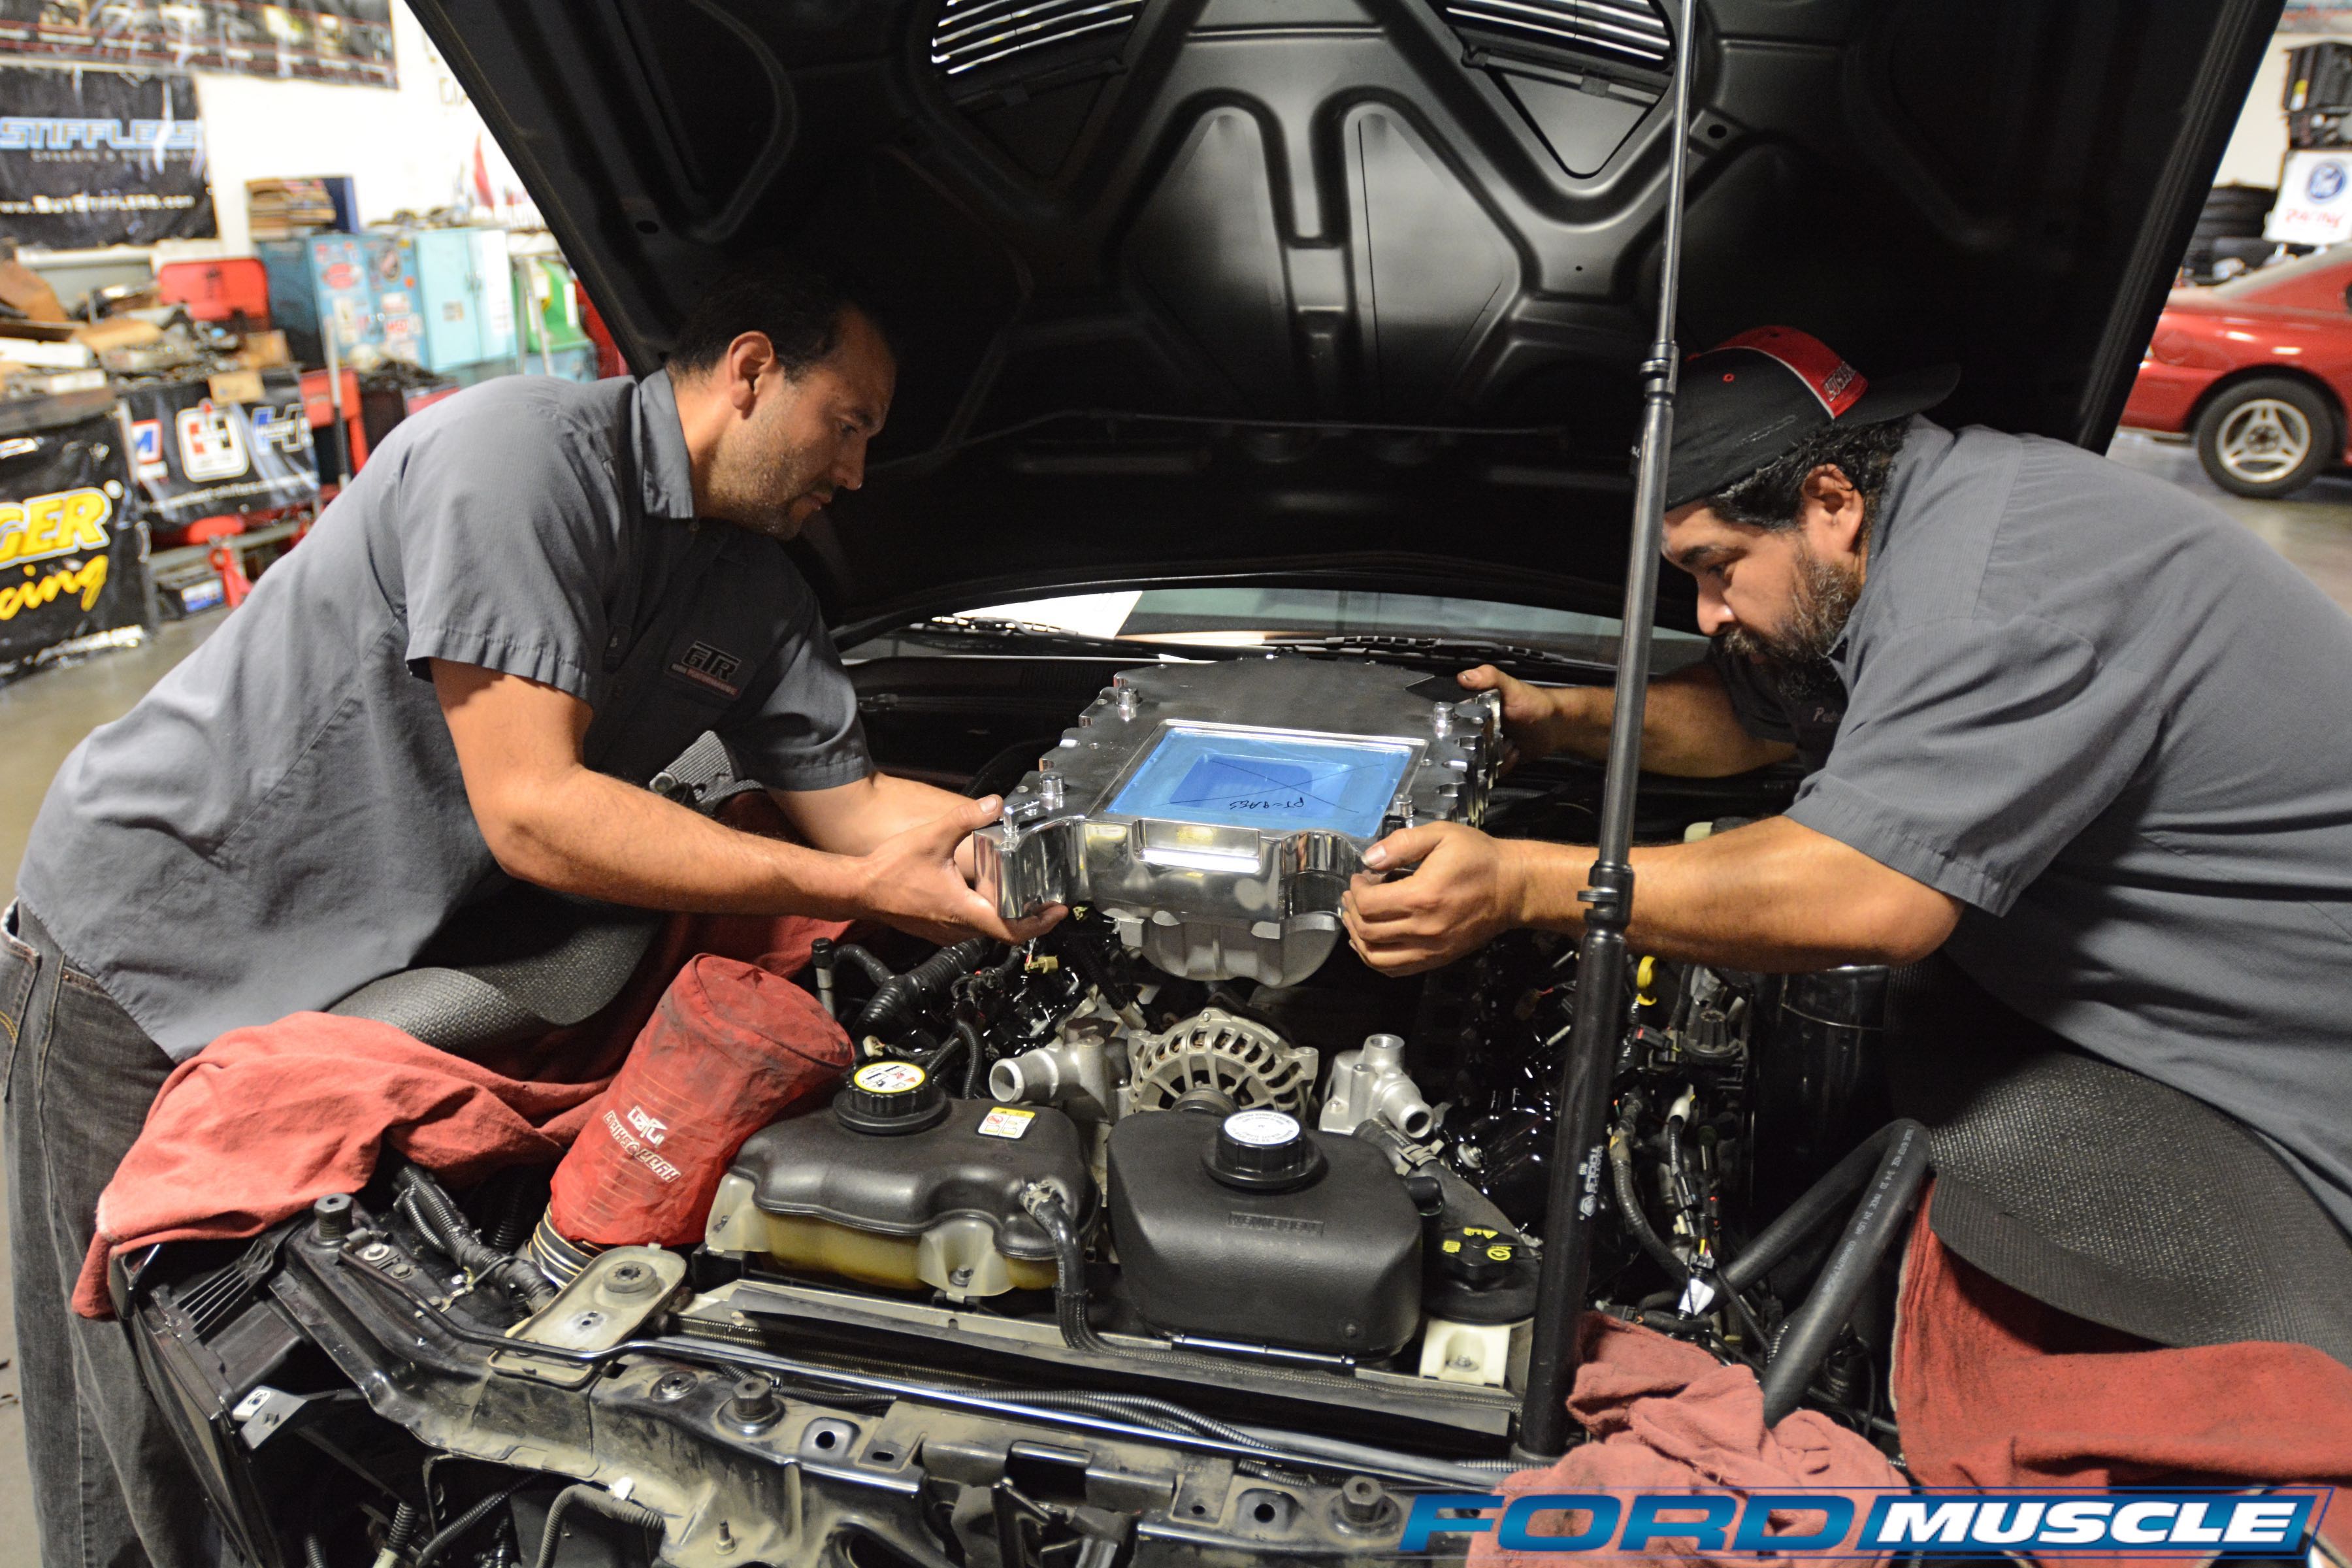
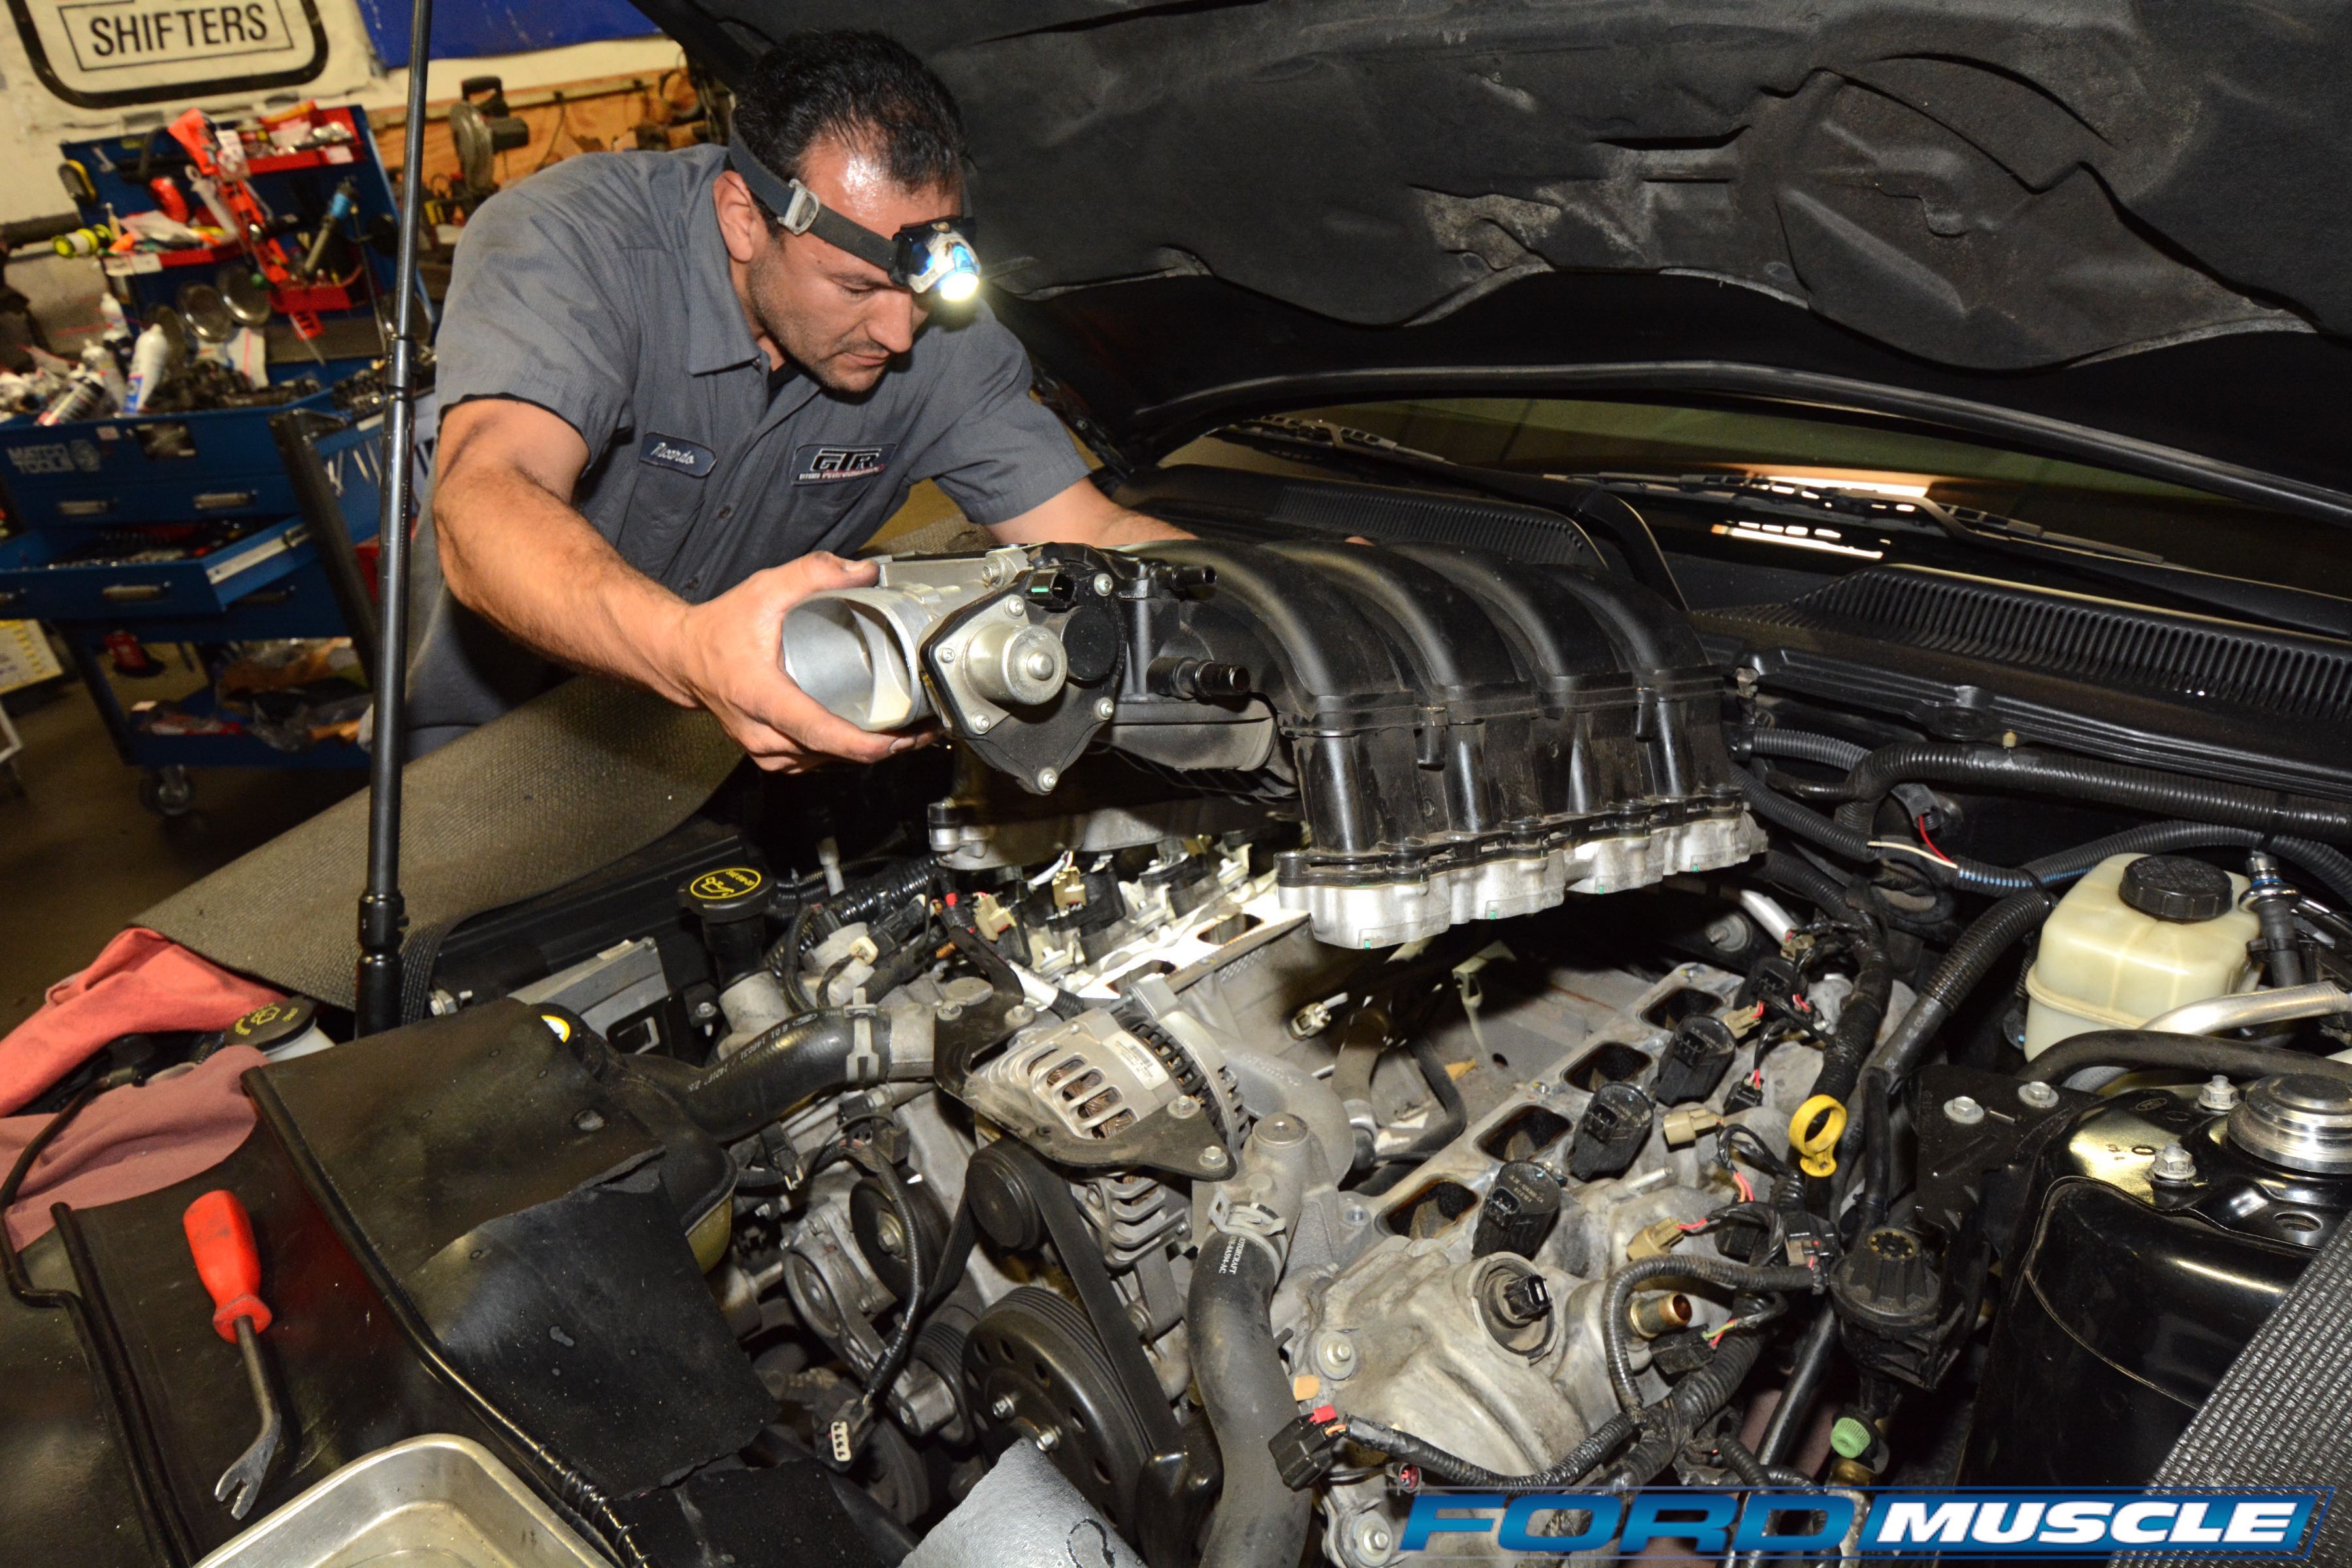
Ricardo’s blowing spark plug recesses clean prior to changing to the colder-heat-range plugs specified by Kenne Bell. He’ll also trial-fit the KB intake manifold using clay to check clearance in the engine valley and slightly relocate the ECU in front of the engine. Thanks to formed gaskets everywhere there’s not a single gasket to scrape or seal in the Three-Valve blower install. Kenne Bell includes these new intake manifold gaskets with this kit. Kenne Bell ships its intake manifold with the charge cooler already fitted and it’s sort of heavy — best to have some help when dropping it in place.
In our next installment we’ll run the newly muscular combination over the dyno rollers and down the strip. Get ready to run at least 10 mph faster!
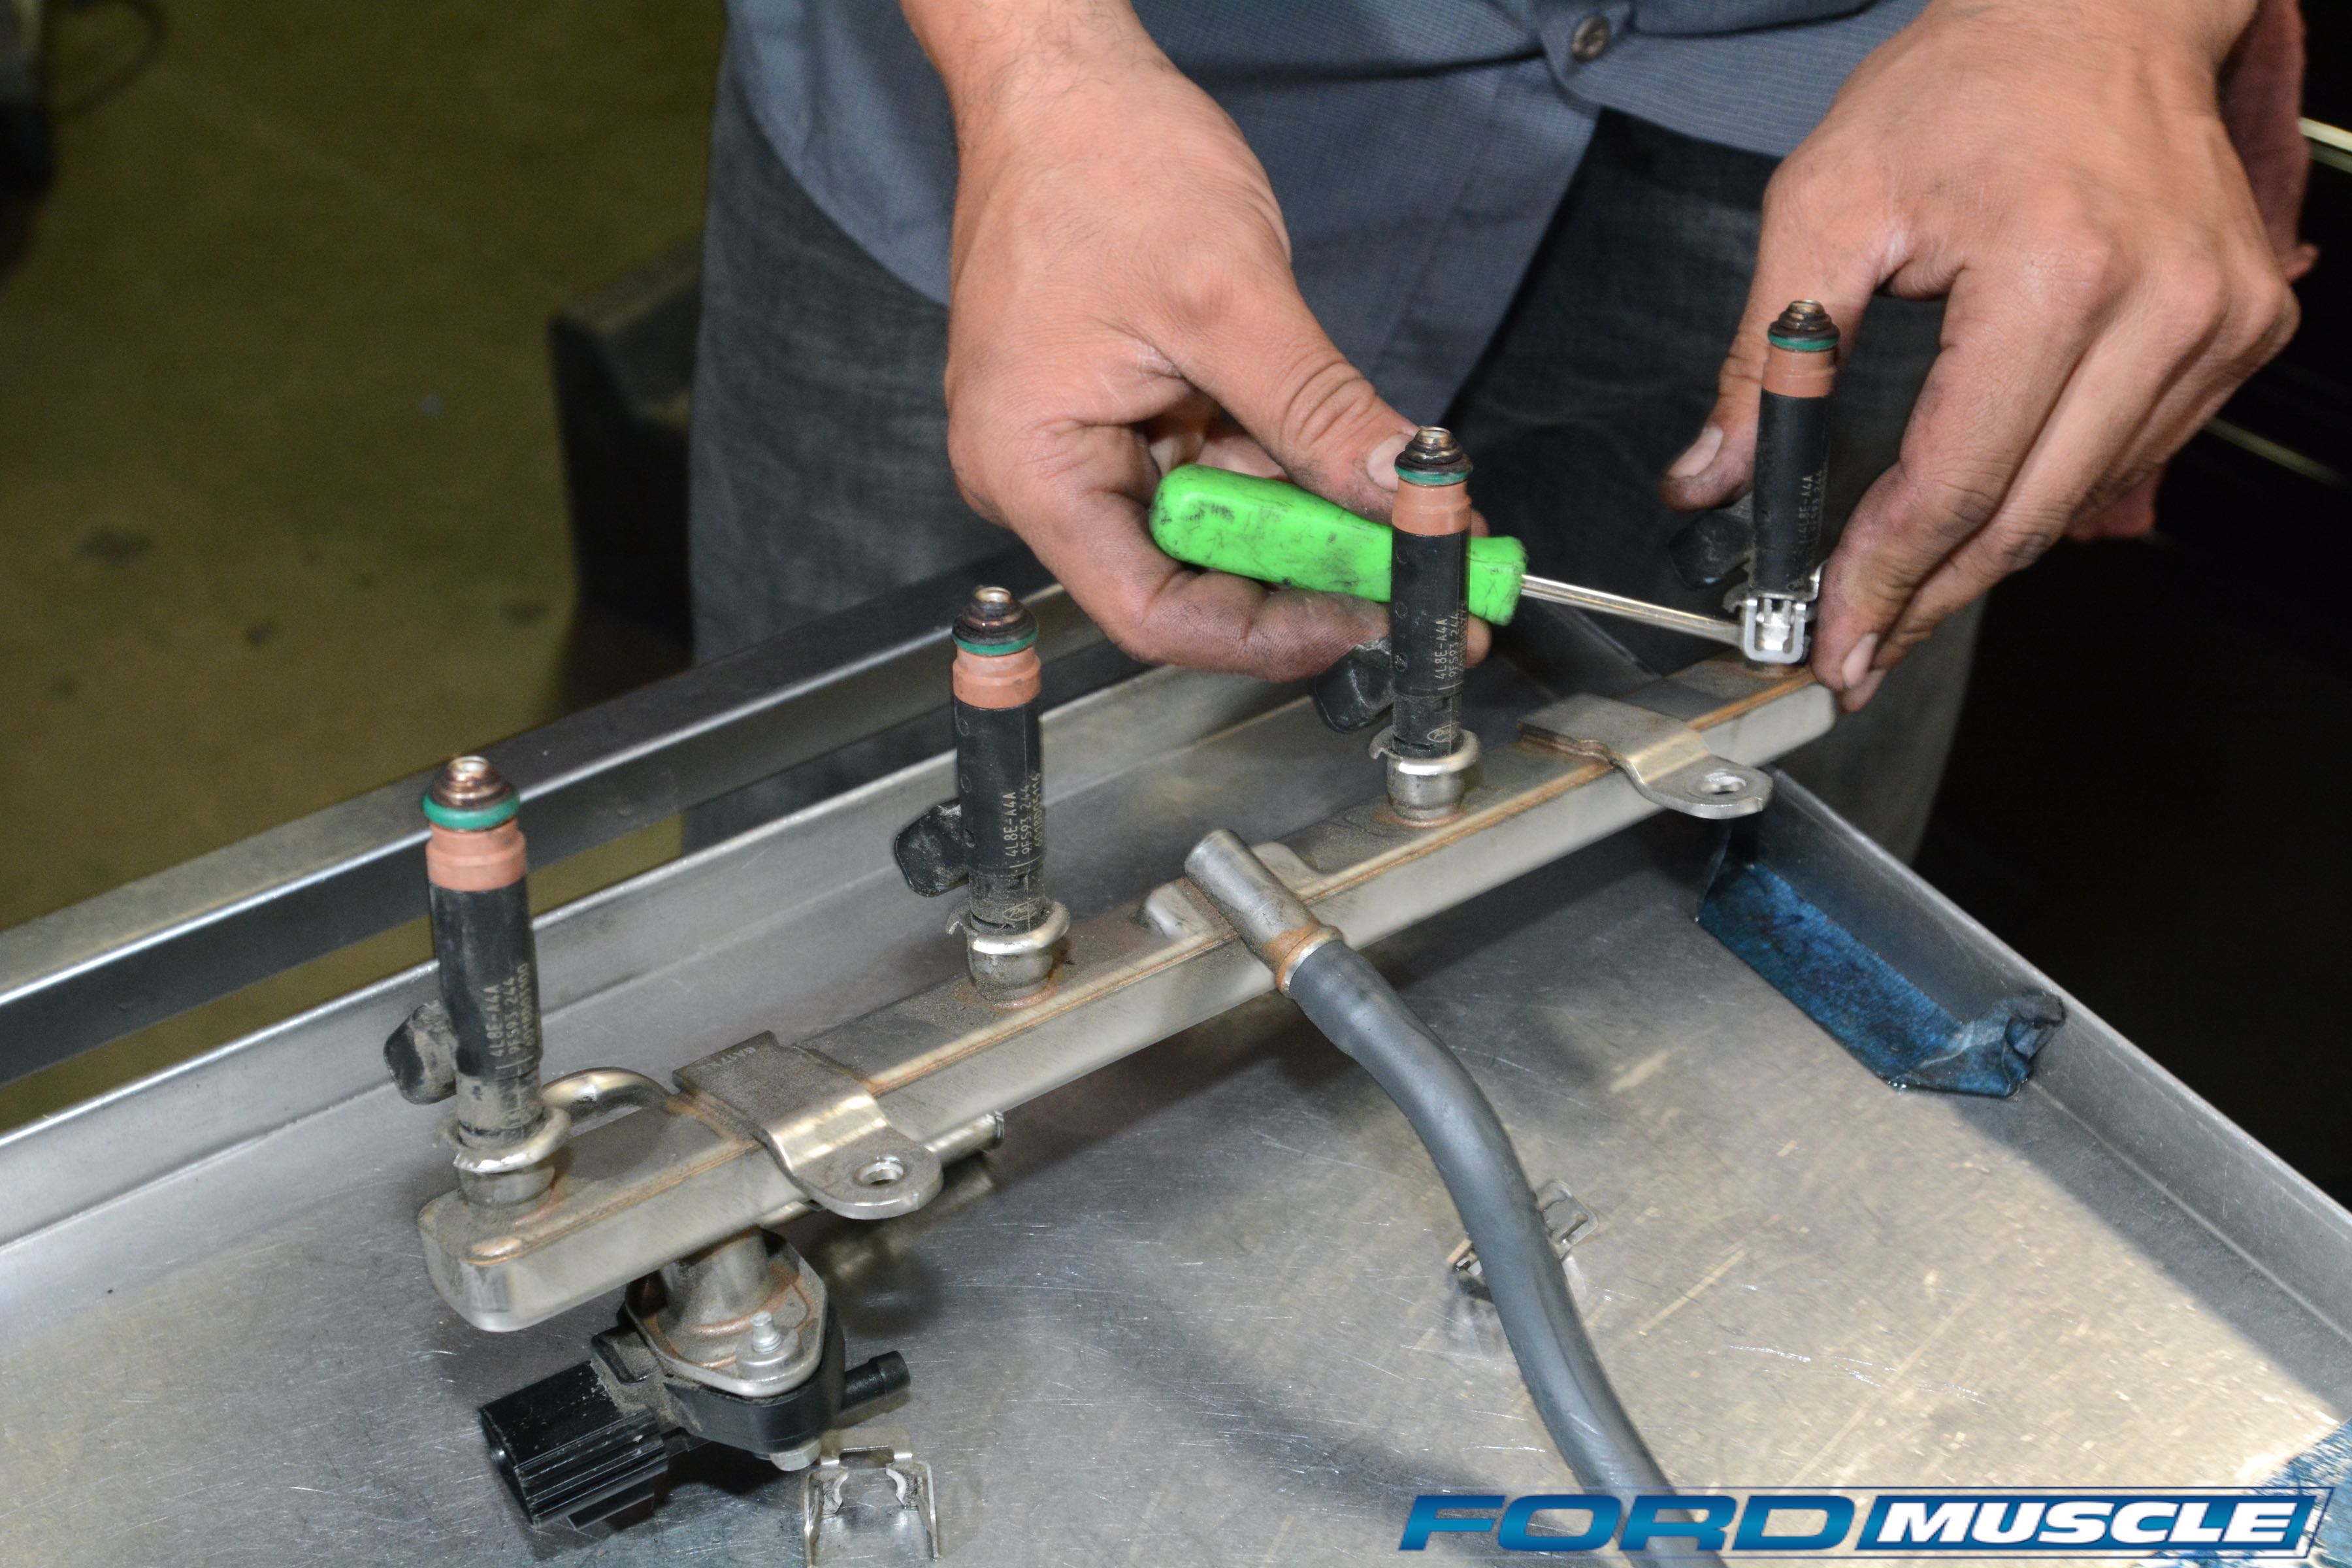

New 39 lb/hr fuel injectors are included in the Kenne Bell kit and are a simple push-in installation. Ricardo had the front two injectors on the passenger side leak initially, but simply fiddling with the fuel rail got them sealed. Unlike the bad old days there’s nearly nothing to do to the front engine dress on a Kenne Bell install. To the right of the alternator is an idler pulley mount, but past that idler and a longer drive belt there’s little to do up front. The alternator, like the rest of the accessories, remains in its stock location. Stock six-rib gear works for street boost; eight-rib options are available for high achievers. Other the new injectors, the only other fuel system mod is adding KB’s Boost-A-Pump in the trunk. You’ll have to solder a wire, but that’s about it.

The Kenne Bell is definitely tall, dark, and handsome on Melissa’s Three-Valve. Working and strut clearance is good, the Kenne Bell tune the best you’ll find and there are mid-12s under your right foot whenever you feel like it. Hit it!
Stay tuned for our next installment when we hit the dyno rollers with the newly supercharged combo to see what this twin-screw Three-Valve can do.