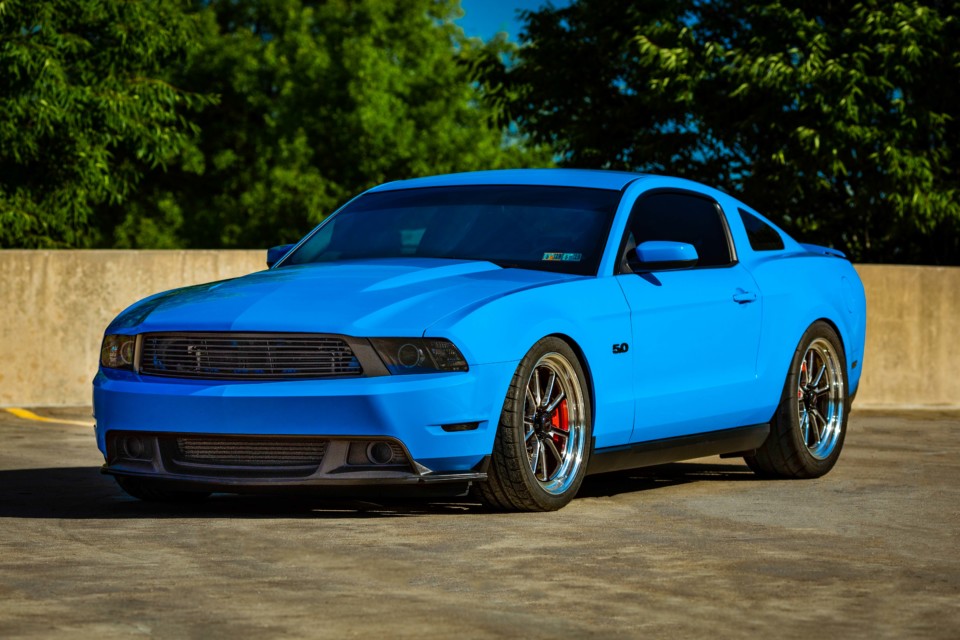
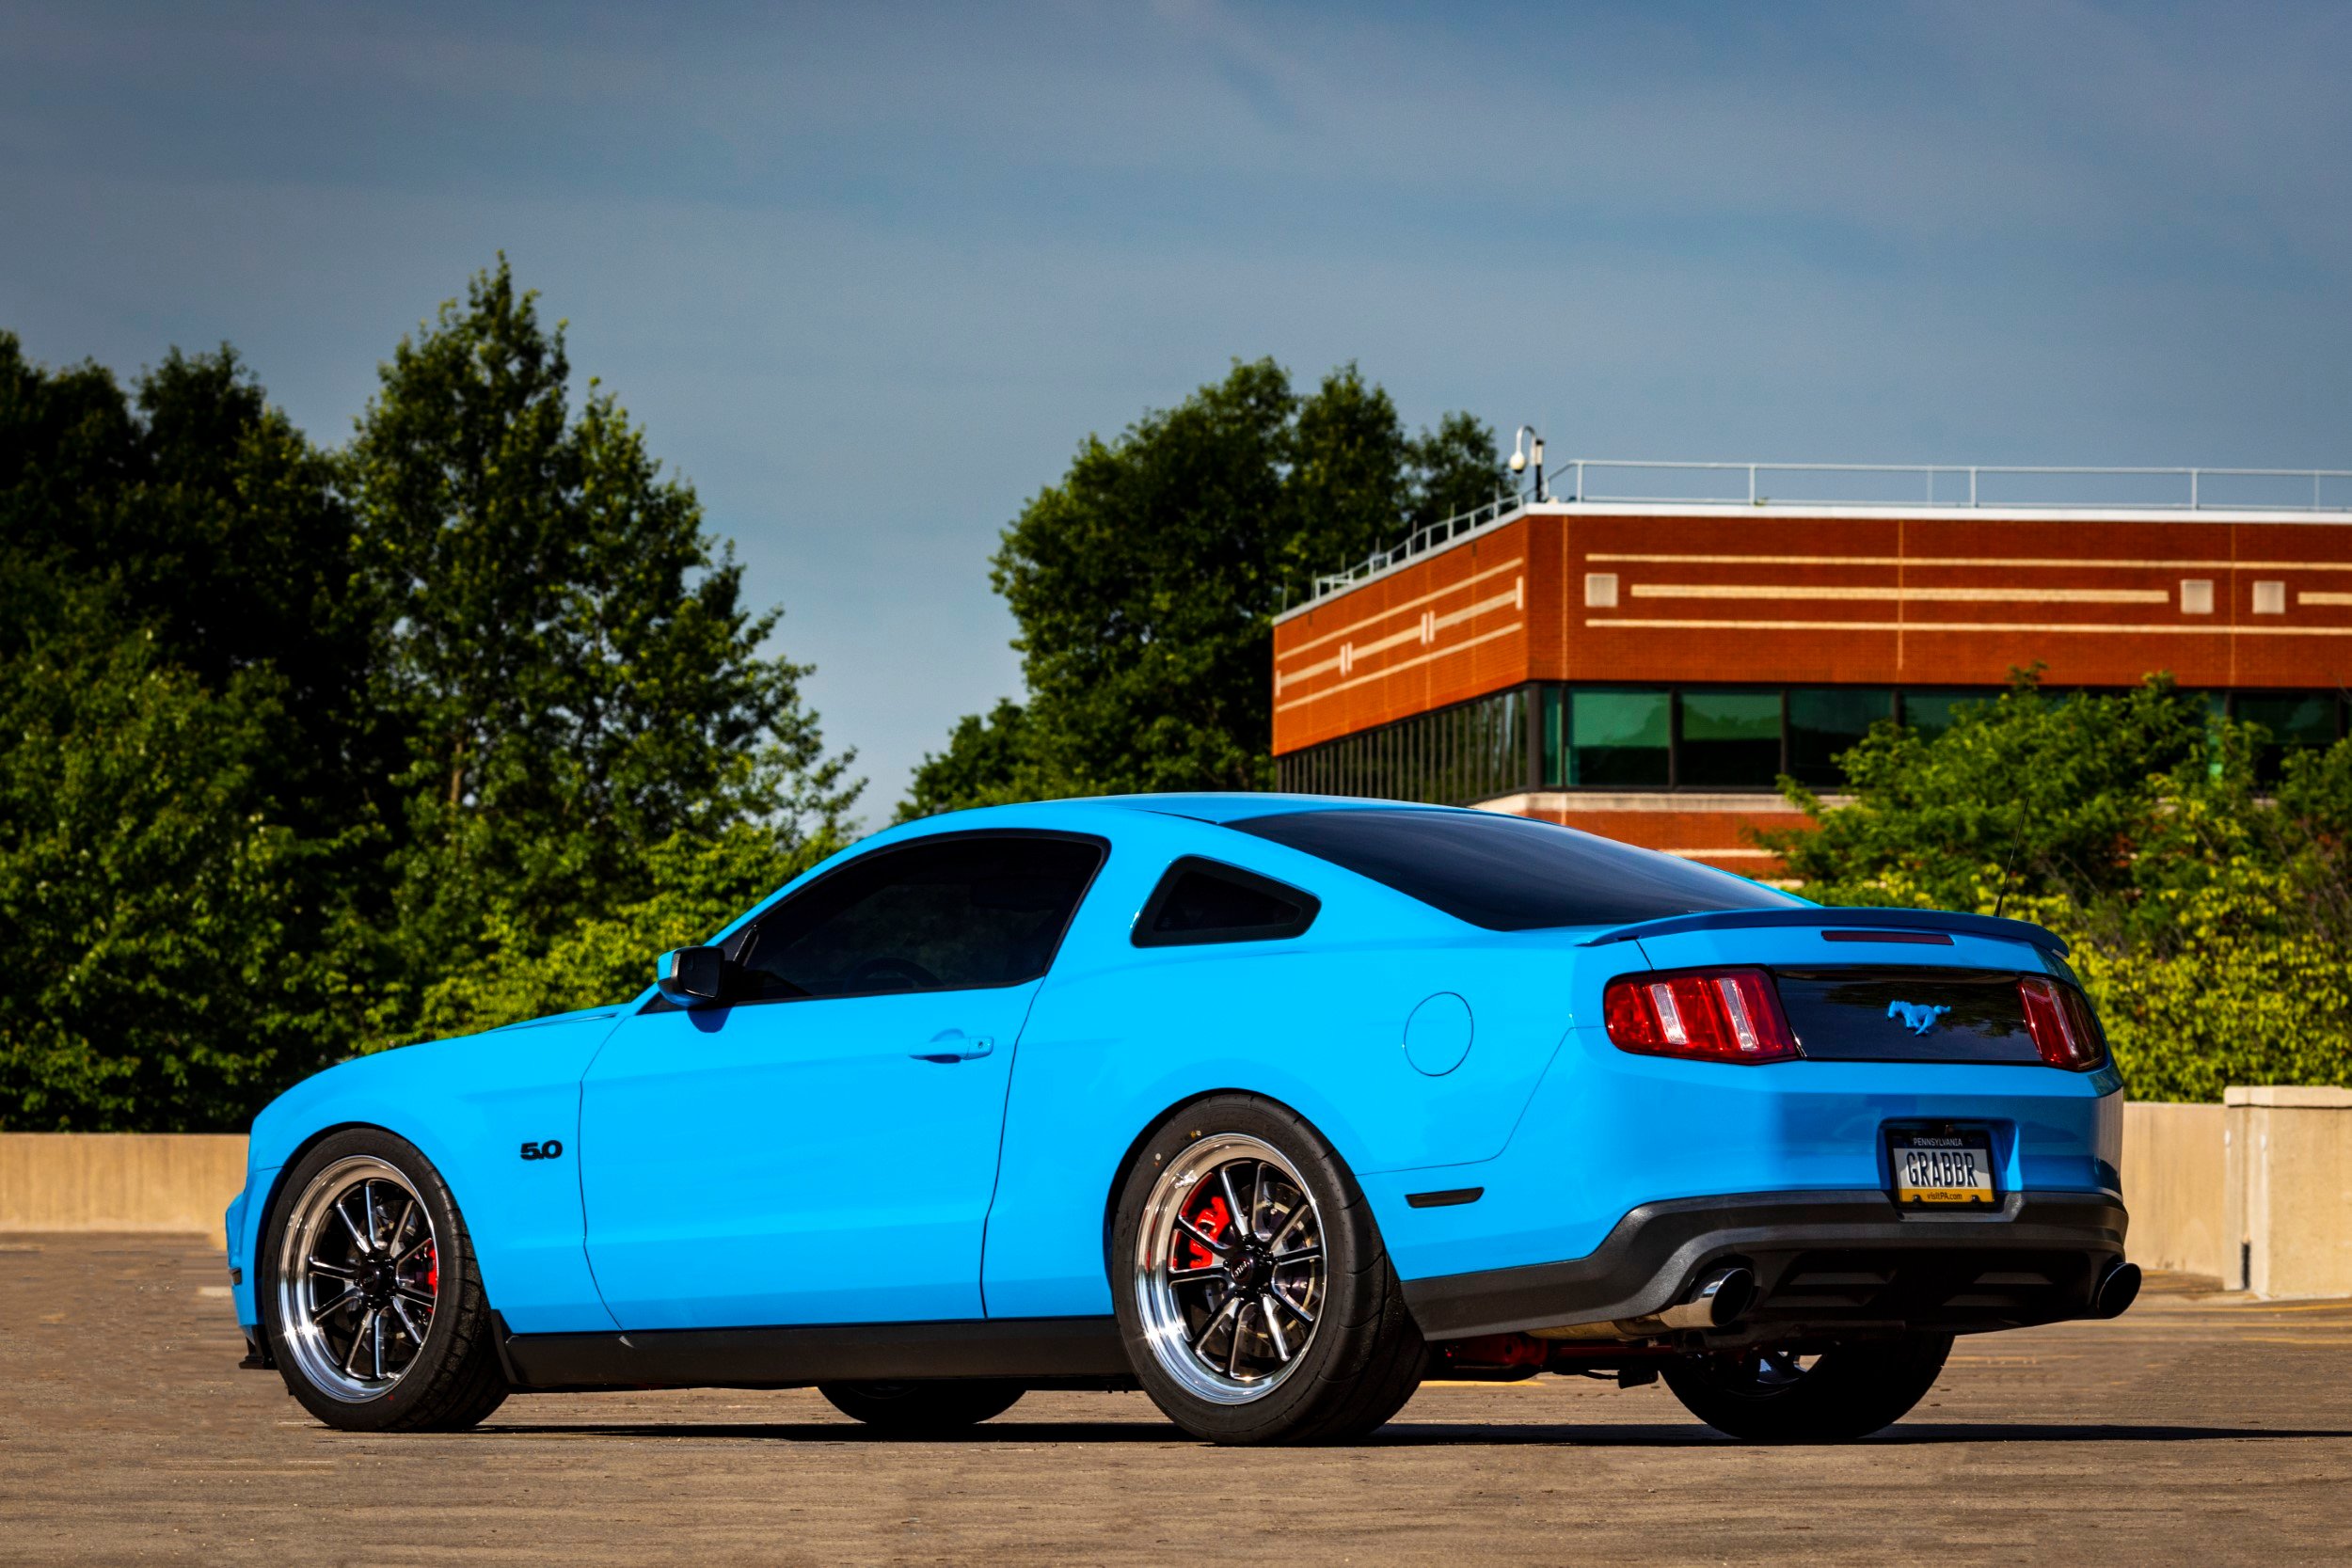
The S197 Mustang chassis, out of production since 2014 and with a production run of ten years (2005–’14), is ripe for modification; in many cases these cars are on to their second, third, and fourth owners and have suspension parts which have seen far better days. This is even more so the case when the owners have visions of the car performing well both on the street and at the track, as in the case of Project Grabbr, which was acquired with an assortment of mismatched suspension parts underneath.
The setup we arrived with wasn’t really conducive to performing properly for how we use the car most.
Lowering springs from one manufacturer, Koni front and rear dampers designed for a handling application, poly-bushed billet aluminum rear lower control arms of unknown origin mounted to BMR Suspension relocation brackets, and a BMR first-gen upper control arm and mount all combined to be inconsistent at the dragstrip and not ideal on the street—and rightfully so—as the parts weren’t designed to work together, and the performance showed it.
In addition, there was a lower ball joint in the front that had seen better days despite the car being garage-kept for most of its life. The arrangement of components installed on the car were more suited toward street handling than anything else, and since we like to get rowdy at the drags a few times a year, we needed to correct these deficiencies.

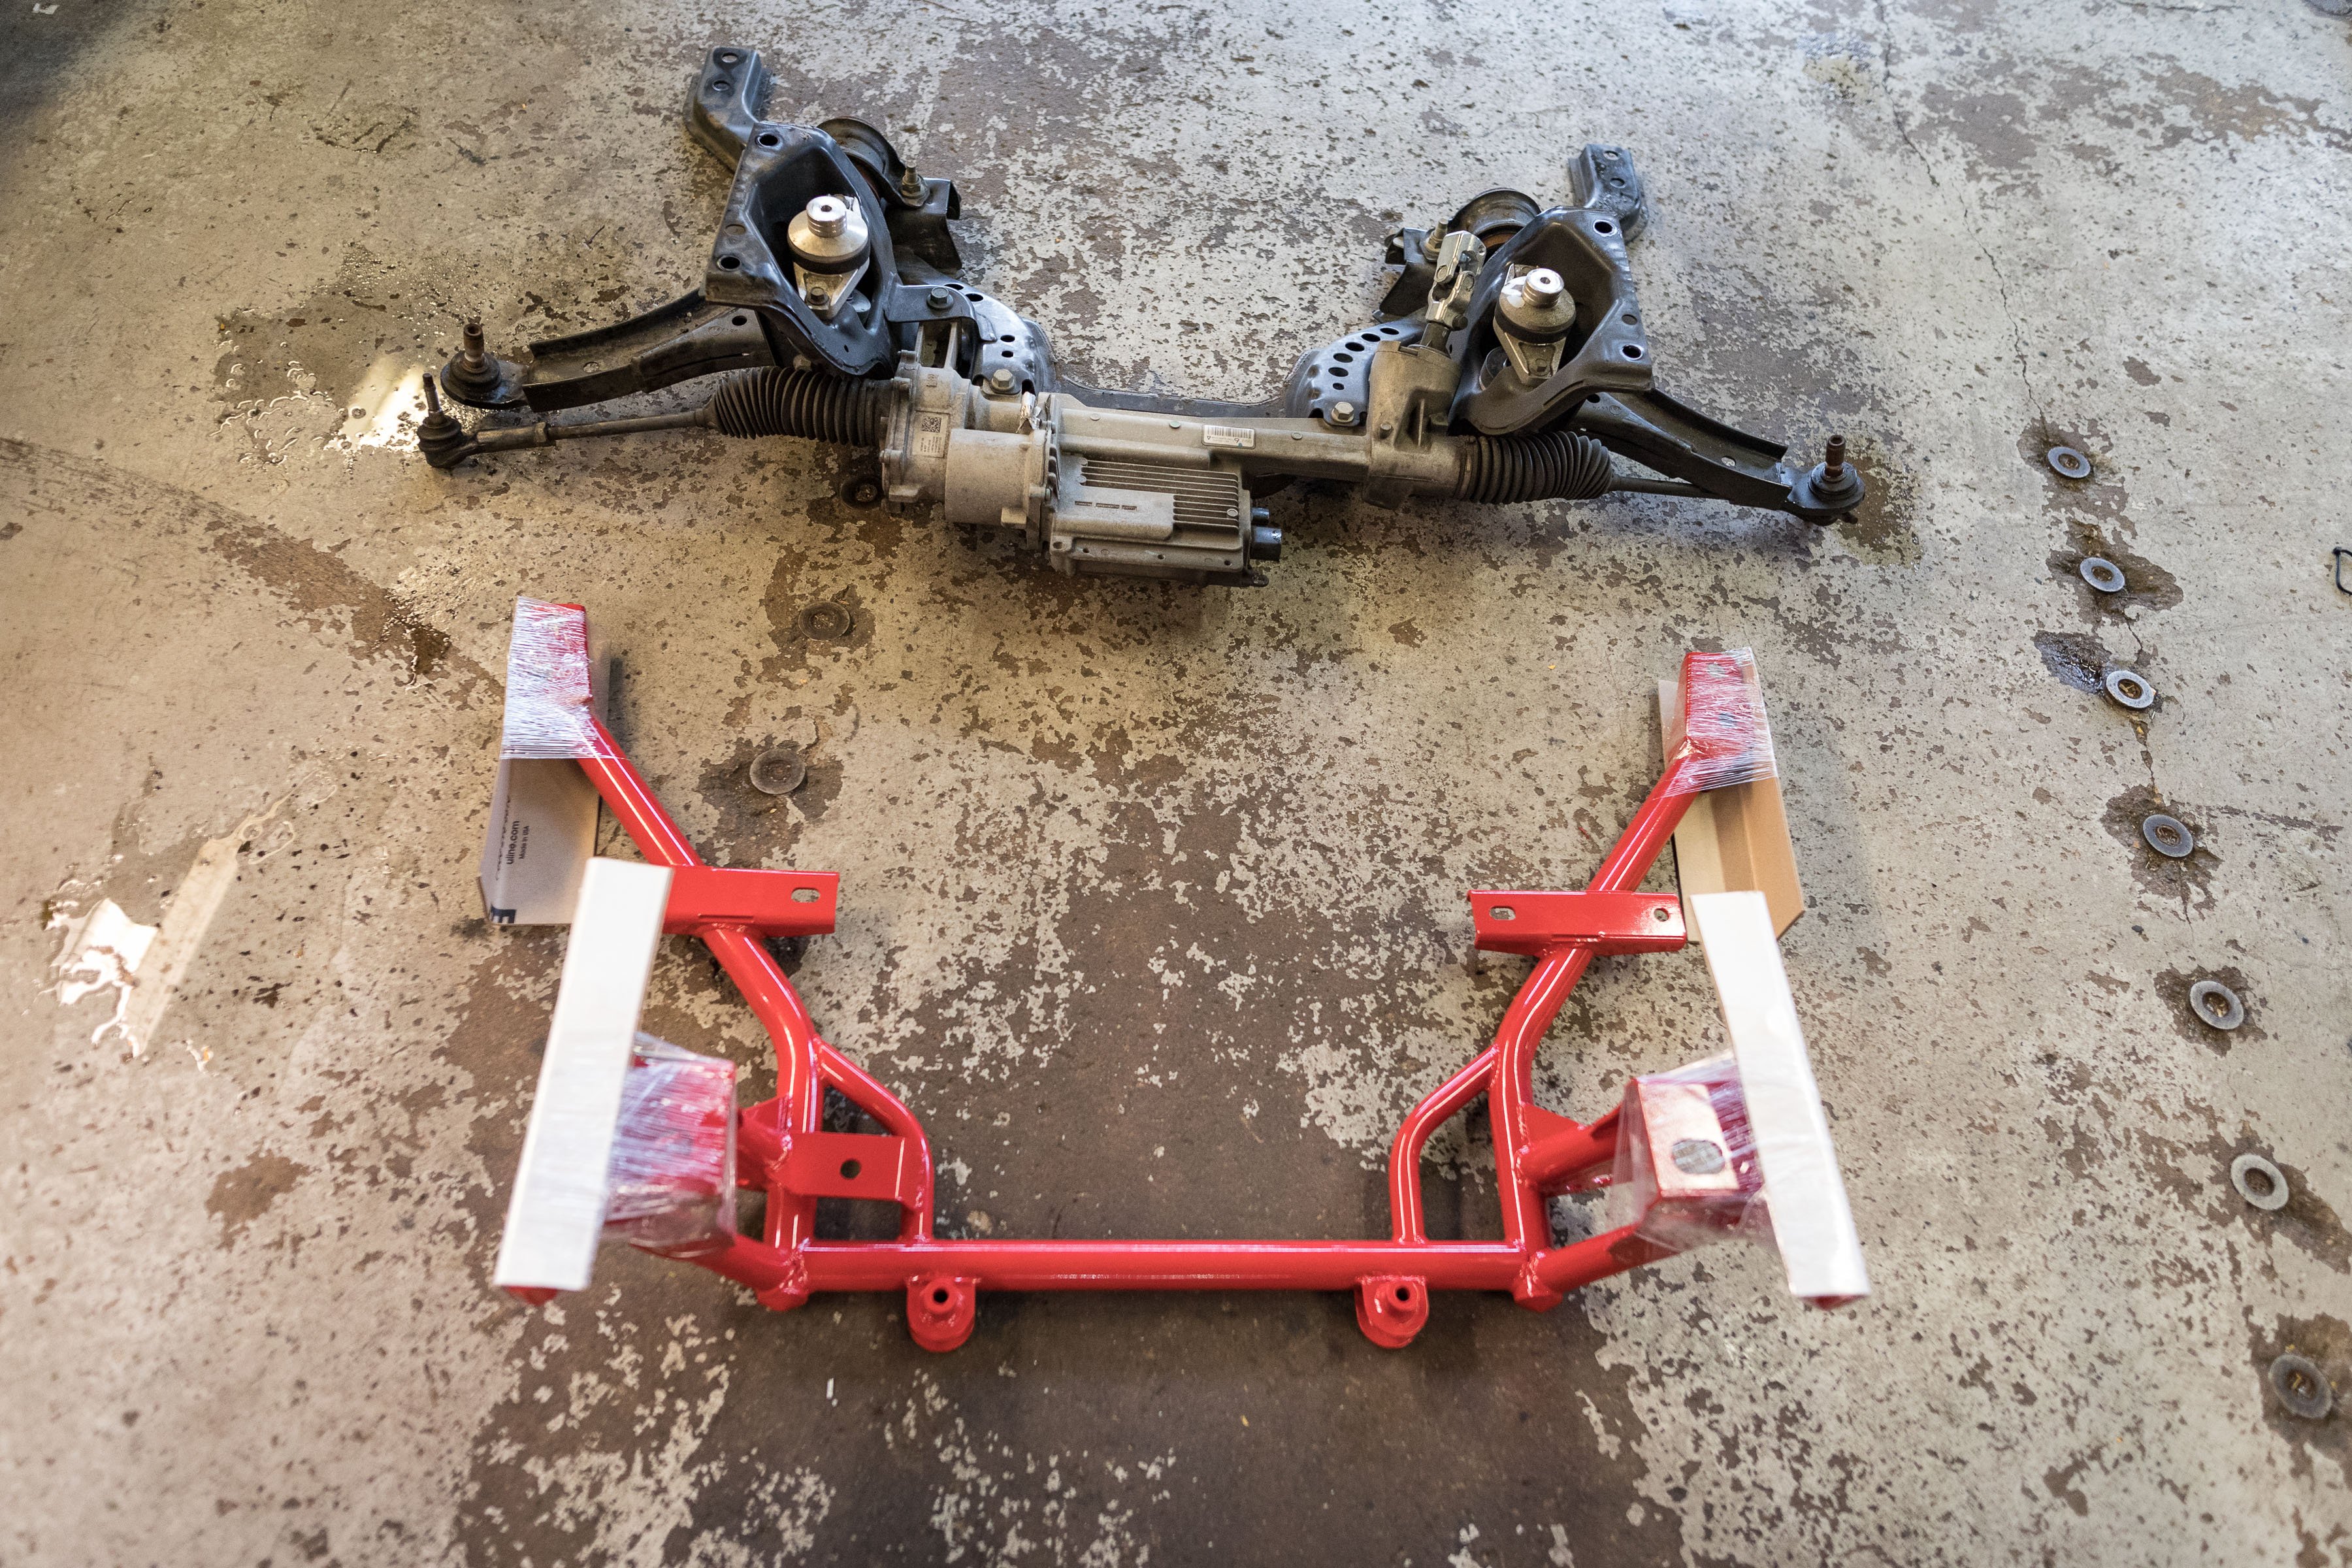
Our plan included the replacement of every component underneath the car from front to rear, with the exception of the perfectly-functional lower control arm relocation brackets. There’s only so much room on the table, so we couldn’t show the front suspension here.
With these concerns in mind, we hatched a plan to go front-to-back under the car and upgrade each and every component with a double-duty goal in mind—have the car perform on the street and ride nicely and turn up the wick with the performance at the track. The best-laid plans don’t always come to fruition, as you’ll see at the end of the article, but there’s no doubt the car is ready for the next step in its evolution.
Since the team at BMR Suspension is well-versed in S197 performance, and can count many of the quickest racers with the three-link suspension as part of its customer base, we headed in their direction to chat with superstar tech dude Kelly Aiken, who is well-known in the community as one of the go-to guys when it comes to tuning the suspension for late-model Mustangs.
“The first thing I do is determine what the customer will use the car for, and then their budget. Typically my customers will do a few things at a time rather than upgrade the whole suspension at one time. We always focus on the rear suspension first, and then move to the front. The return on investment for the front components doesn’t necessarily have the same impact as a rear upgrade does initially,” says Aiken.
“For about $1,000, you can do all of the basics: the upper control arm, the mount, the lower control arms, the relocation brackets, and a good set of shocks. There’s no real set-in-stone package of components they’ll need. It’s all based on the customer’s situation. If a customer has $500 to spend, I try to point them in the right direction.”
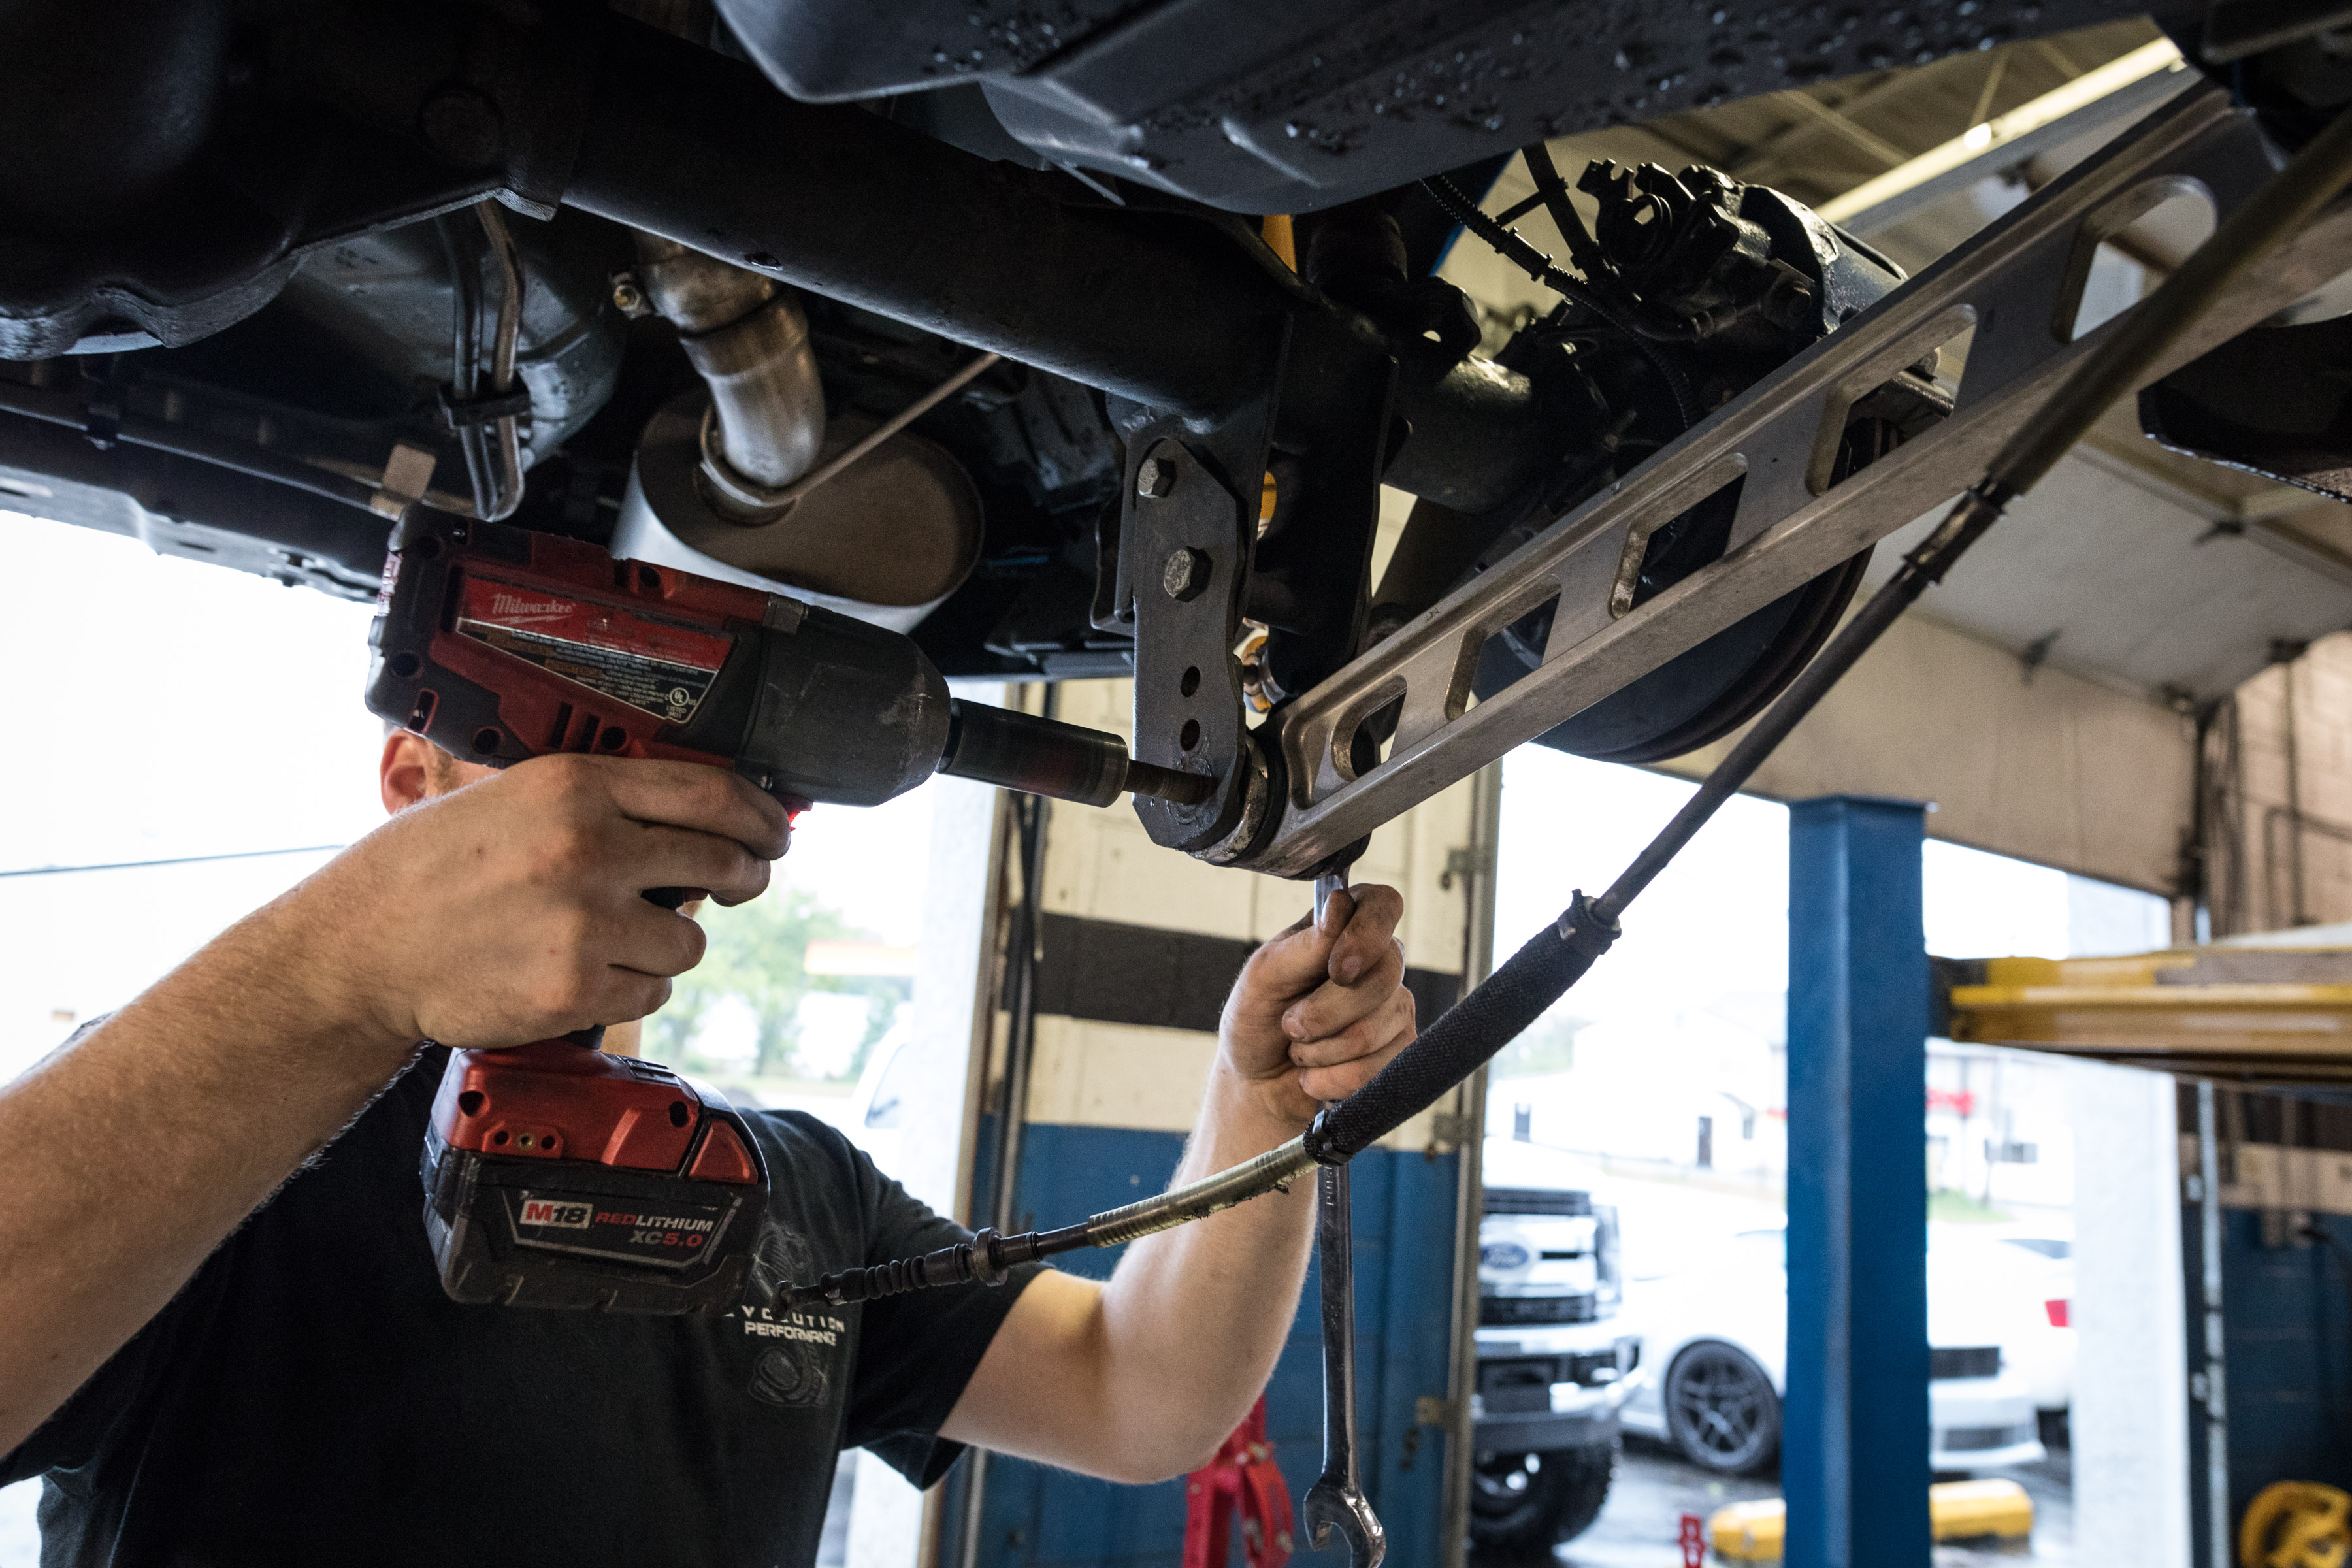
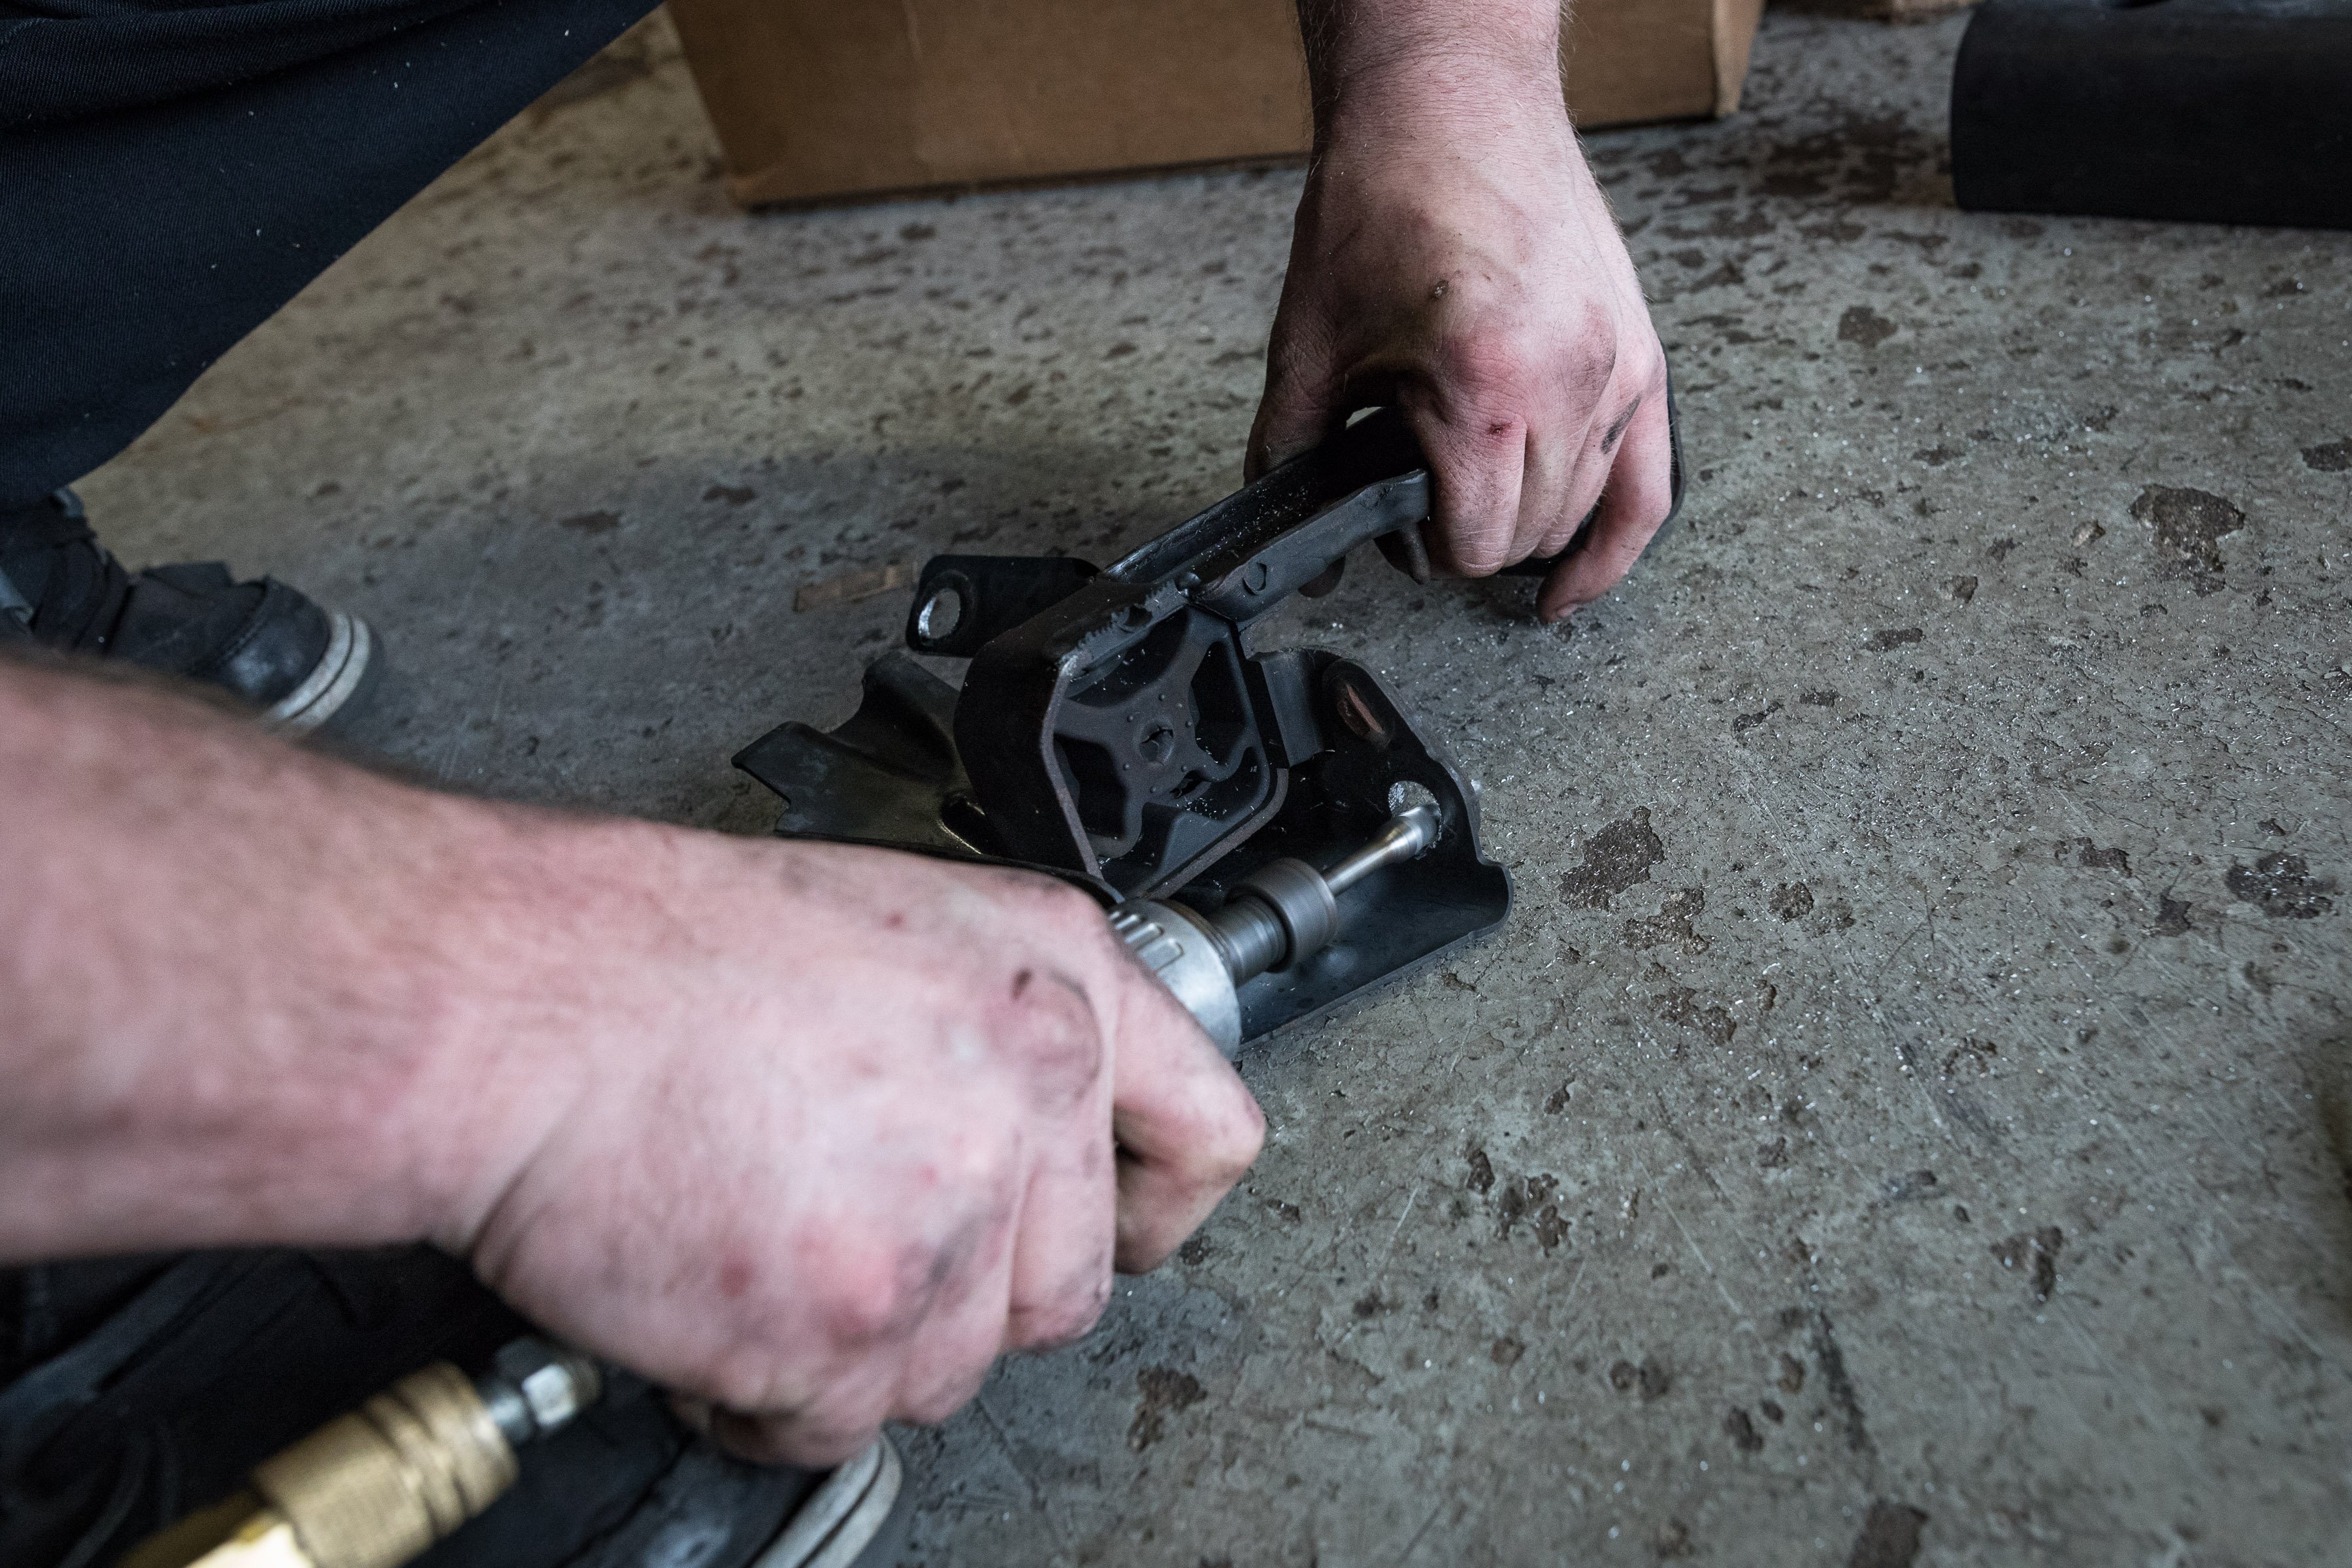
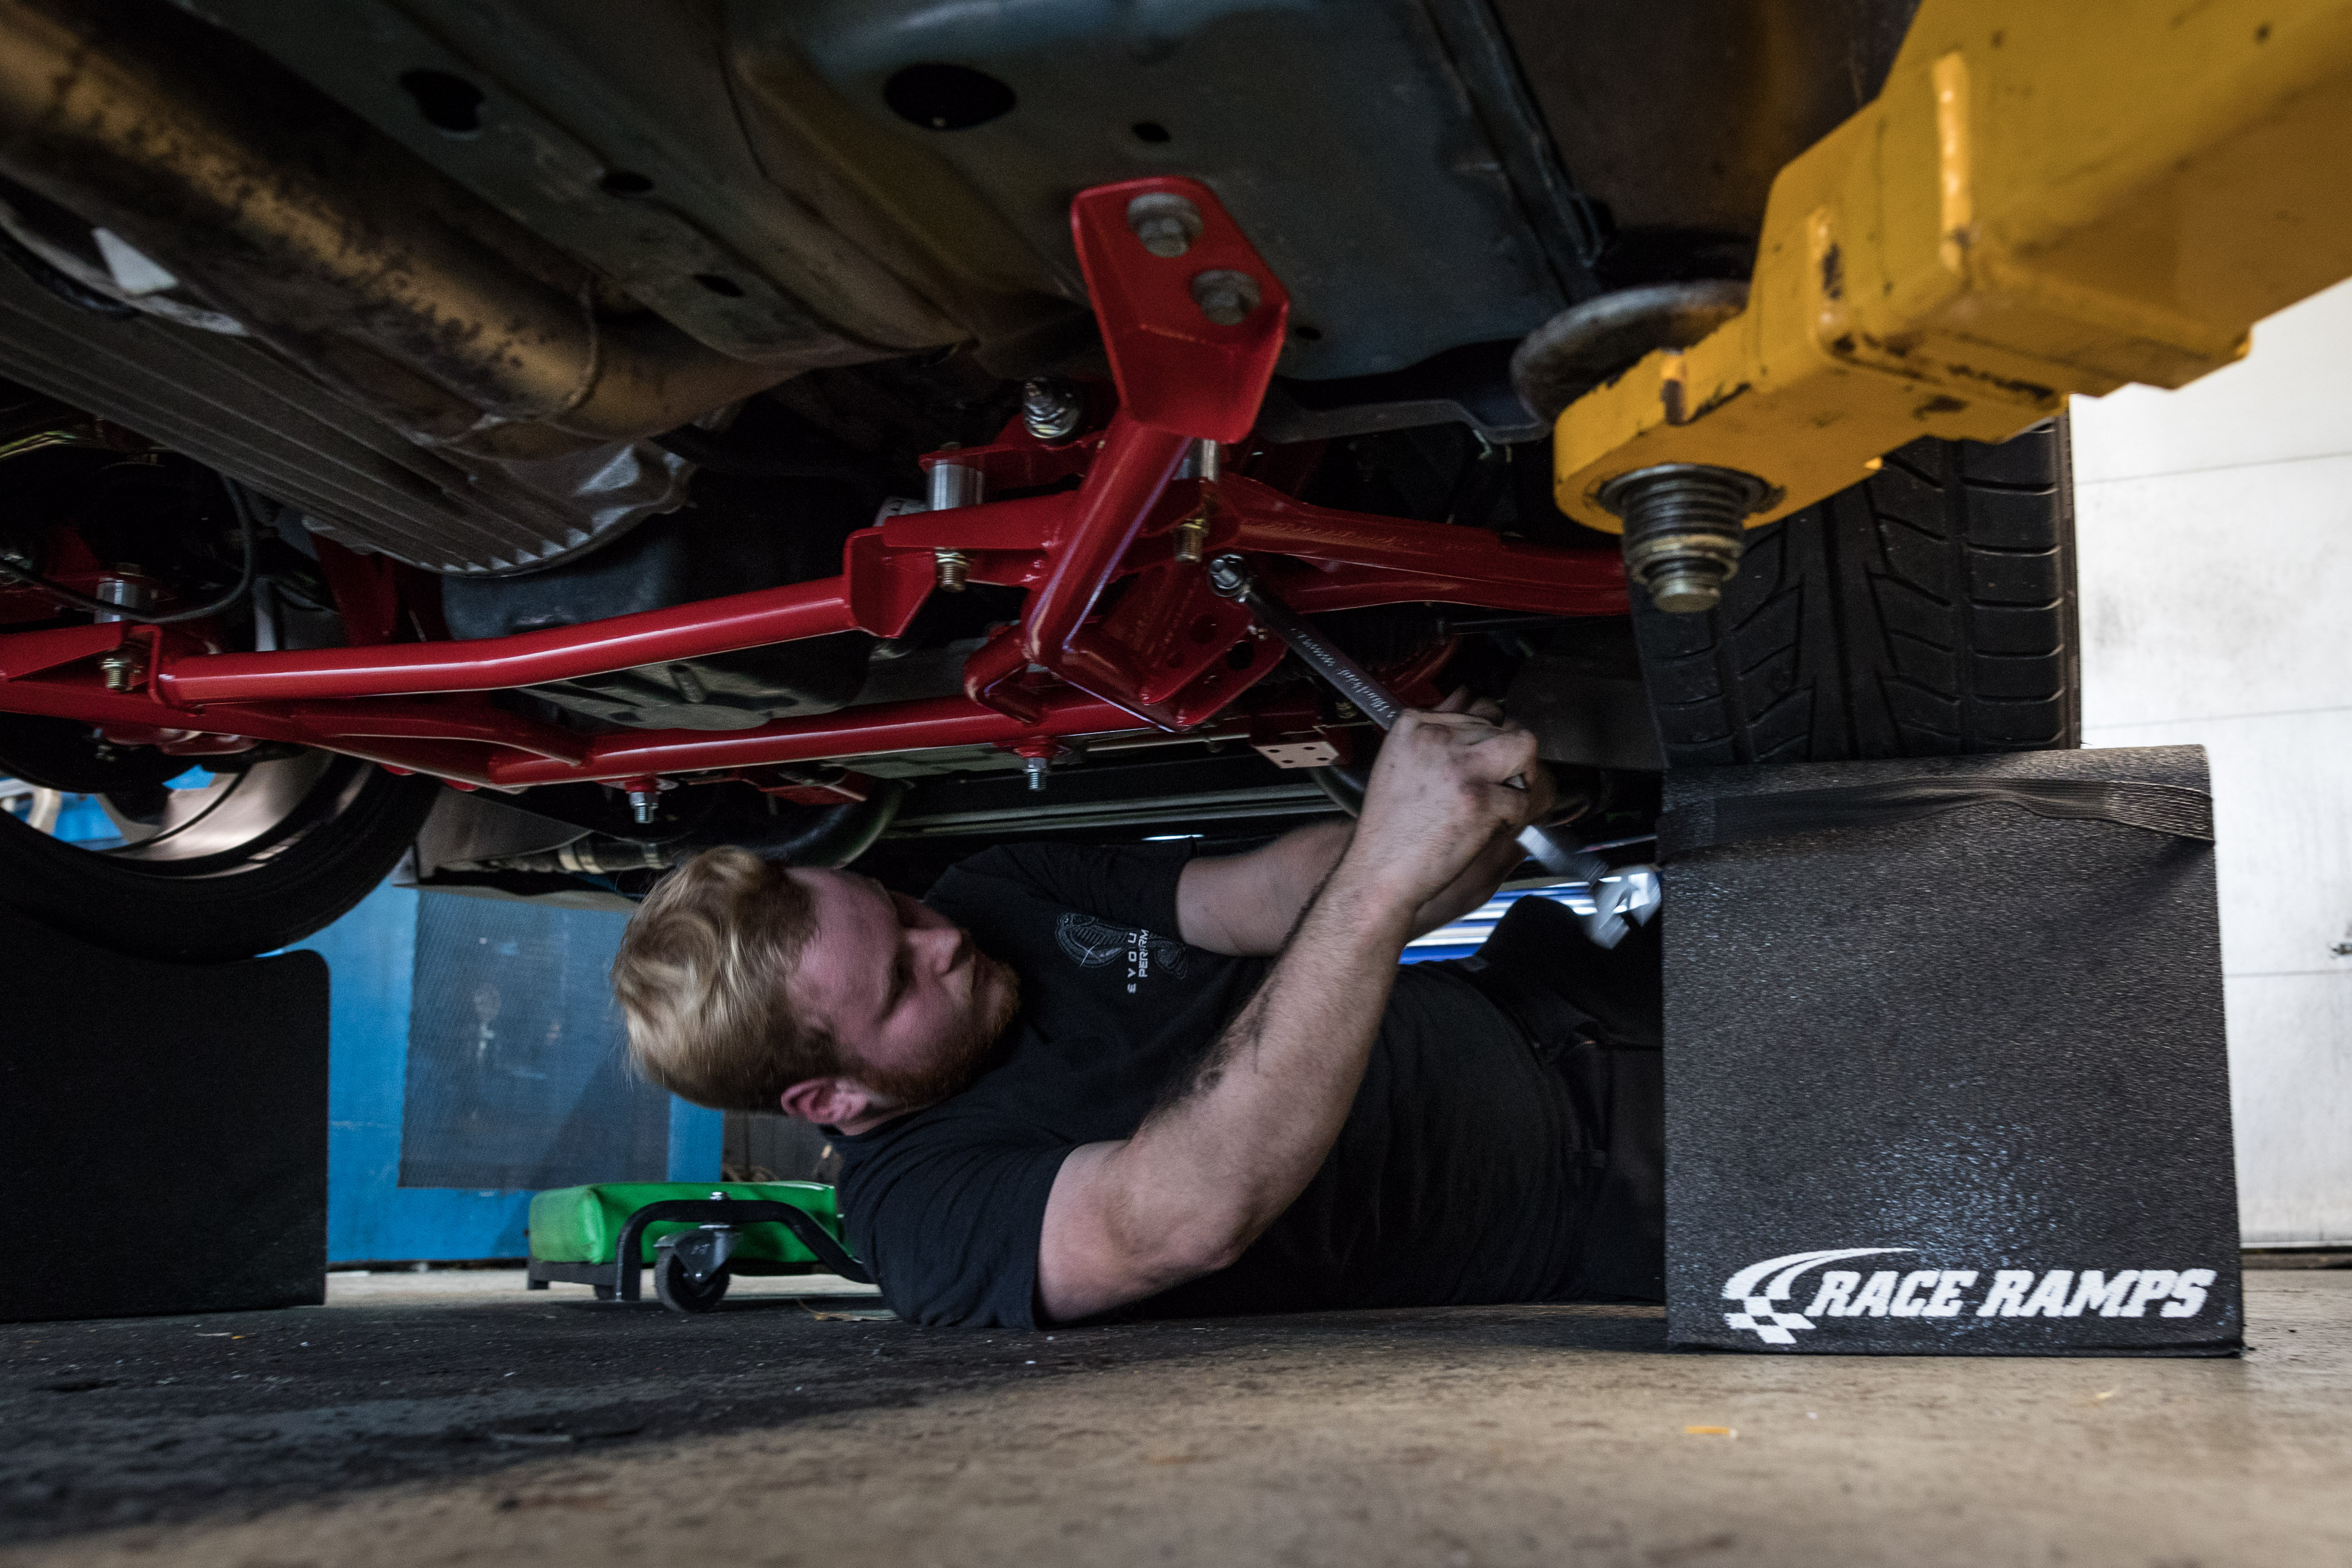
Evolution Performance’s Steve Schechterly disconnected the parking brake cables and then removed our existing lower control arms.
Since we had such a random mismatch of parts underneath the car—which included first-generation BMR parts—we decided to upgrade everything at once, with the exception of the company’s lower control arm relocation brackets, as the design of those hadn’t changed since they were initially installed on the car.
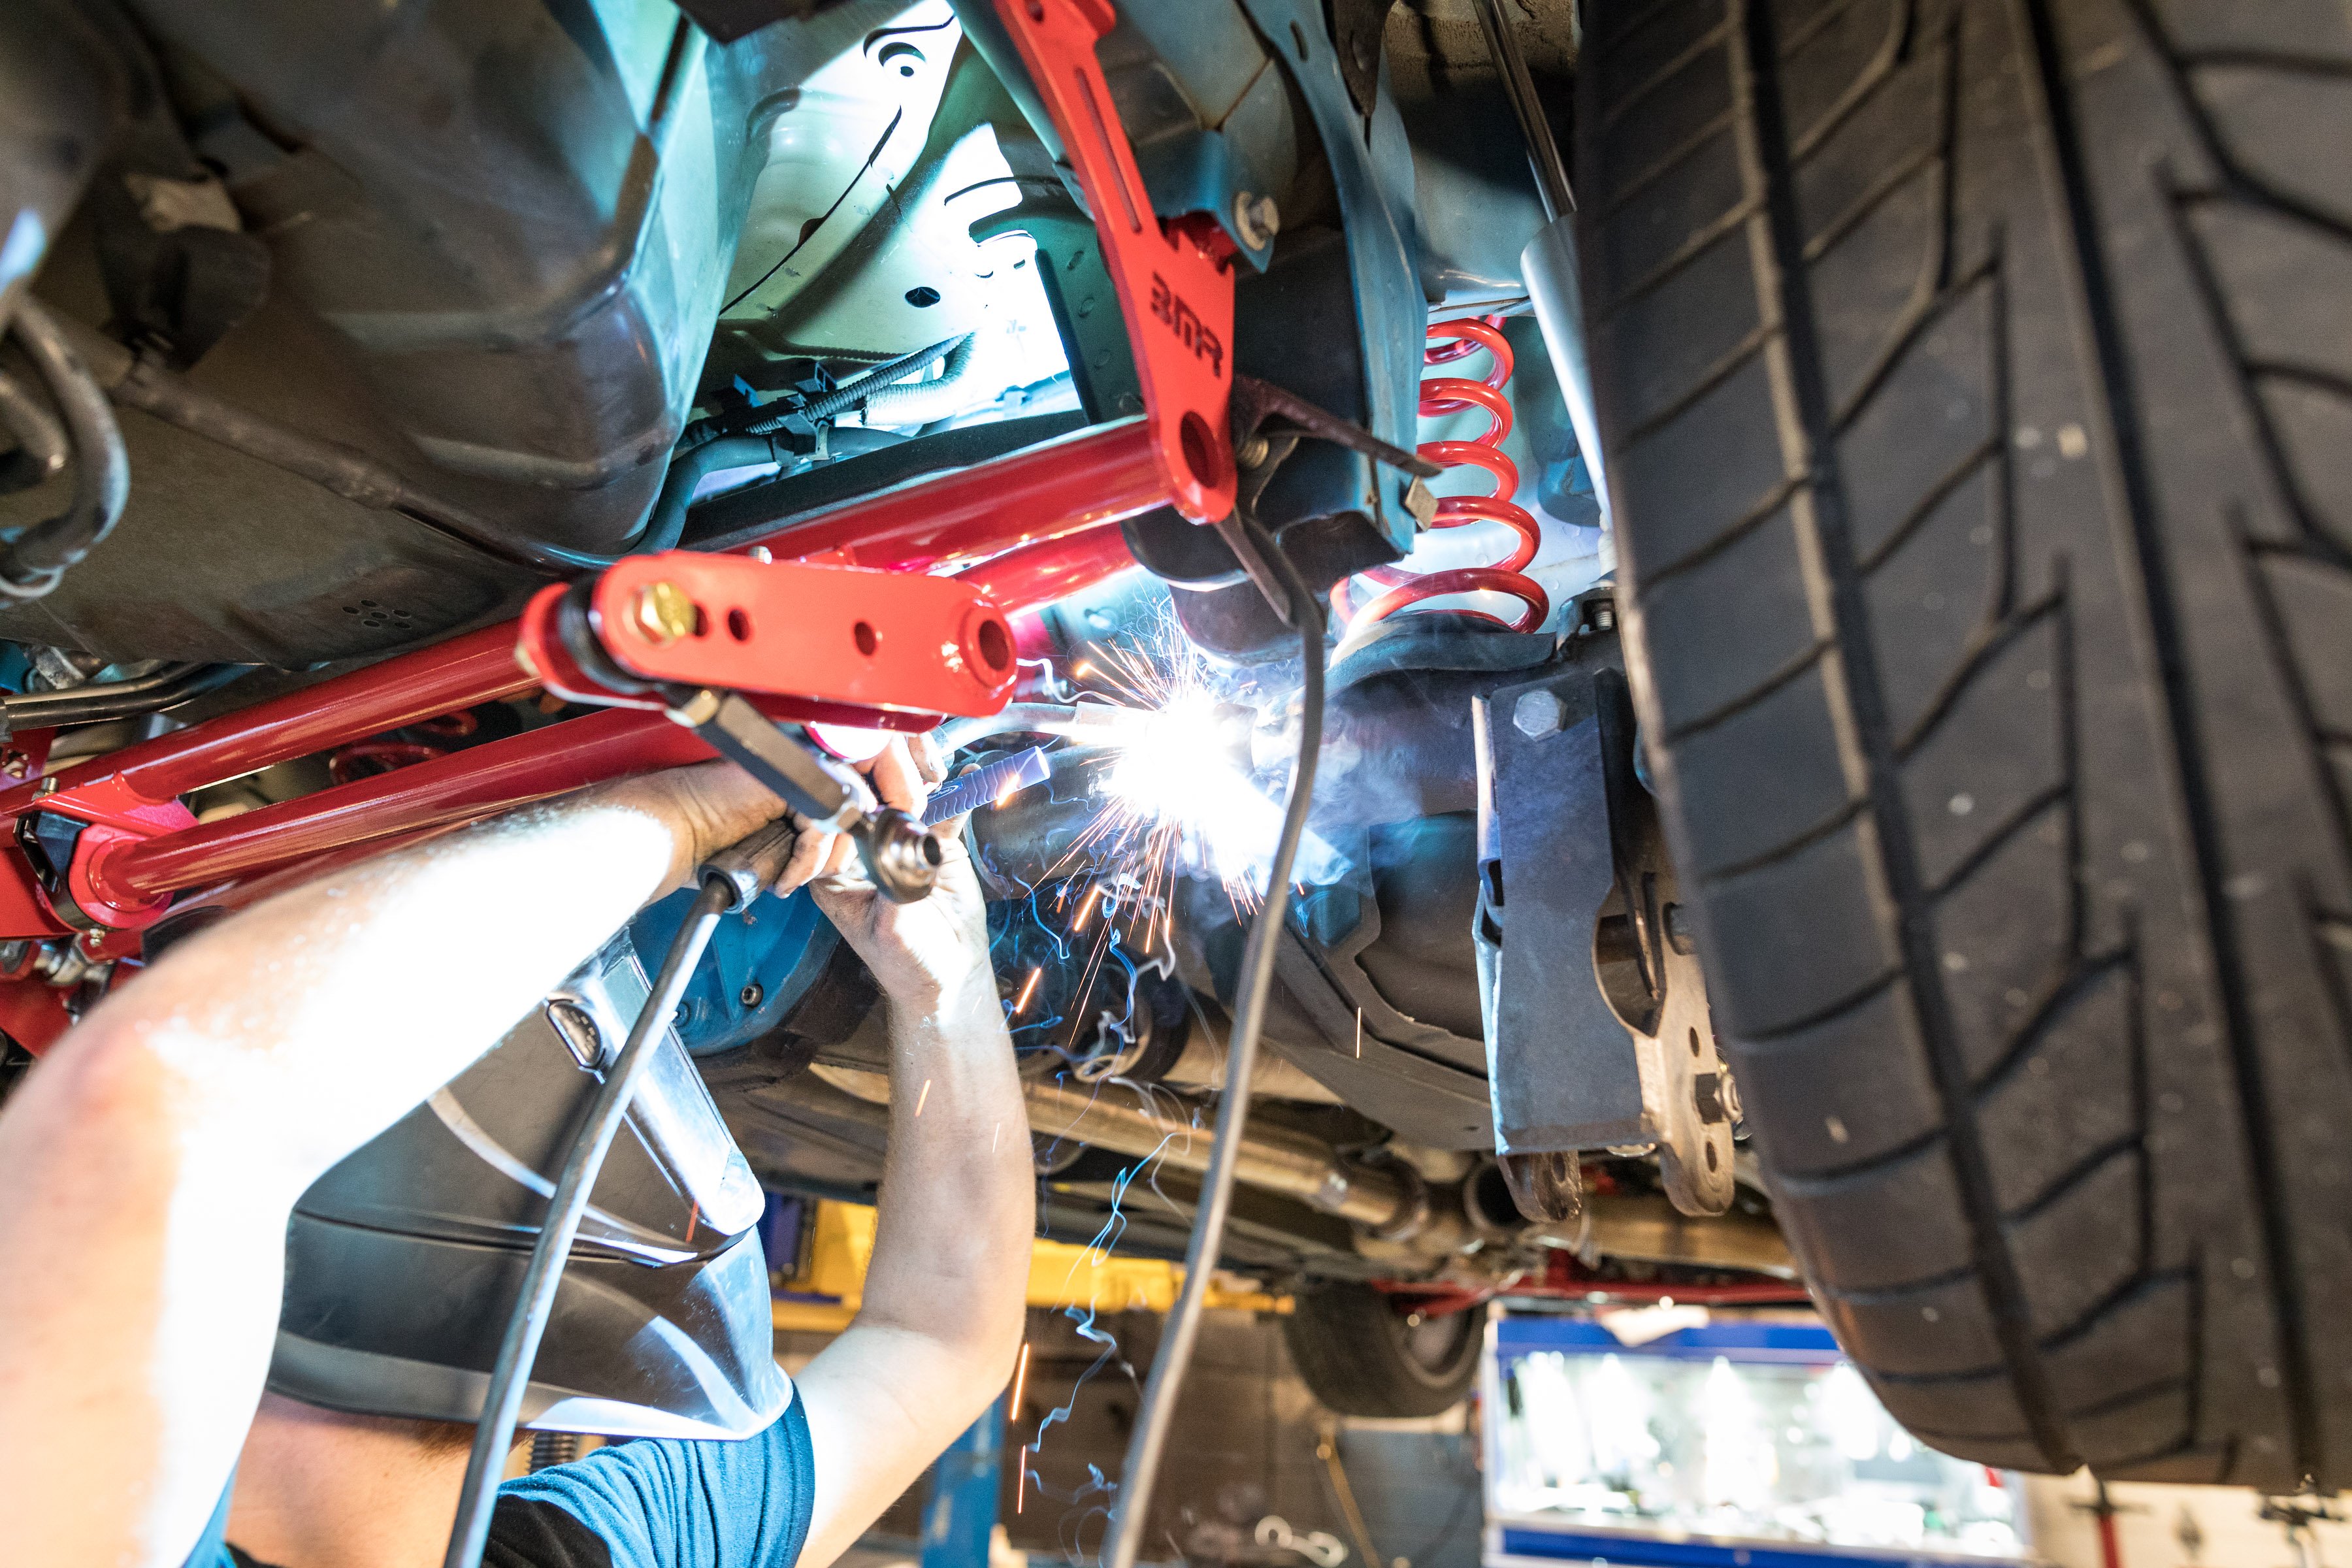
Now, if you’ve never seen any of BMR’s products up close, we can say one thing is certain: they are BEEFY. Over-engineered would be another apt term to describe their construction. The company’s parts are crafted from drawn-over-mandrel steel tubing and precision MIG-welded, then powdercoated in the buyer’s choice of BMR Red or Black Hammertone; we chose the red for visibility to better showcase all of the components.

Steve prepared the Panhard rod bracket for the relocation kit, which moves the rod out from the factory location and is designed to offer additional clearance for the differential cover, which we needed. Our original bar had been modified to work with the TA Performance girdle on the car.
We headed to see Fred Cook and the late-model Mustang wizards at Evolution Performance in Aston, PA. These guys are well-versed in all things Mustang and have plenty of experience with performing complete system upgrades like this one. They use a wide variety of BMR’s products on their own cars; if that’s not a solid testimonial about the performance and quality of these pieces, we’re not sure what is.
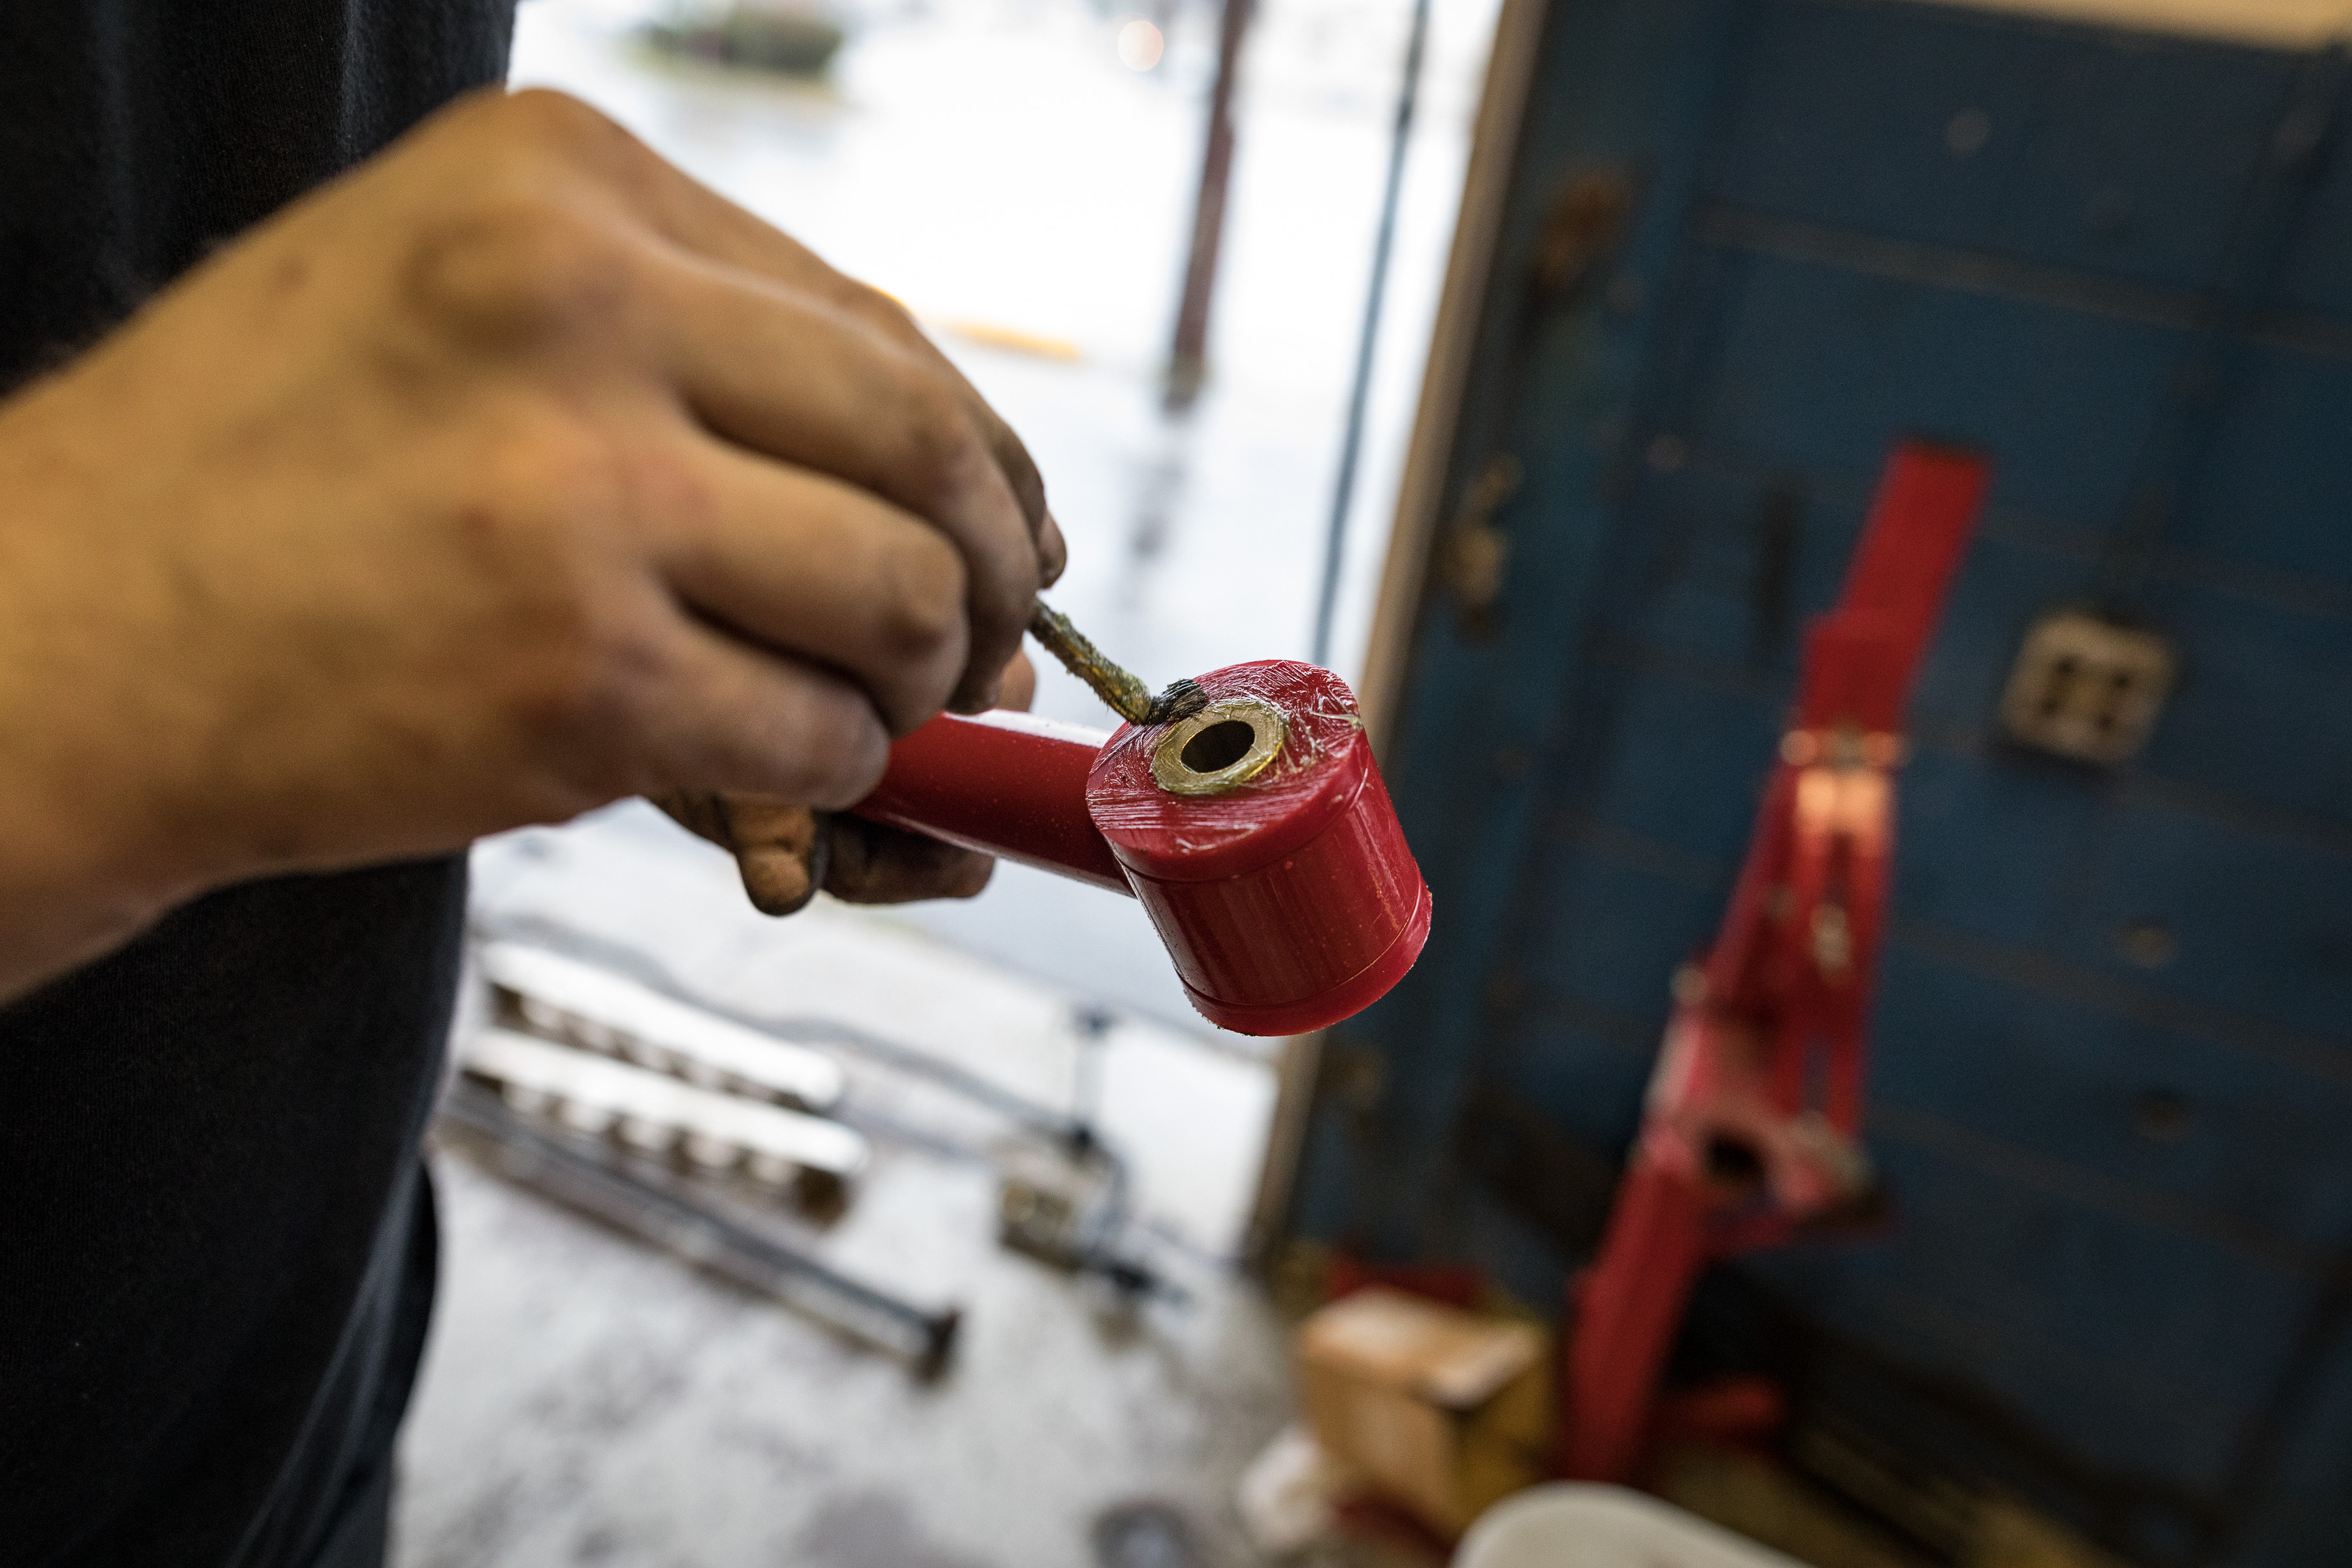
Lubricating the chassis-side urethane bushings in the lower control arms is critical to help prevent unwanted squeaks.
Upgrading The Rear Suspension
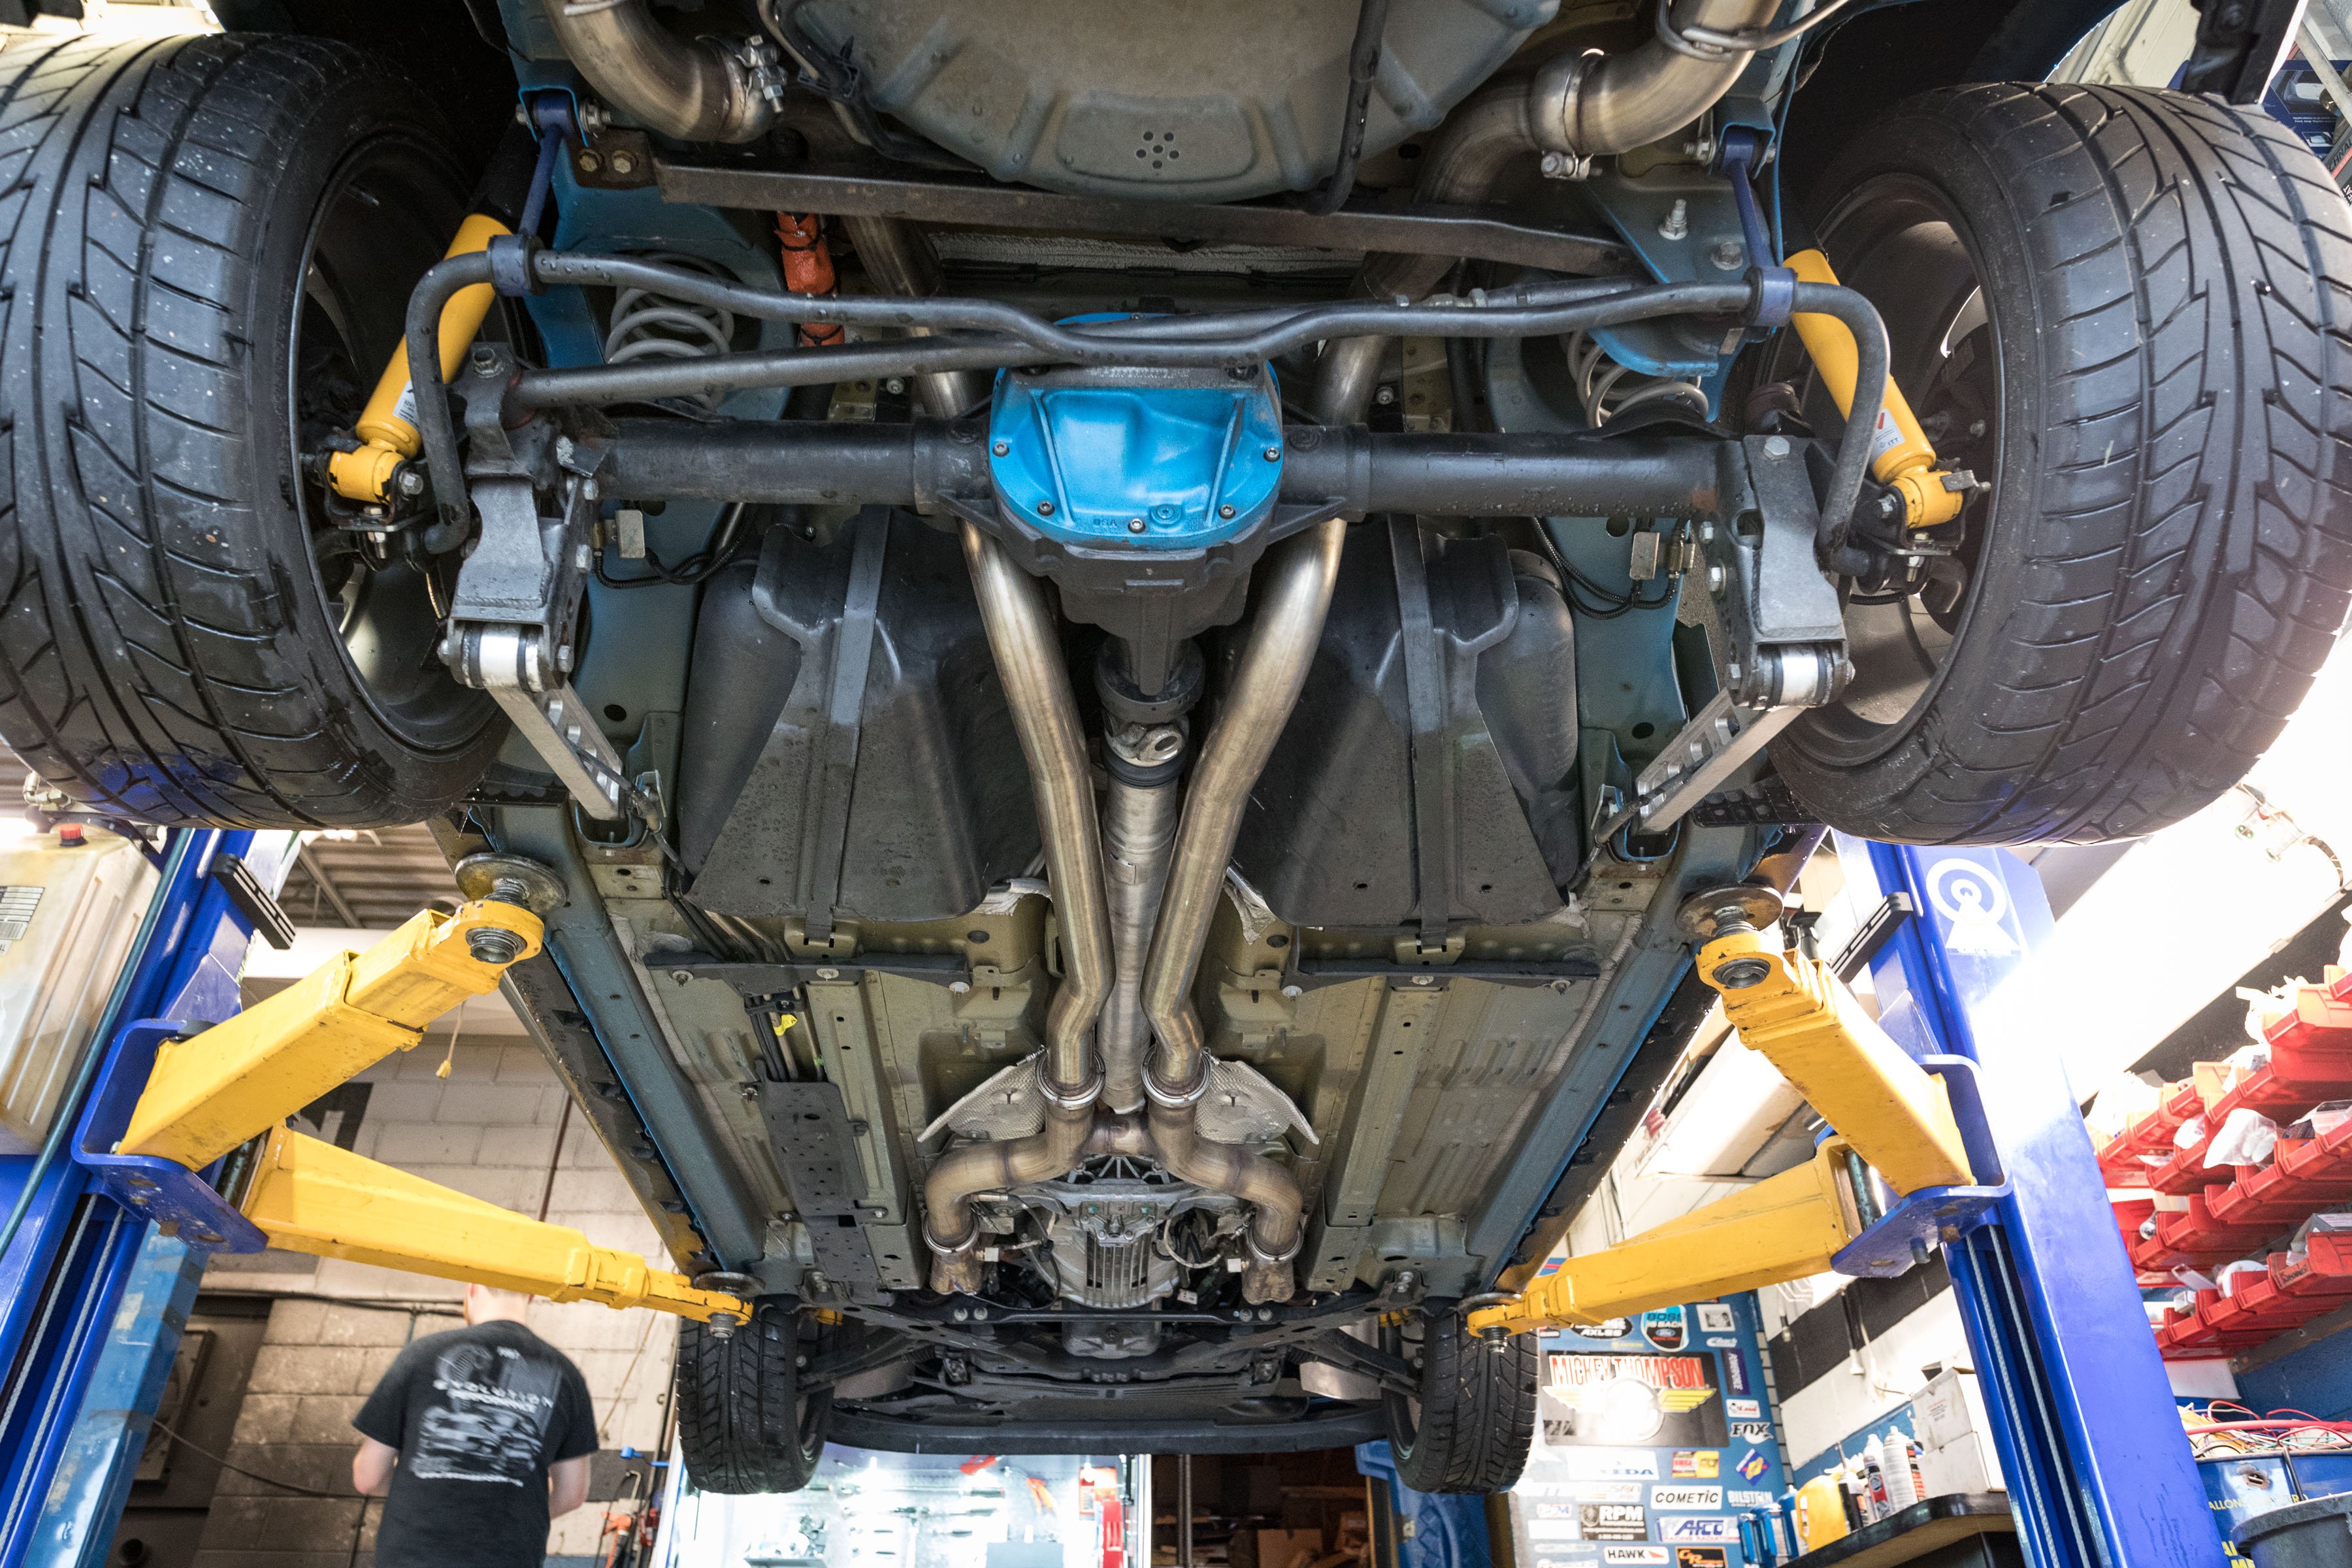
In the rear of the car, Aiken recommended the company’s TCA021 lower control arms, built in a double-adjustable configuration to permit on-car adjustability. These have a combination of bushings: the body-side bushing is polyurethane, while the end that slots into the relocation bracket uses a rod end to limit deflection and promote forward motion. Remember that our relocation brackets (CAB005) were pre-existing and didn’t need to be replaced. We used the middle hole in the relocation bracket for location of the rod end.
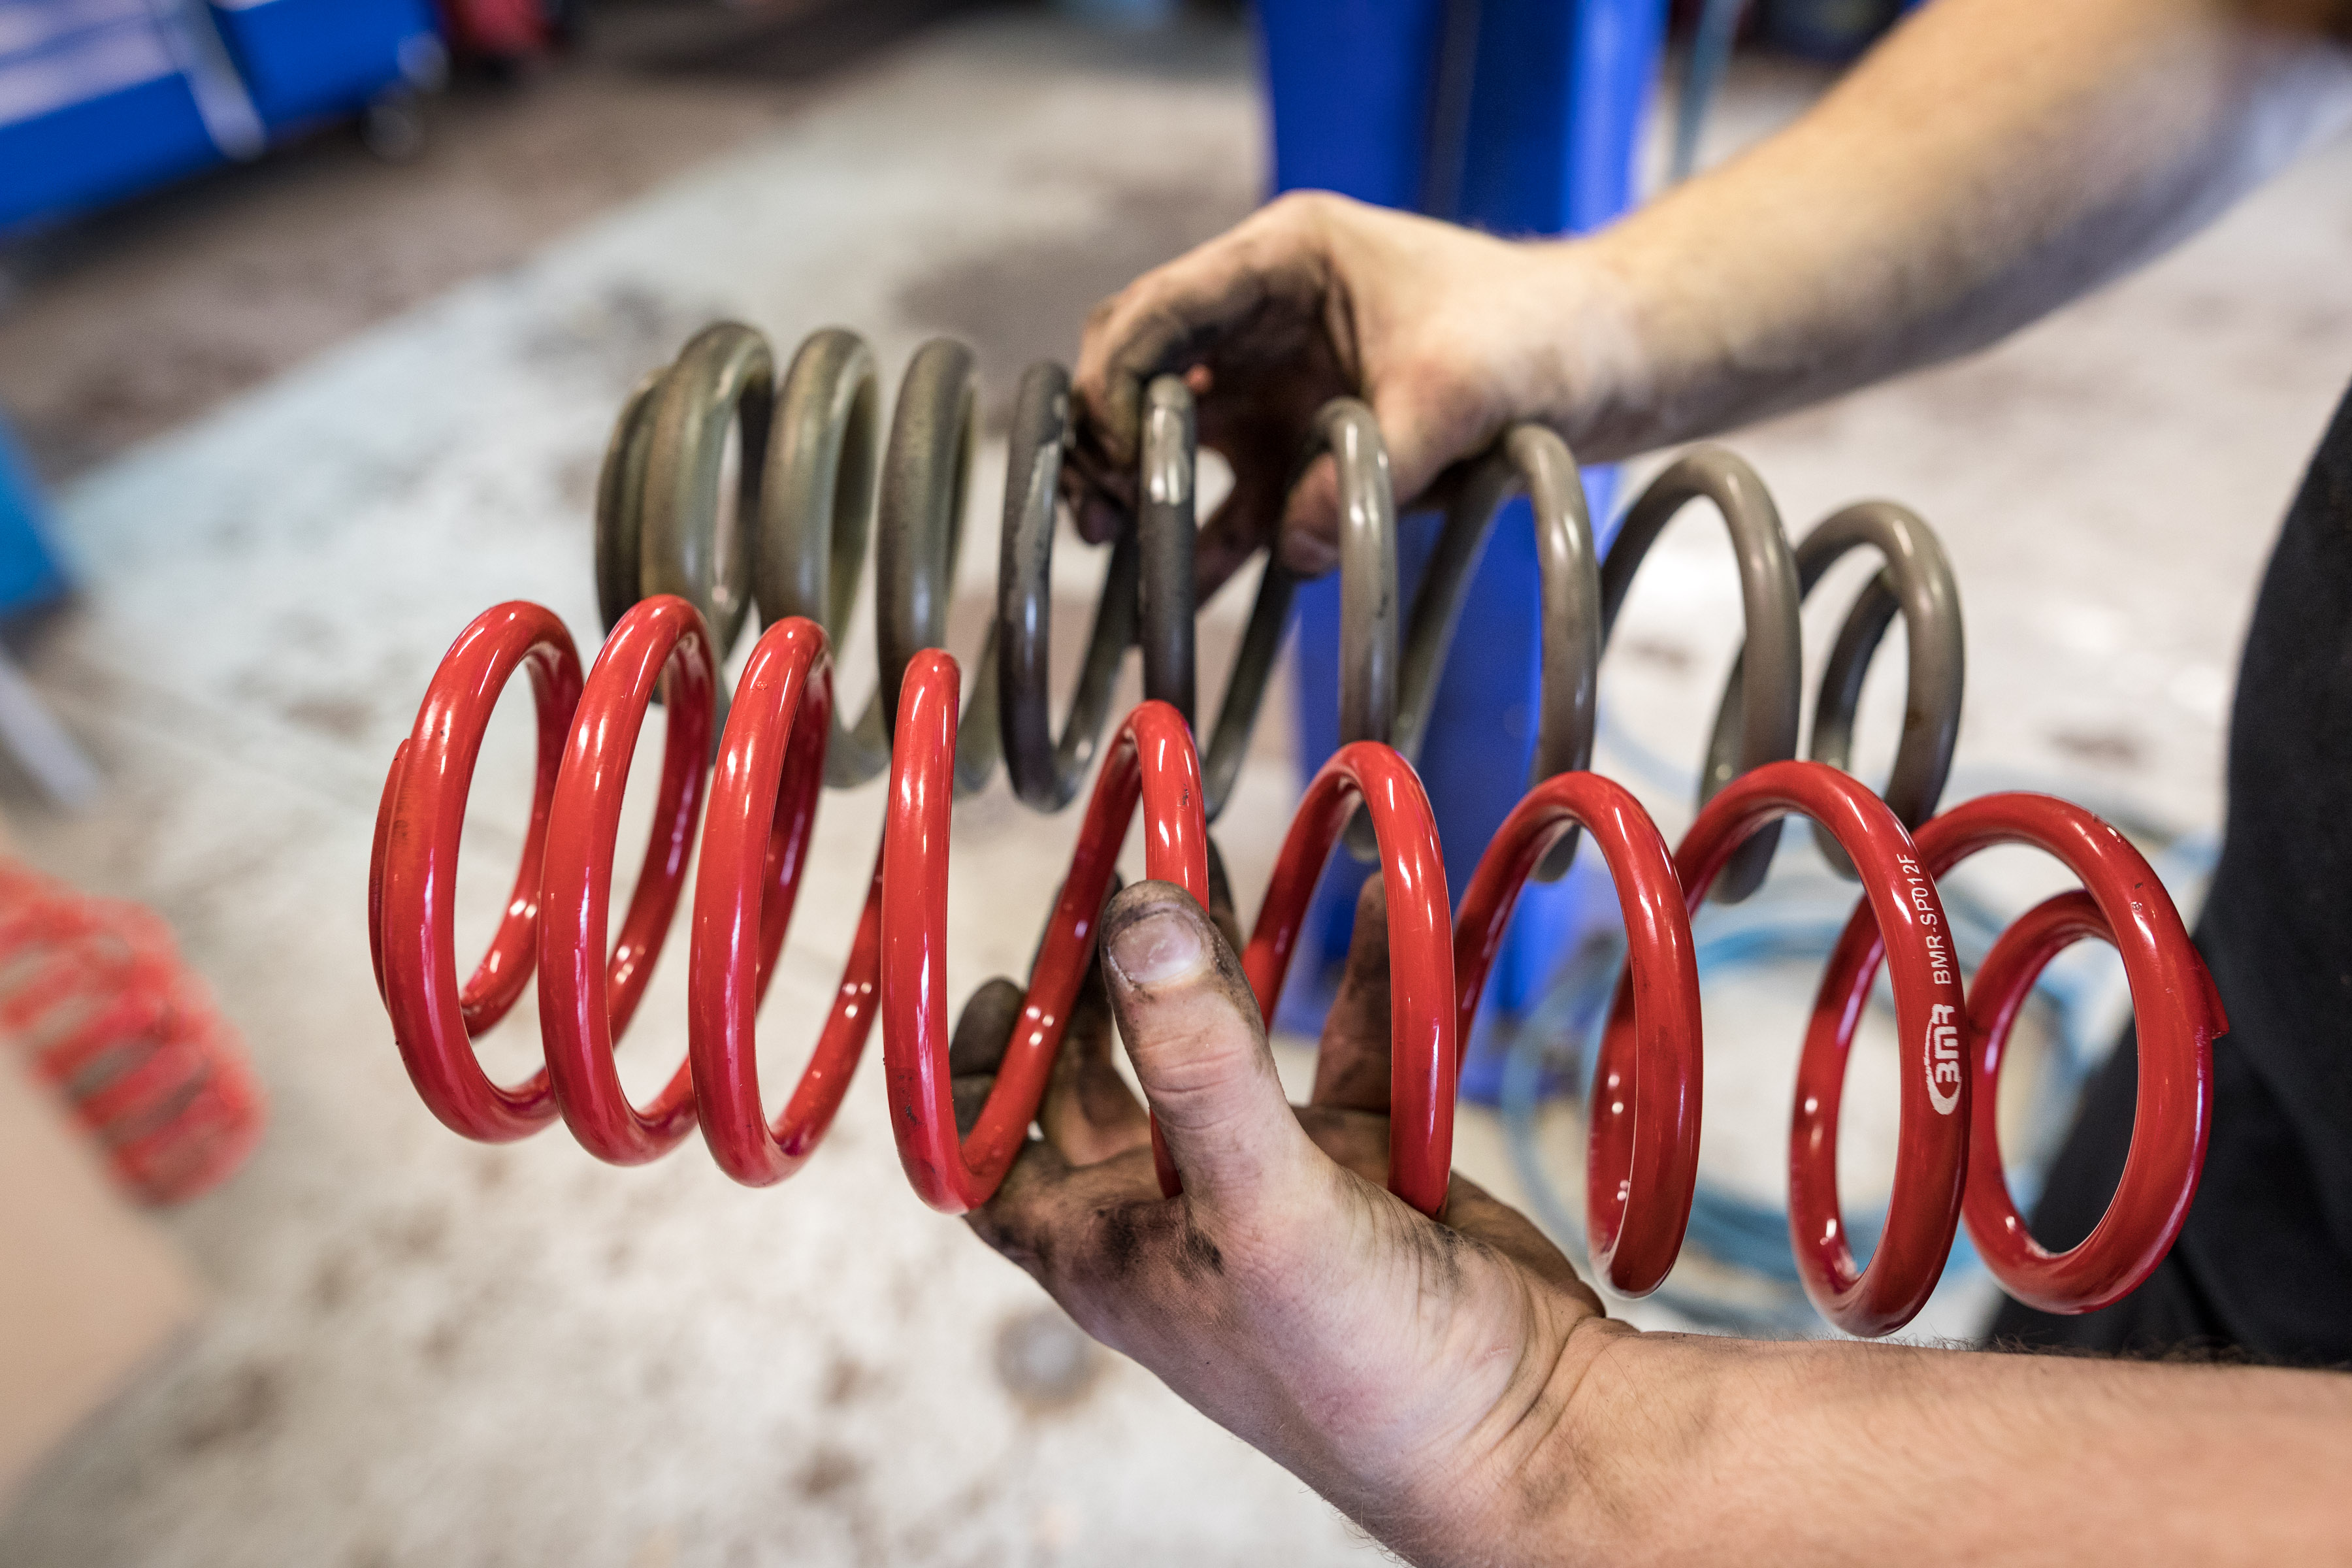
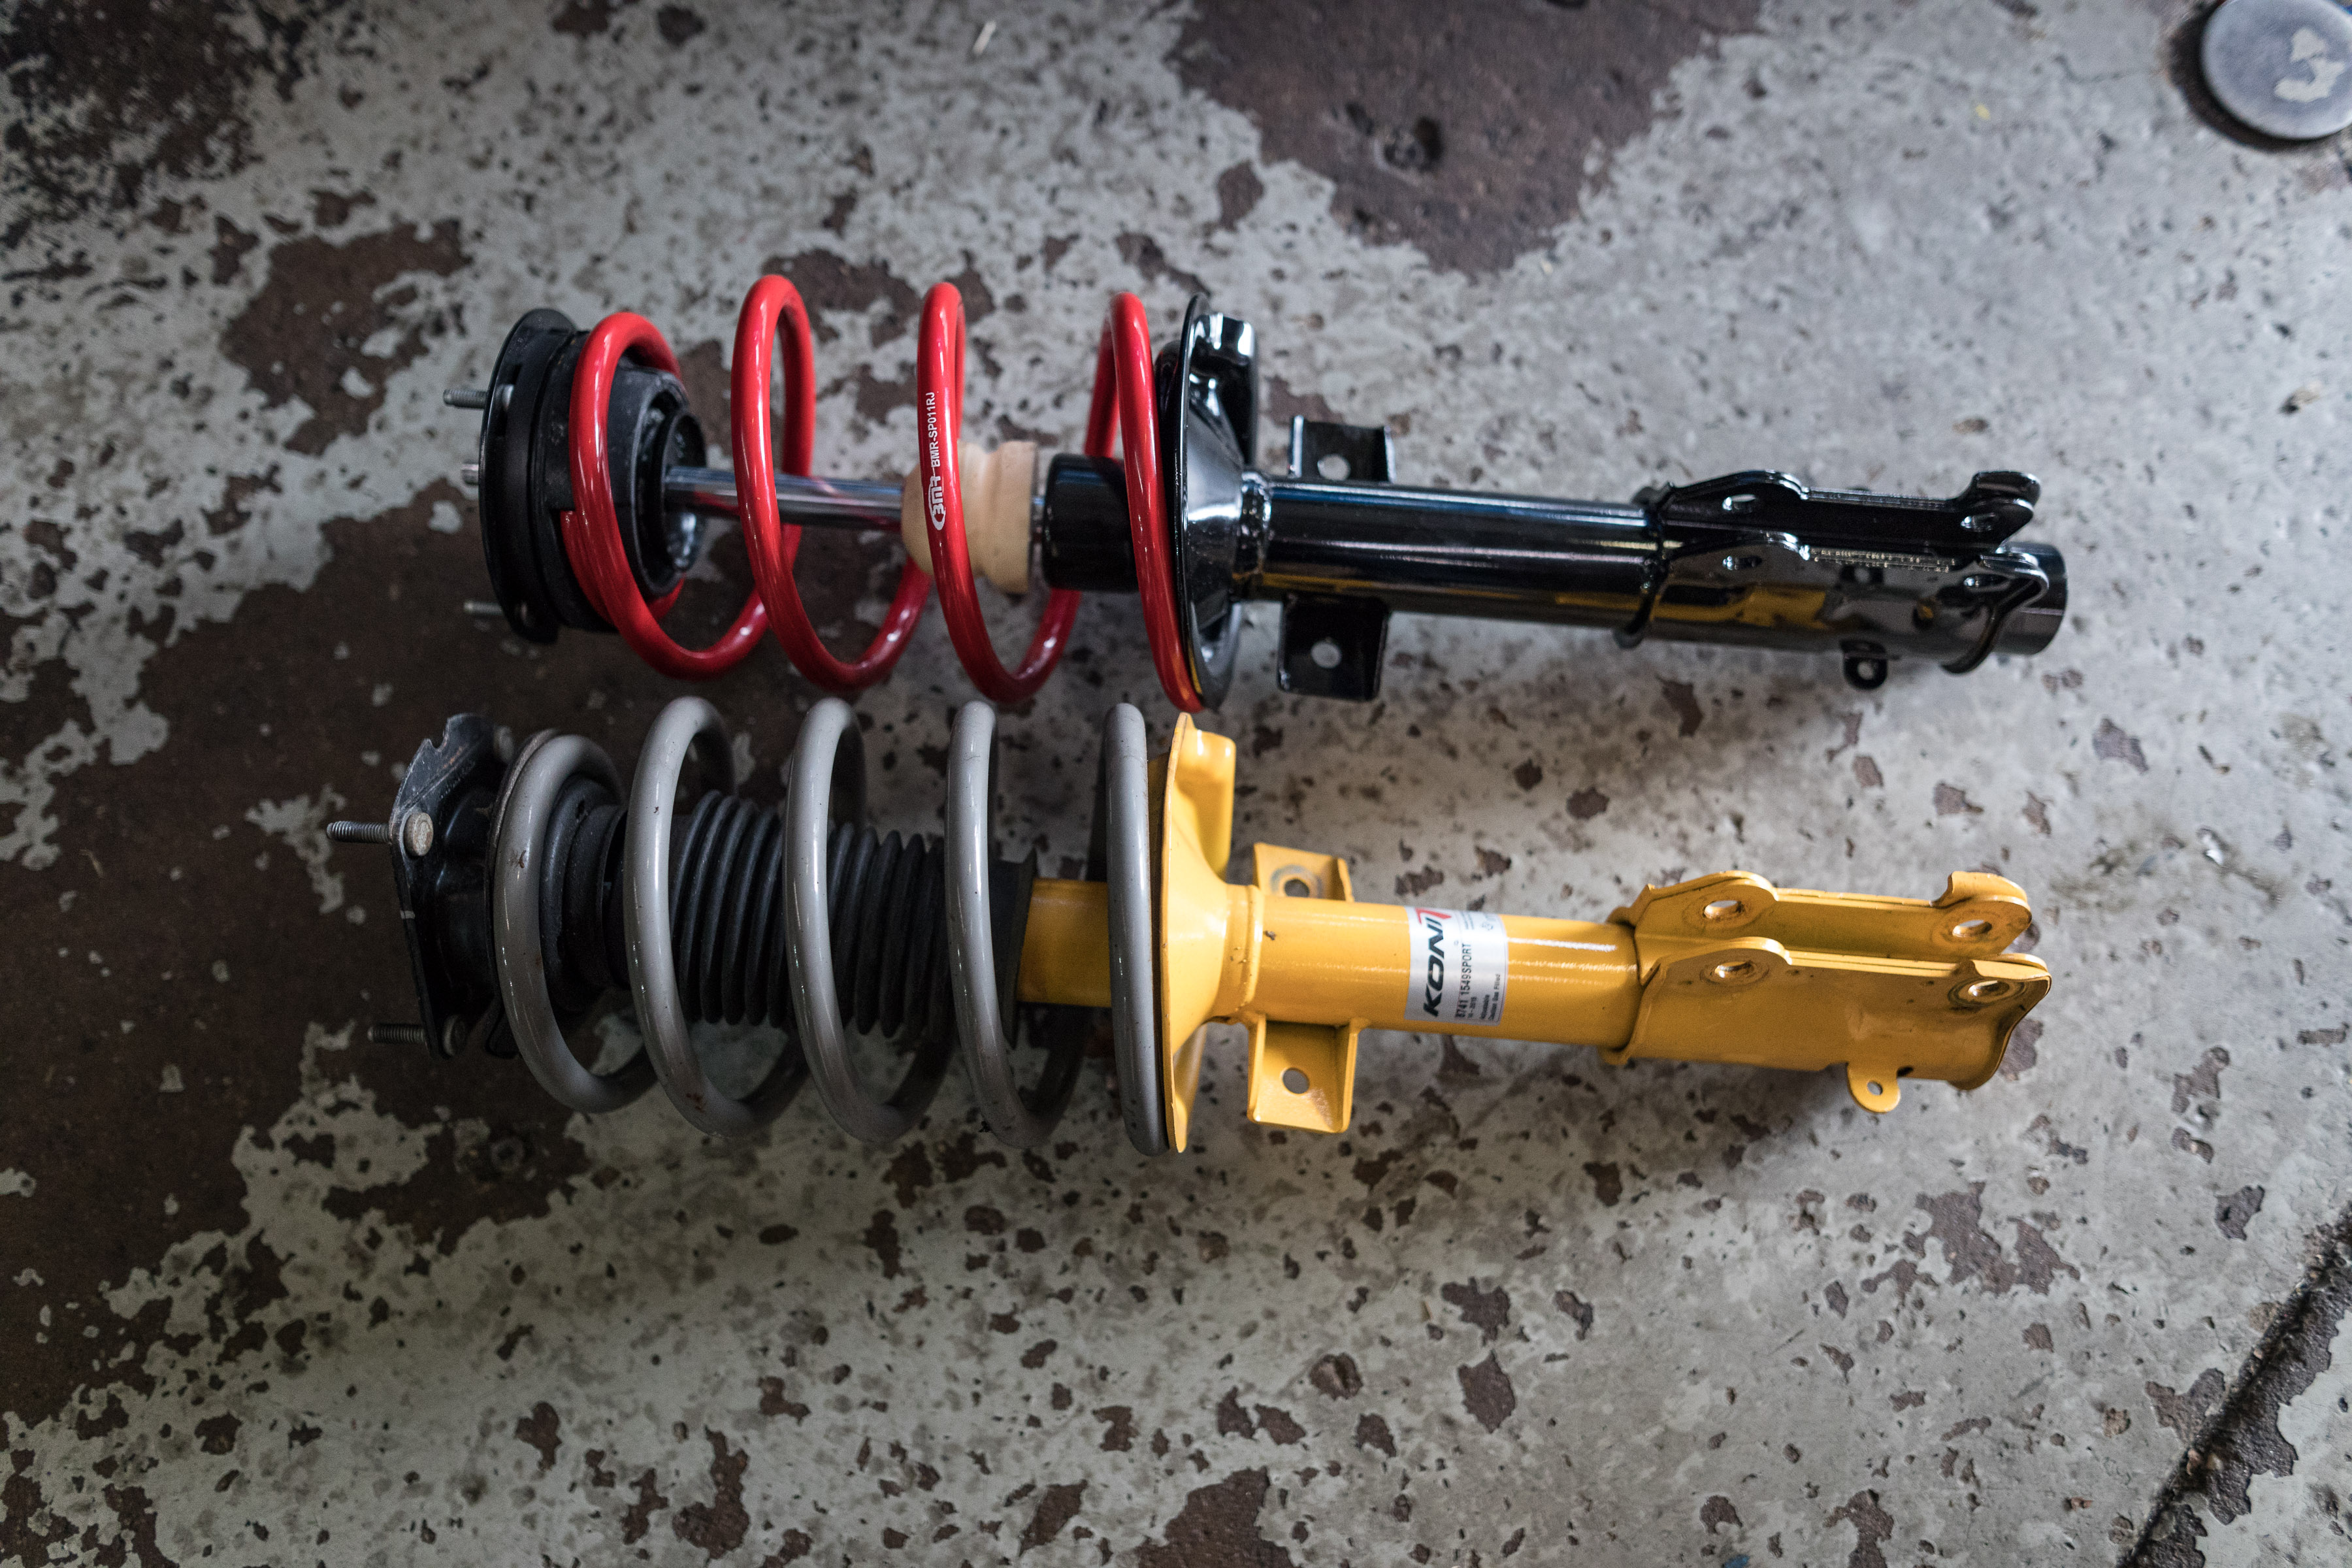
Comparing the new BMR rear spring to the old springs. The BMR spring’s linear rate differs from the progressive-rate springs we removed from the car and will provide a more consistent, supple ride. Also note that the BMR spring retains the OEM hourglass shape, which most aftermarket springs don’t do. This is designed to counteract wheelhop.
The company’s three-hole upper control arm mount (PN UCM002) was installed in conjunction with its super-strong UTCA038 upper control arm, which uses a rod end on the chassis mount side, with the factory rubber bushing retained in the rear housing. Both Aiken and Cook recommended using the middle hole in the mount for best performance with this combination.


We used BMR's new 3-hole upper control arm mount and beefy rod-end upper control arm. While this design does transmit some noise into the cabin, the tradeoff is precise performance. It's a personal decision, and Aiken says many buyers do purchase the company's polyurethane-bushed upper arm to remove the possibility for this to occur. Serious drag car customers don't want to make that tradeoff, though. To combat some of the noise, we elected to retain the rubber bushing at the top of the rearend housing.
Both of these choices were slight compromises owing to the car’s street nature most of the time; by retaining the rubber bushing for the upper, and the poly bushings in the lower, NVH is reduced when compared to vehicles with rod ends in all locations. Now, if this was strictly a drag car, there would be no question—there would be rod ends all around. But it’s not, so we made the necessary concessions to keep the car livable on the street. There is still some noise and harshness with the rod end upper, but we’re willing to live with it. Each owner will be different.
“I get many phone calls from guys with forced induction and guys who simply can’t get traction on the street. If you make anywhere over 600-plus horsepower, when you’re going 20, 30, 40 miles per hour, and you’re in a gear when the RPM is up, it’s hard to make a normal car hook on the street. That’s where our relocation brackets, upper control arm, and mount come into play,” says Aiken.
Strange double-adjustable rear shocks provide all of the flexibility we’ll need, no matter how we end up using the car. With 10 adjustments for both compression and rebound, we set them right in the middle on 5 and 5 for street driving, and then will adjust at the track depending on conditions.
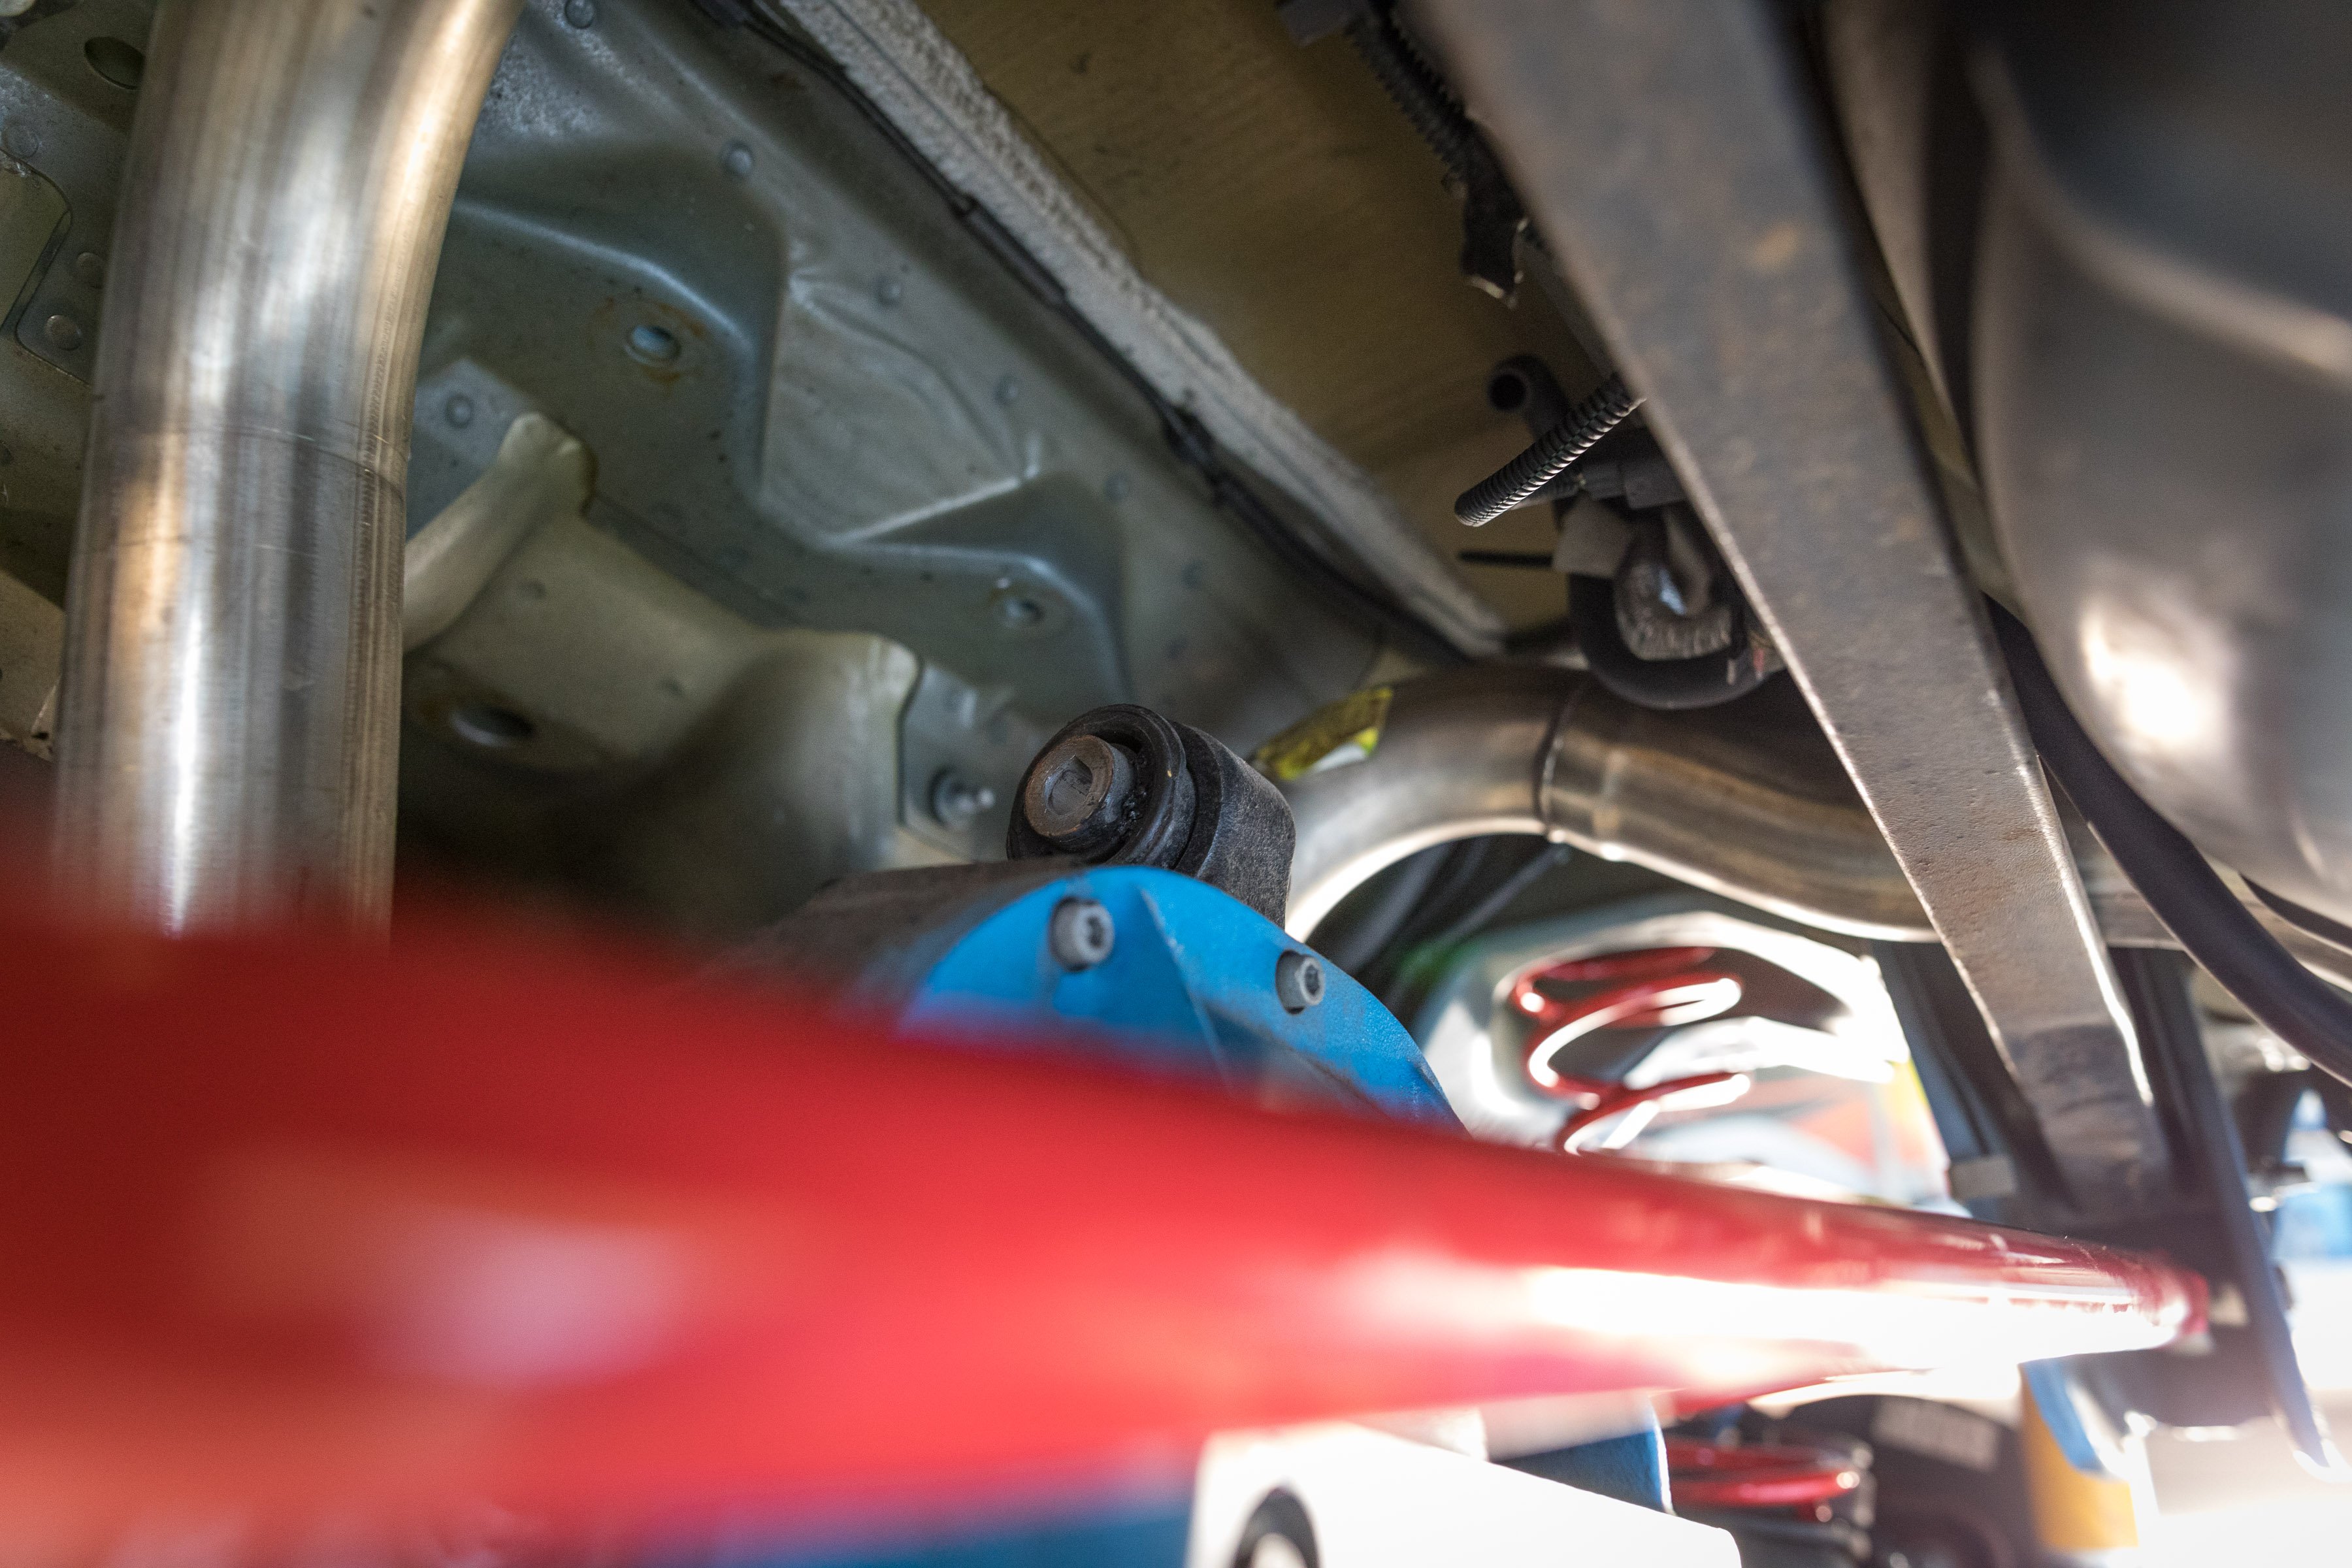
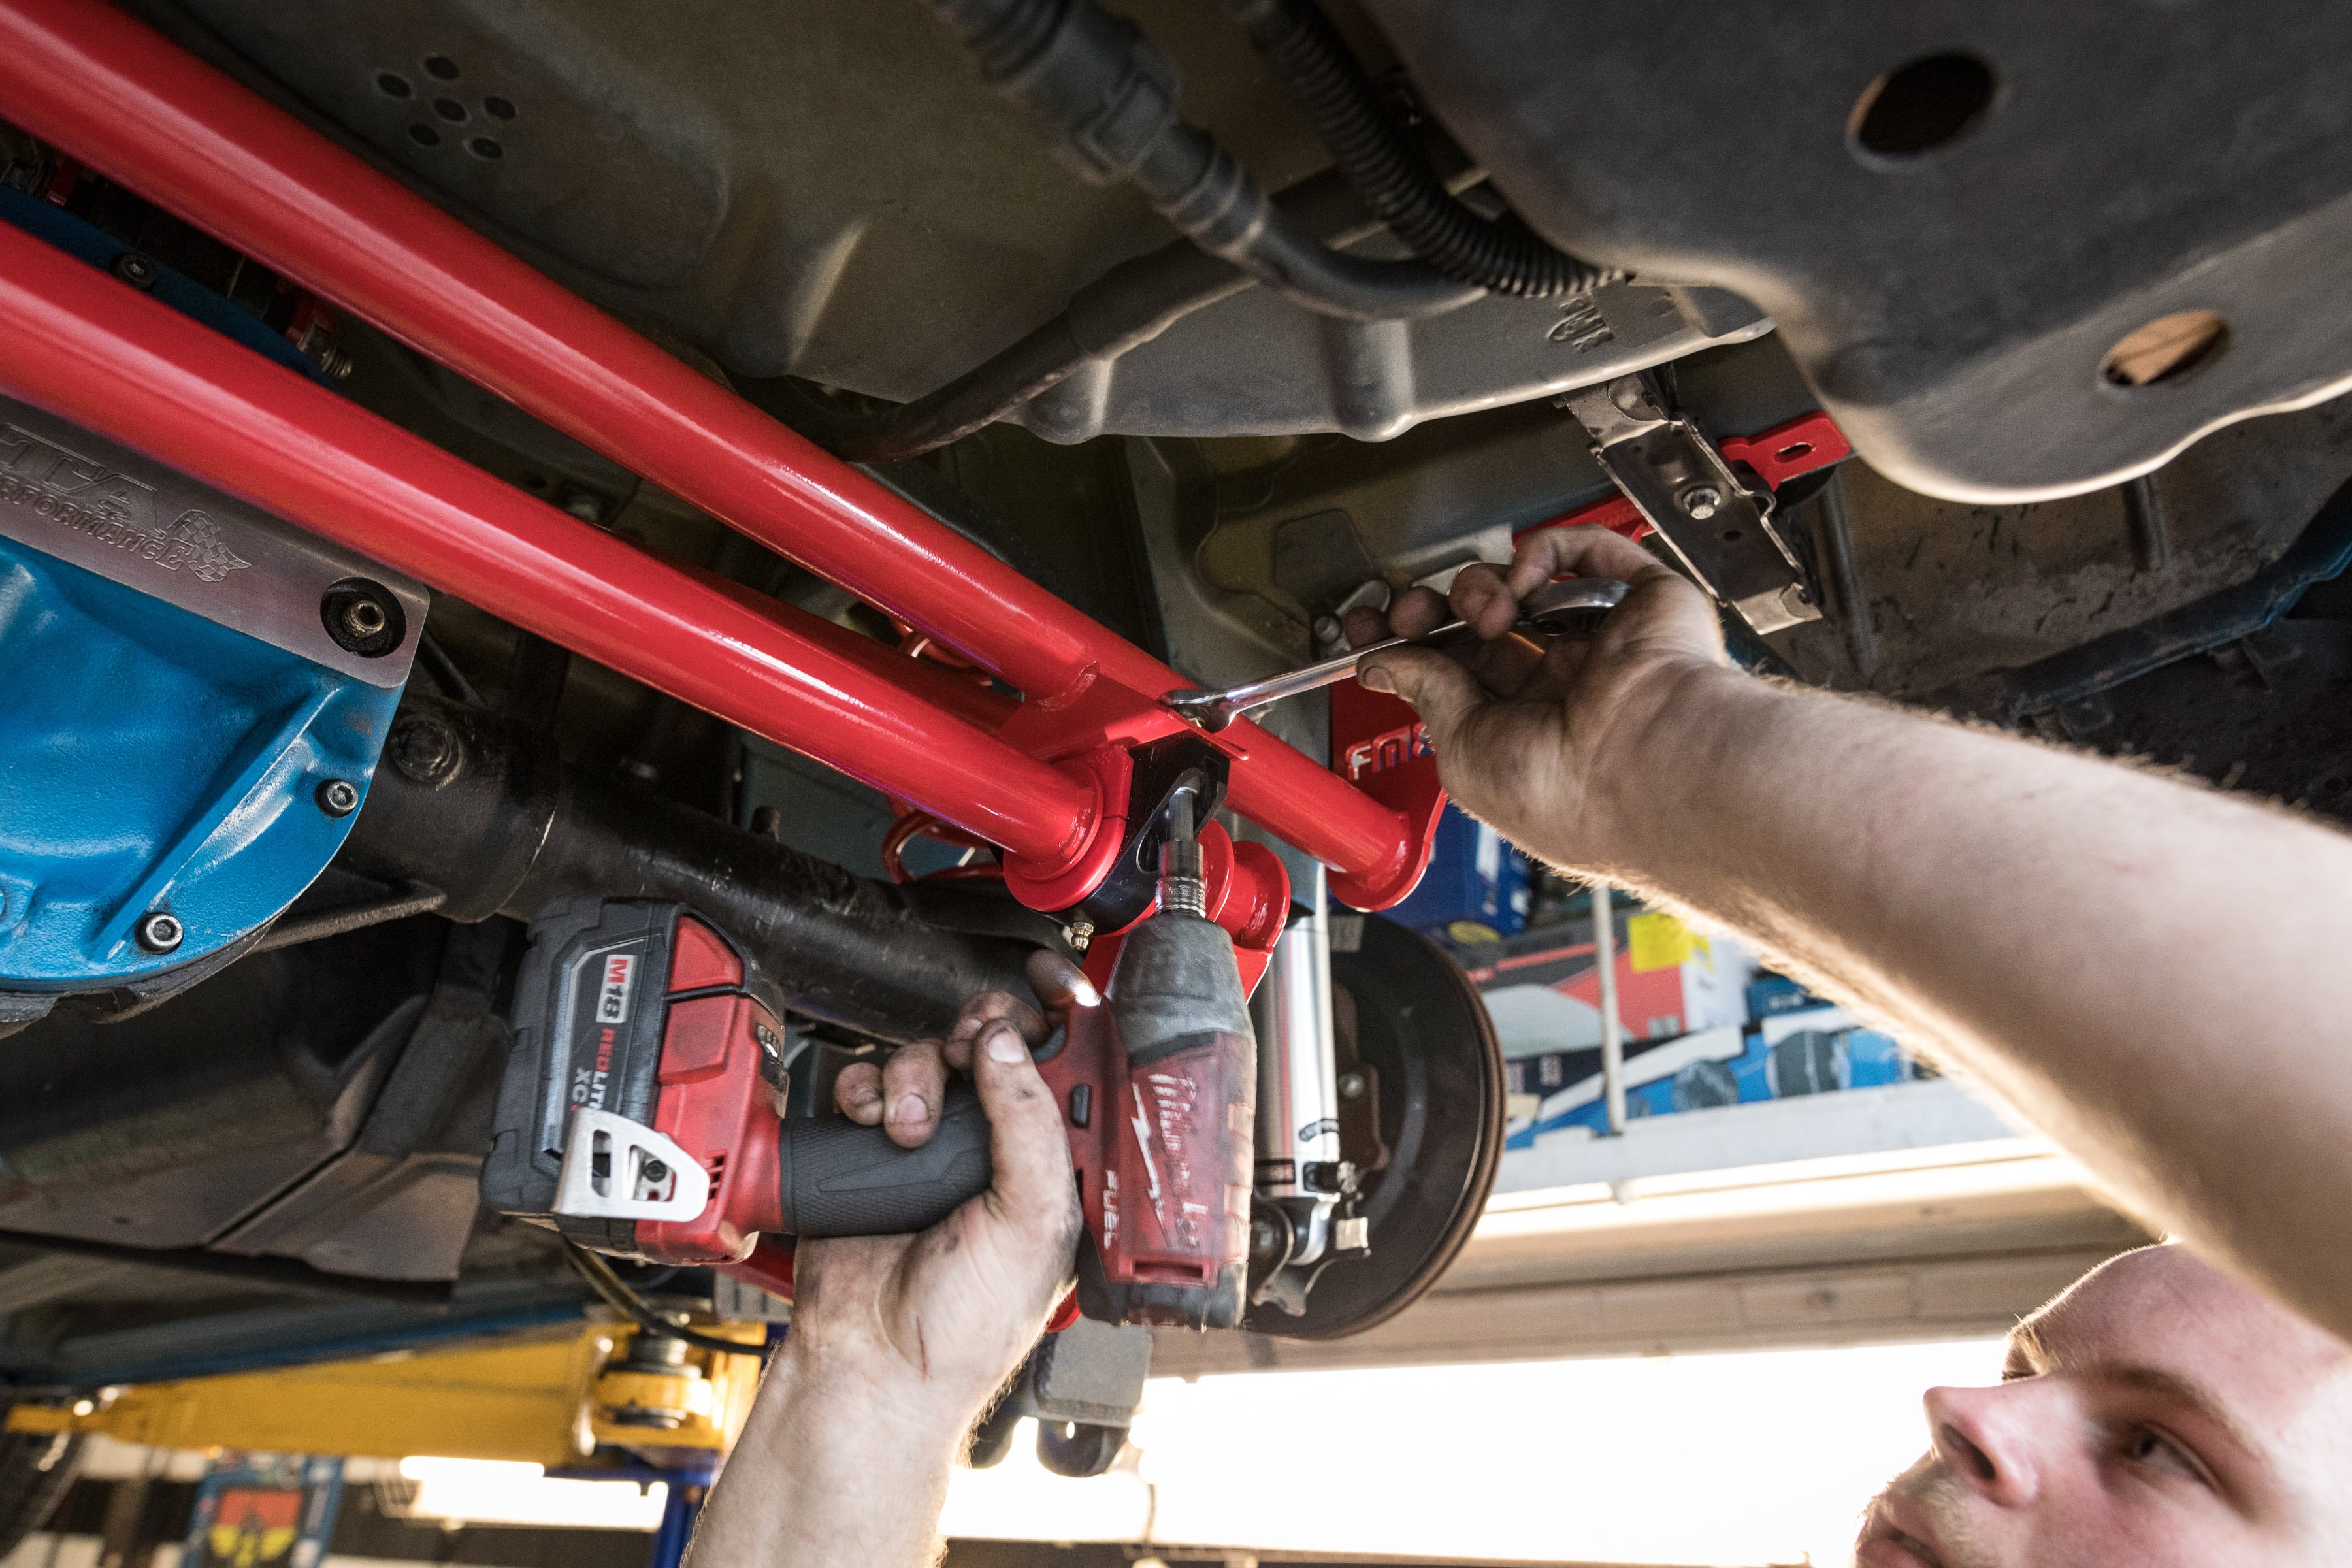
We also used one of BMR’s Panhard bars (PHR012) to positively locate the rear axle side-to-side. This unit is also double-adjustable on the car to help center the rear, especially when a car is lowered as this one is. Additionally, one of the company’s Panhard Bar relocation kits (PHR008) was installed onto the left side of the rearend housing; this gets the bar spaced out from our TA Performance rearend girdle for clearance purposes. The old Panhard bar had actually been put into a vise and massaged slightly to clear the girdle, so the relocation kit was a welcome addition.
Speaking of the car being lowered, Aiken didn’t hesitate to recommend the company’s SP009 lowering spring kit for the 2005-’14 Mustang. This springs are not drag-specific; rather, they are billed as an all-round solution for the owner who wants to be able to do a bit of everything and not wreck the car’s ride. The CNC-coiled springs are manufactured from chrome silicon high-tensile spring wire and cold-wound, then shot-peened to remove residual stresses before being tested across a variety of spring lengths in a CNC-controlled load cell. The linear-rate springs lower the car 1.5-inches, and as a function of the rear spring’s hourglass shape, will help to prevent wheelhop.
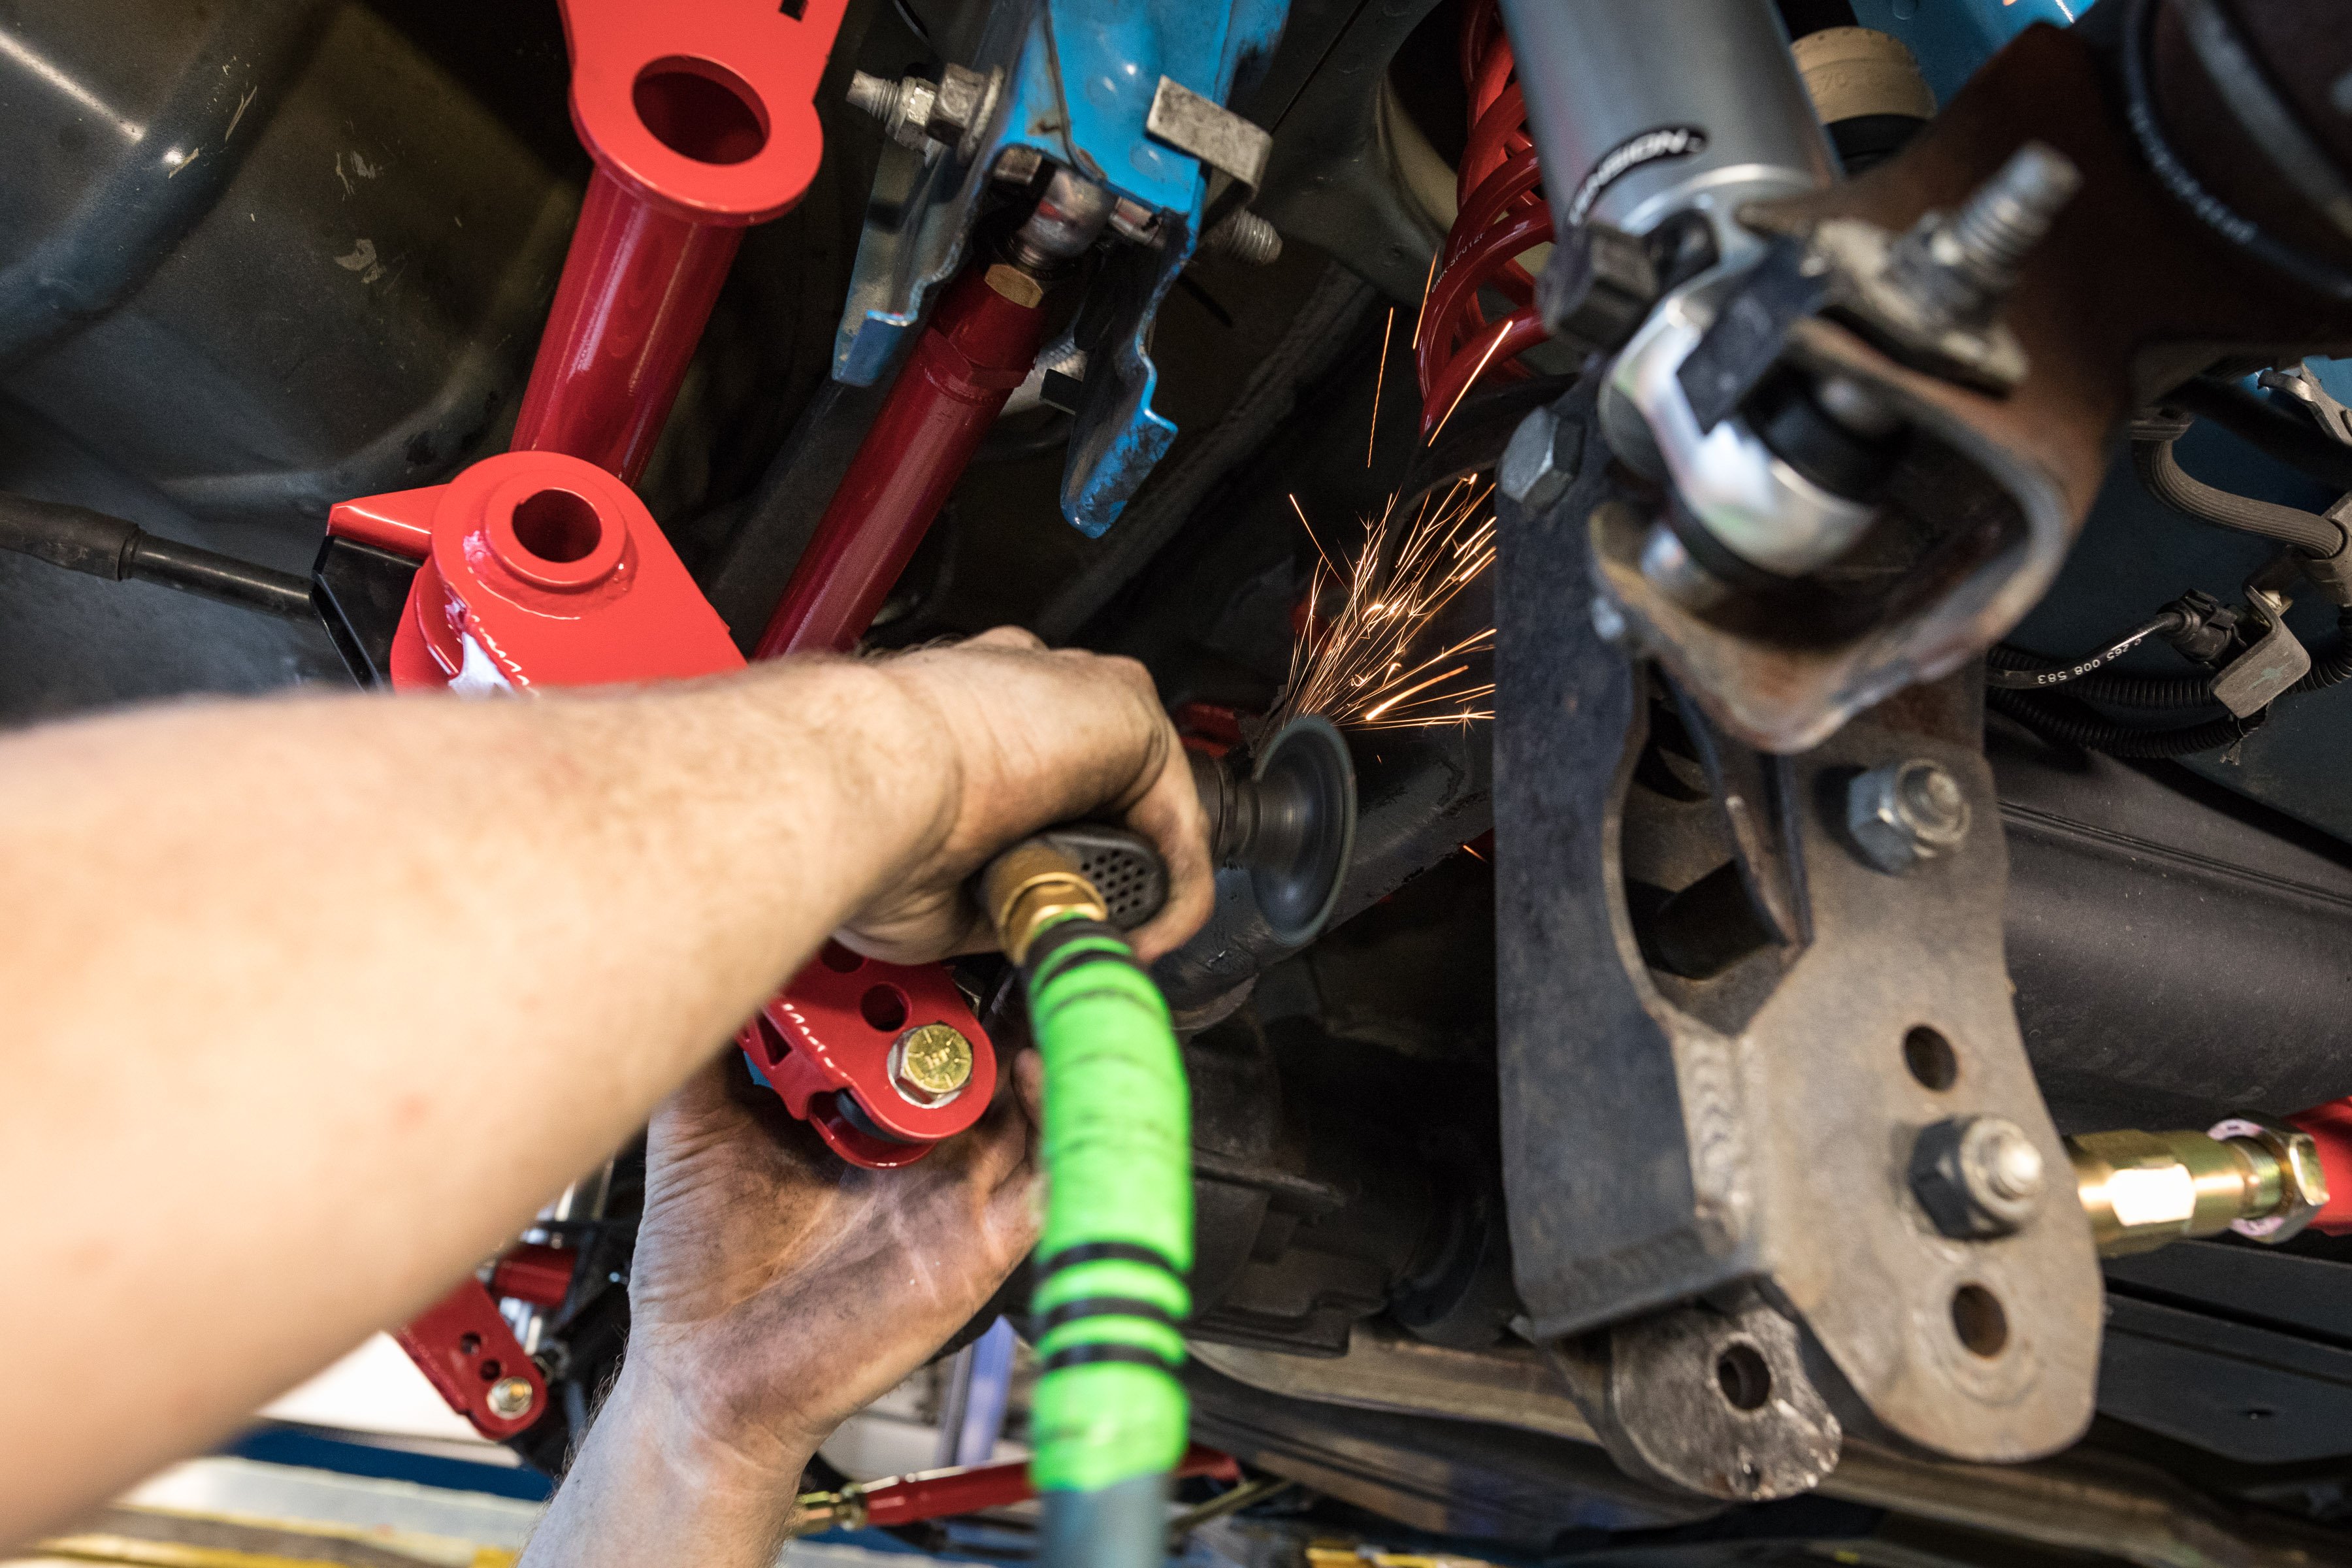
The only non-bolt-on piece in the whole system we selected was the Xtreme Anti-Roll Bar, and even that only requires mild fabrication that can be performed by any competent shop. One of the muffler hangers needs to have a hole enlarged, and the tabs need to be welded to the rearend housing. That's it. The rest of the kit bolts right on. Every joint throughout the suspension is also greasable for long life and smooth operation.
The last BMR piece in the rear of the car is the company’s XSB005 Xtreme Anti Roll Bar Kit, which features a hollow 35mm bar designed to help the car to launch harder without affecting its behavior on the street. The XSB005 offers three different positions for the end-links to improve the rate by as much as 4,090-percent over the stock bar. Since it uses 95-durometer low-deflection polyurethane bushings, it will handle high compression loads without failure. The XSB005 is manufactured from heavy-wall 1.375-inch DOM tubing.
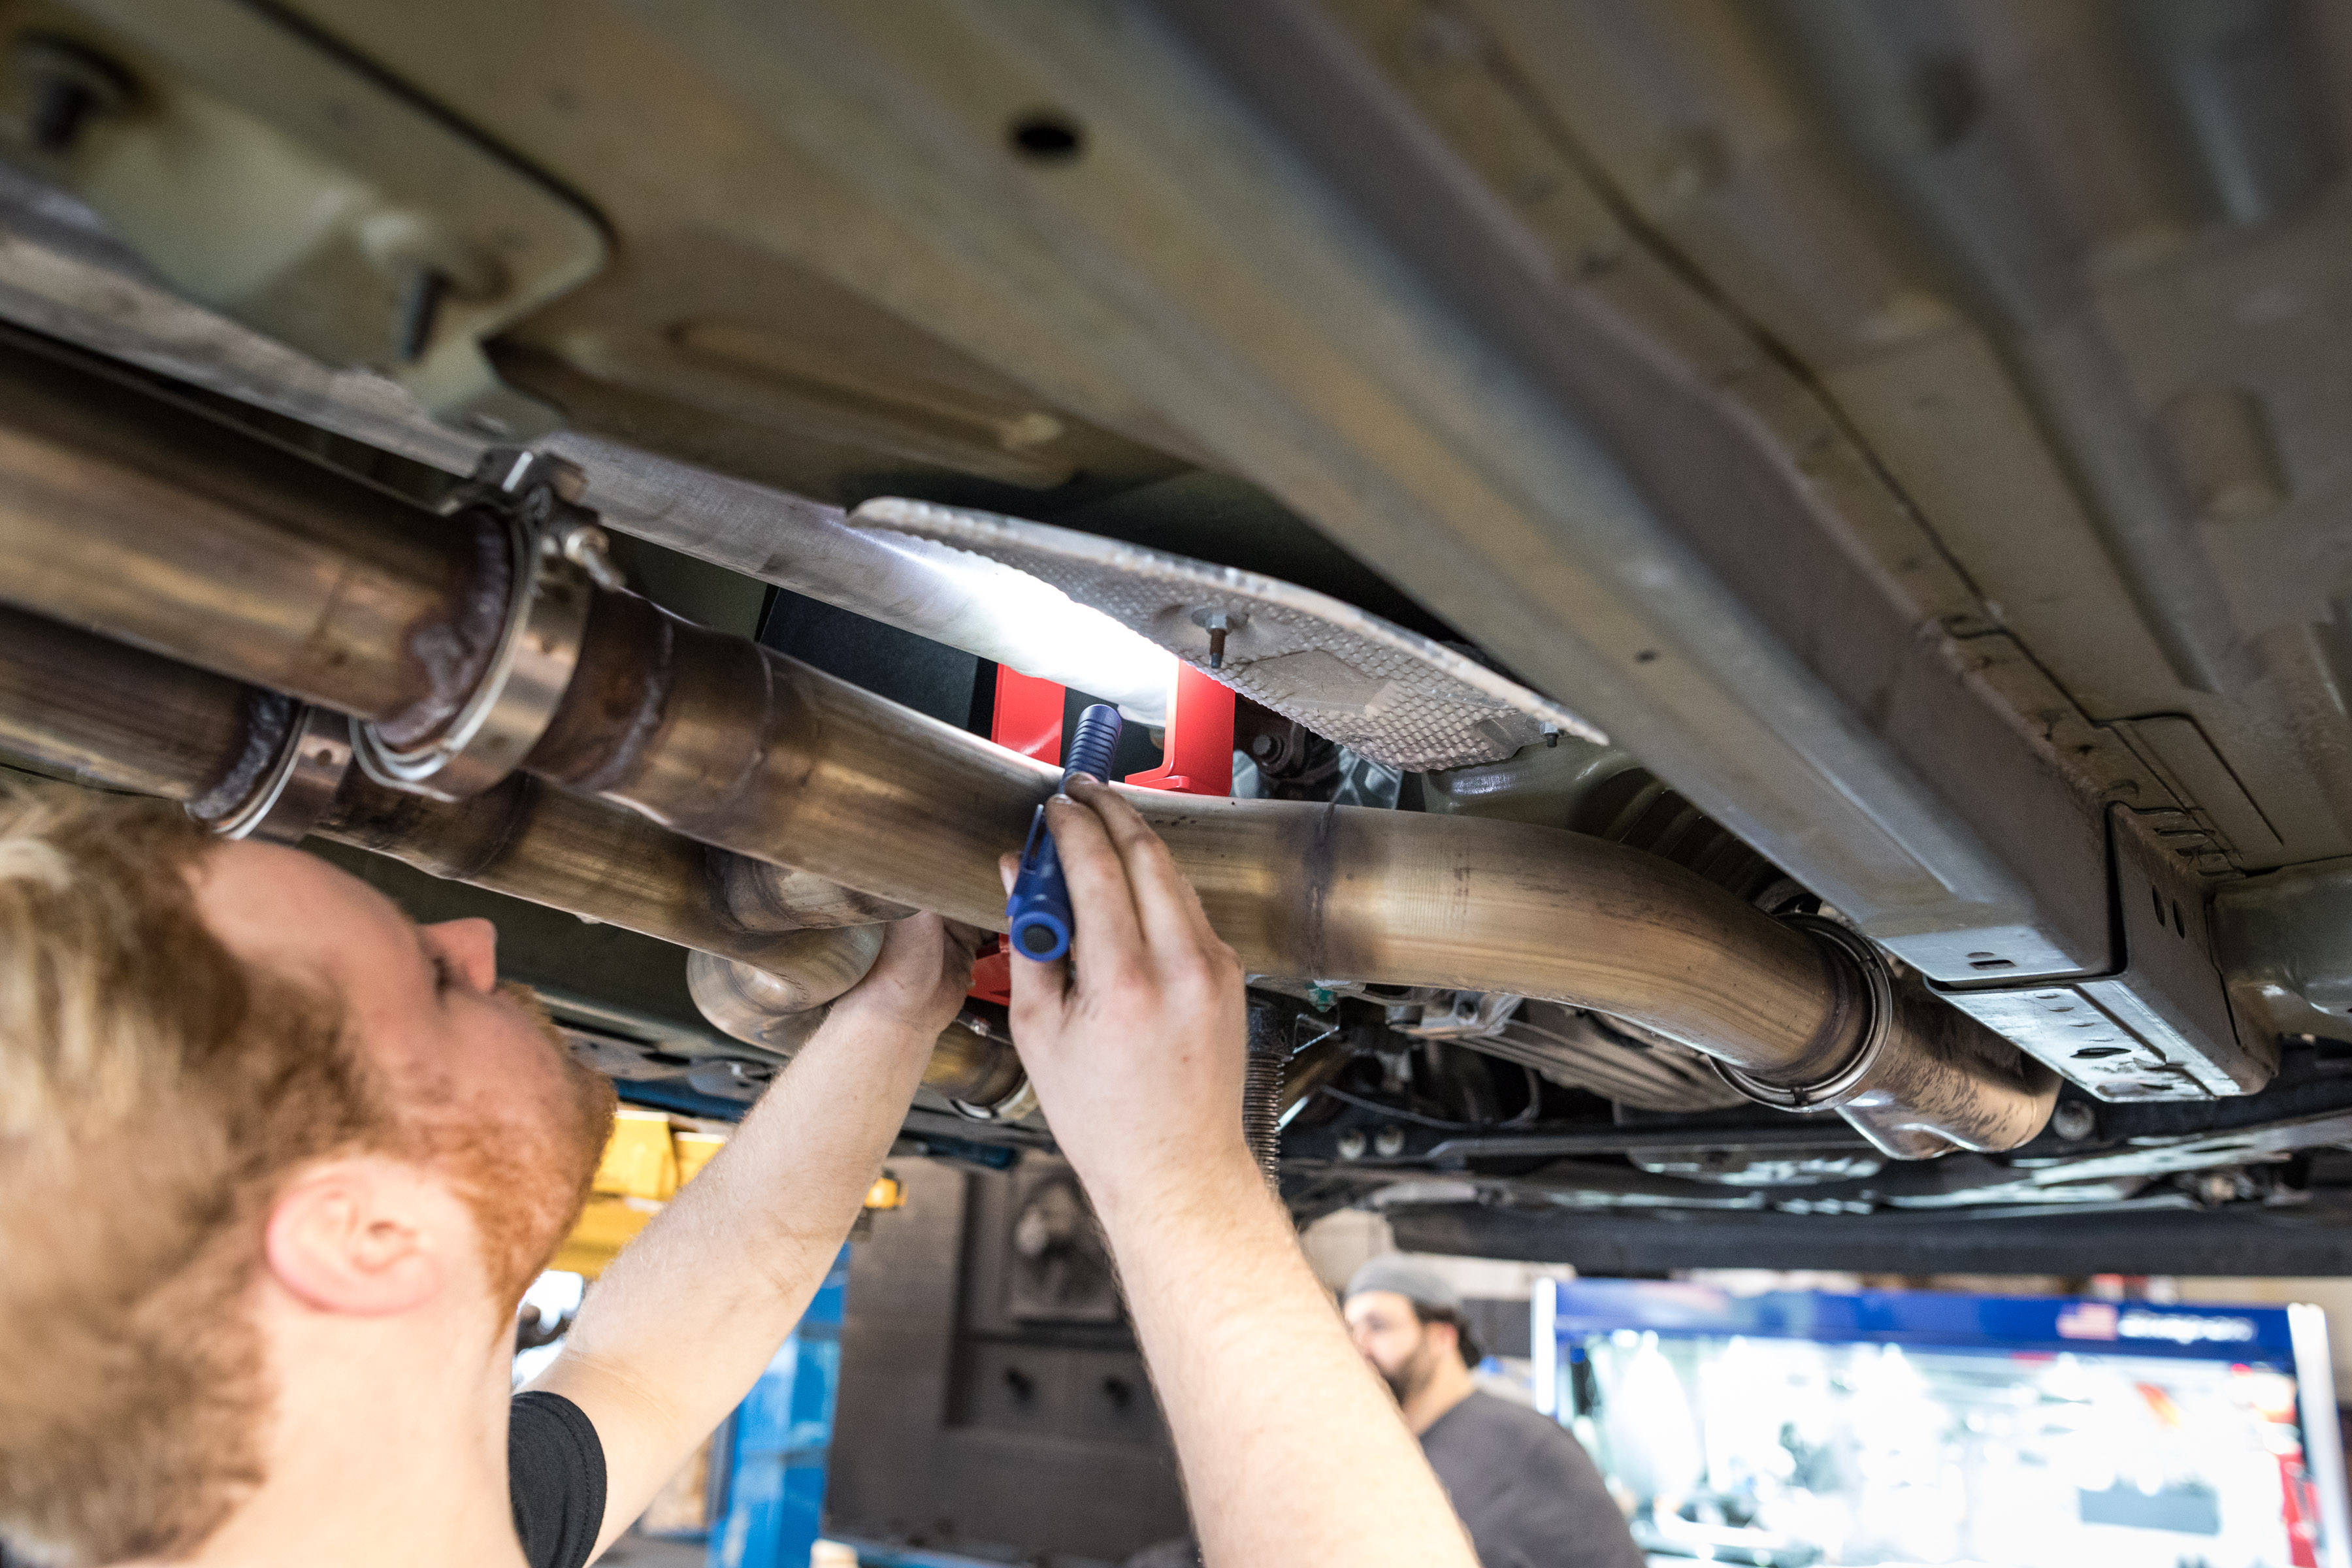
Fitting the driveshaft loop is tight, but easily doable. It’s about as bolt-on as bolt-ons come.
The simplest part we installed as part of this system is the company’s driveshaft loop (PN DSL017). The loop bolts in, right underneath the factory transmission crossmember, and is designed to keep the car NHRA-legal—and the driver safe in the event of a front U-joint failure. By containing the nose of the driveshaft in this instance, it will prevent the car from trying to pogo at speed if the shaft were to fail downtrack and dig into the track surface. Similarly, it will prevent a broken shaft from entering the driver’s compartment through the floor. Four bolts mount it to the crossmember location, and four bolts retain the loop to the baseplate. This thing is about as simple as it gets and extremely effective.
Stock parts are for the birds.
Fixing The Front
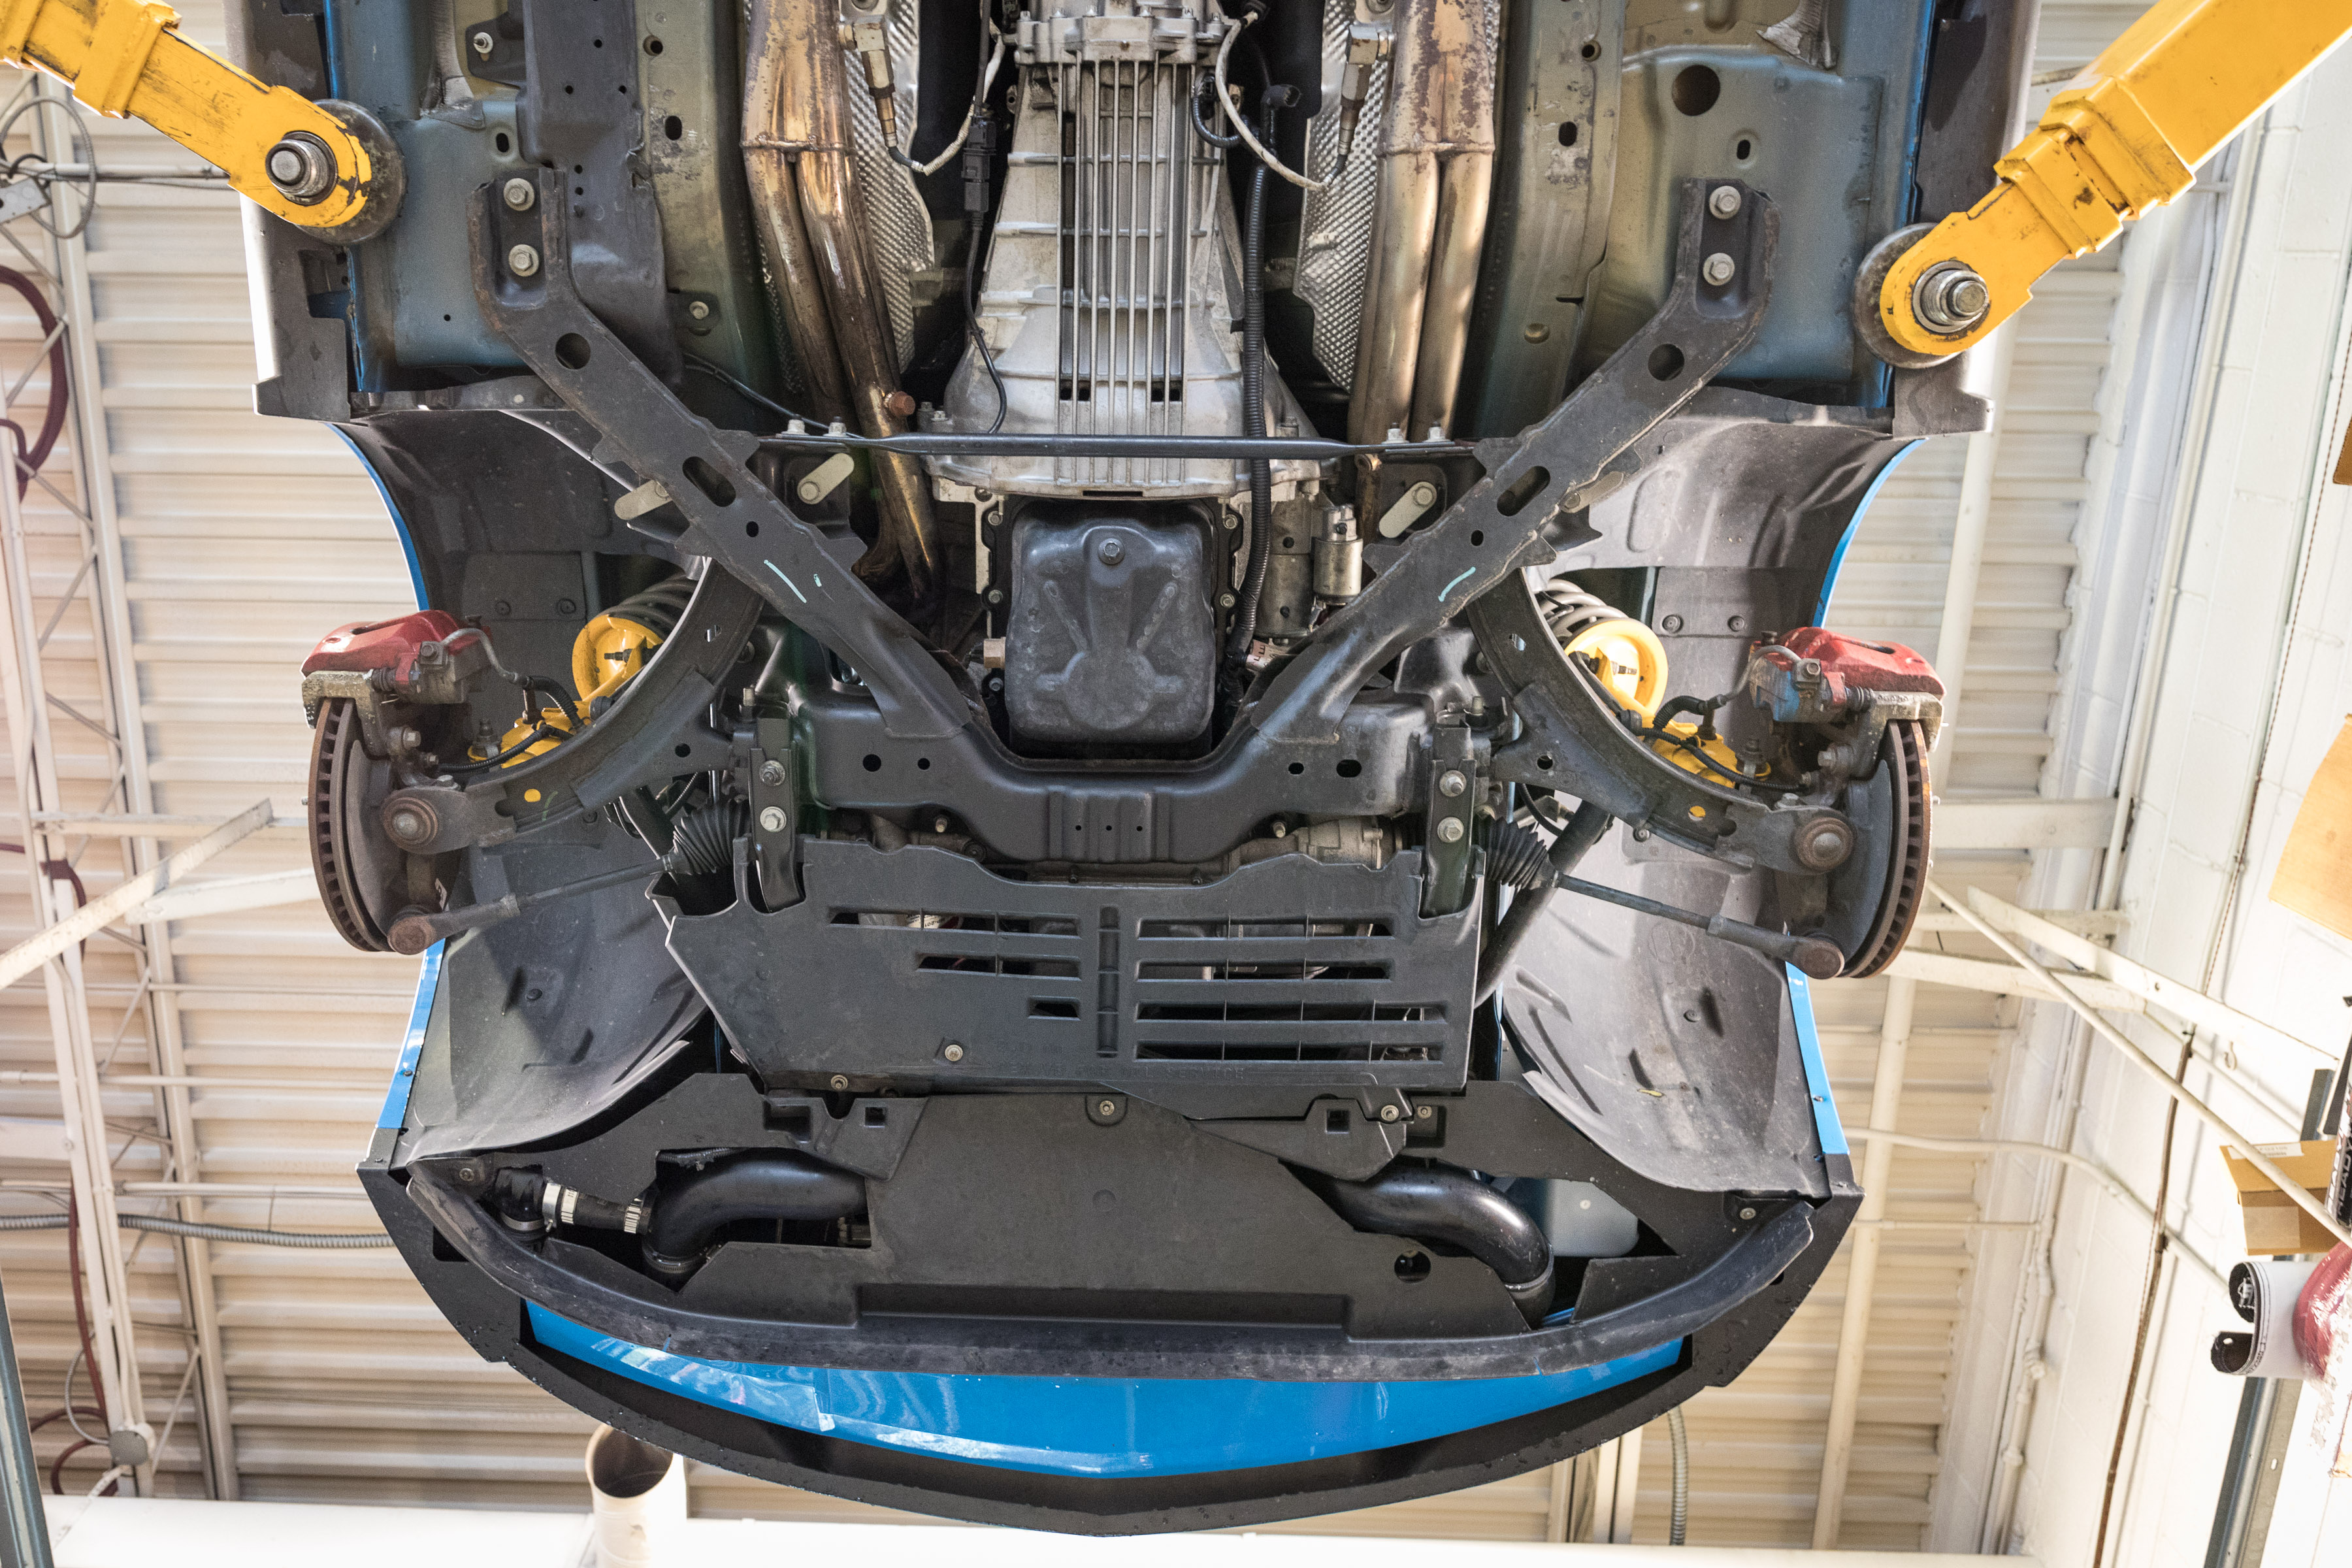
The S197 is notorious for its lack of room around the factory K-member; in fact, the easiest path to installing a set of long-tube headers is to actually drop the K-member out of the car to simplify the process. It’s bulky, heavy-duty construction coupled with the large electronic steering rack offers one thing for certain, though: unneeded weight, which can be easily reduced by installing a lightweight tubular K-member and A-arms.
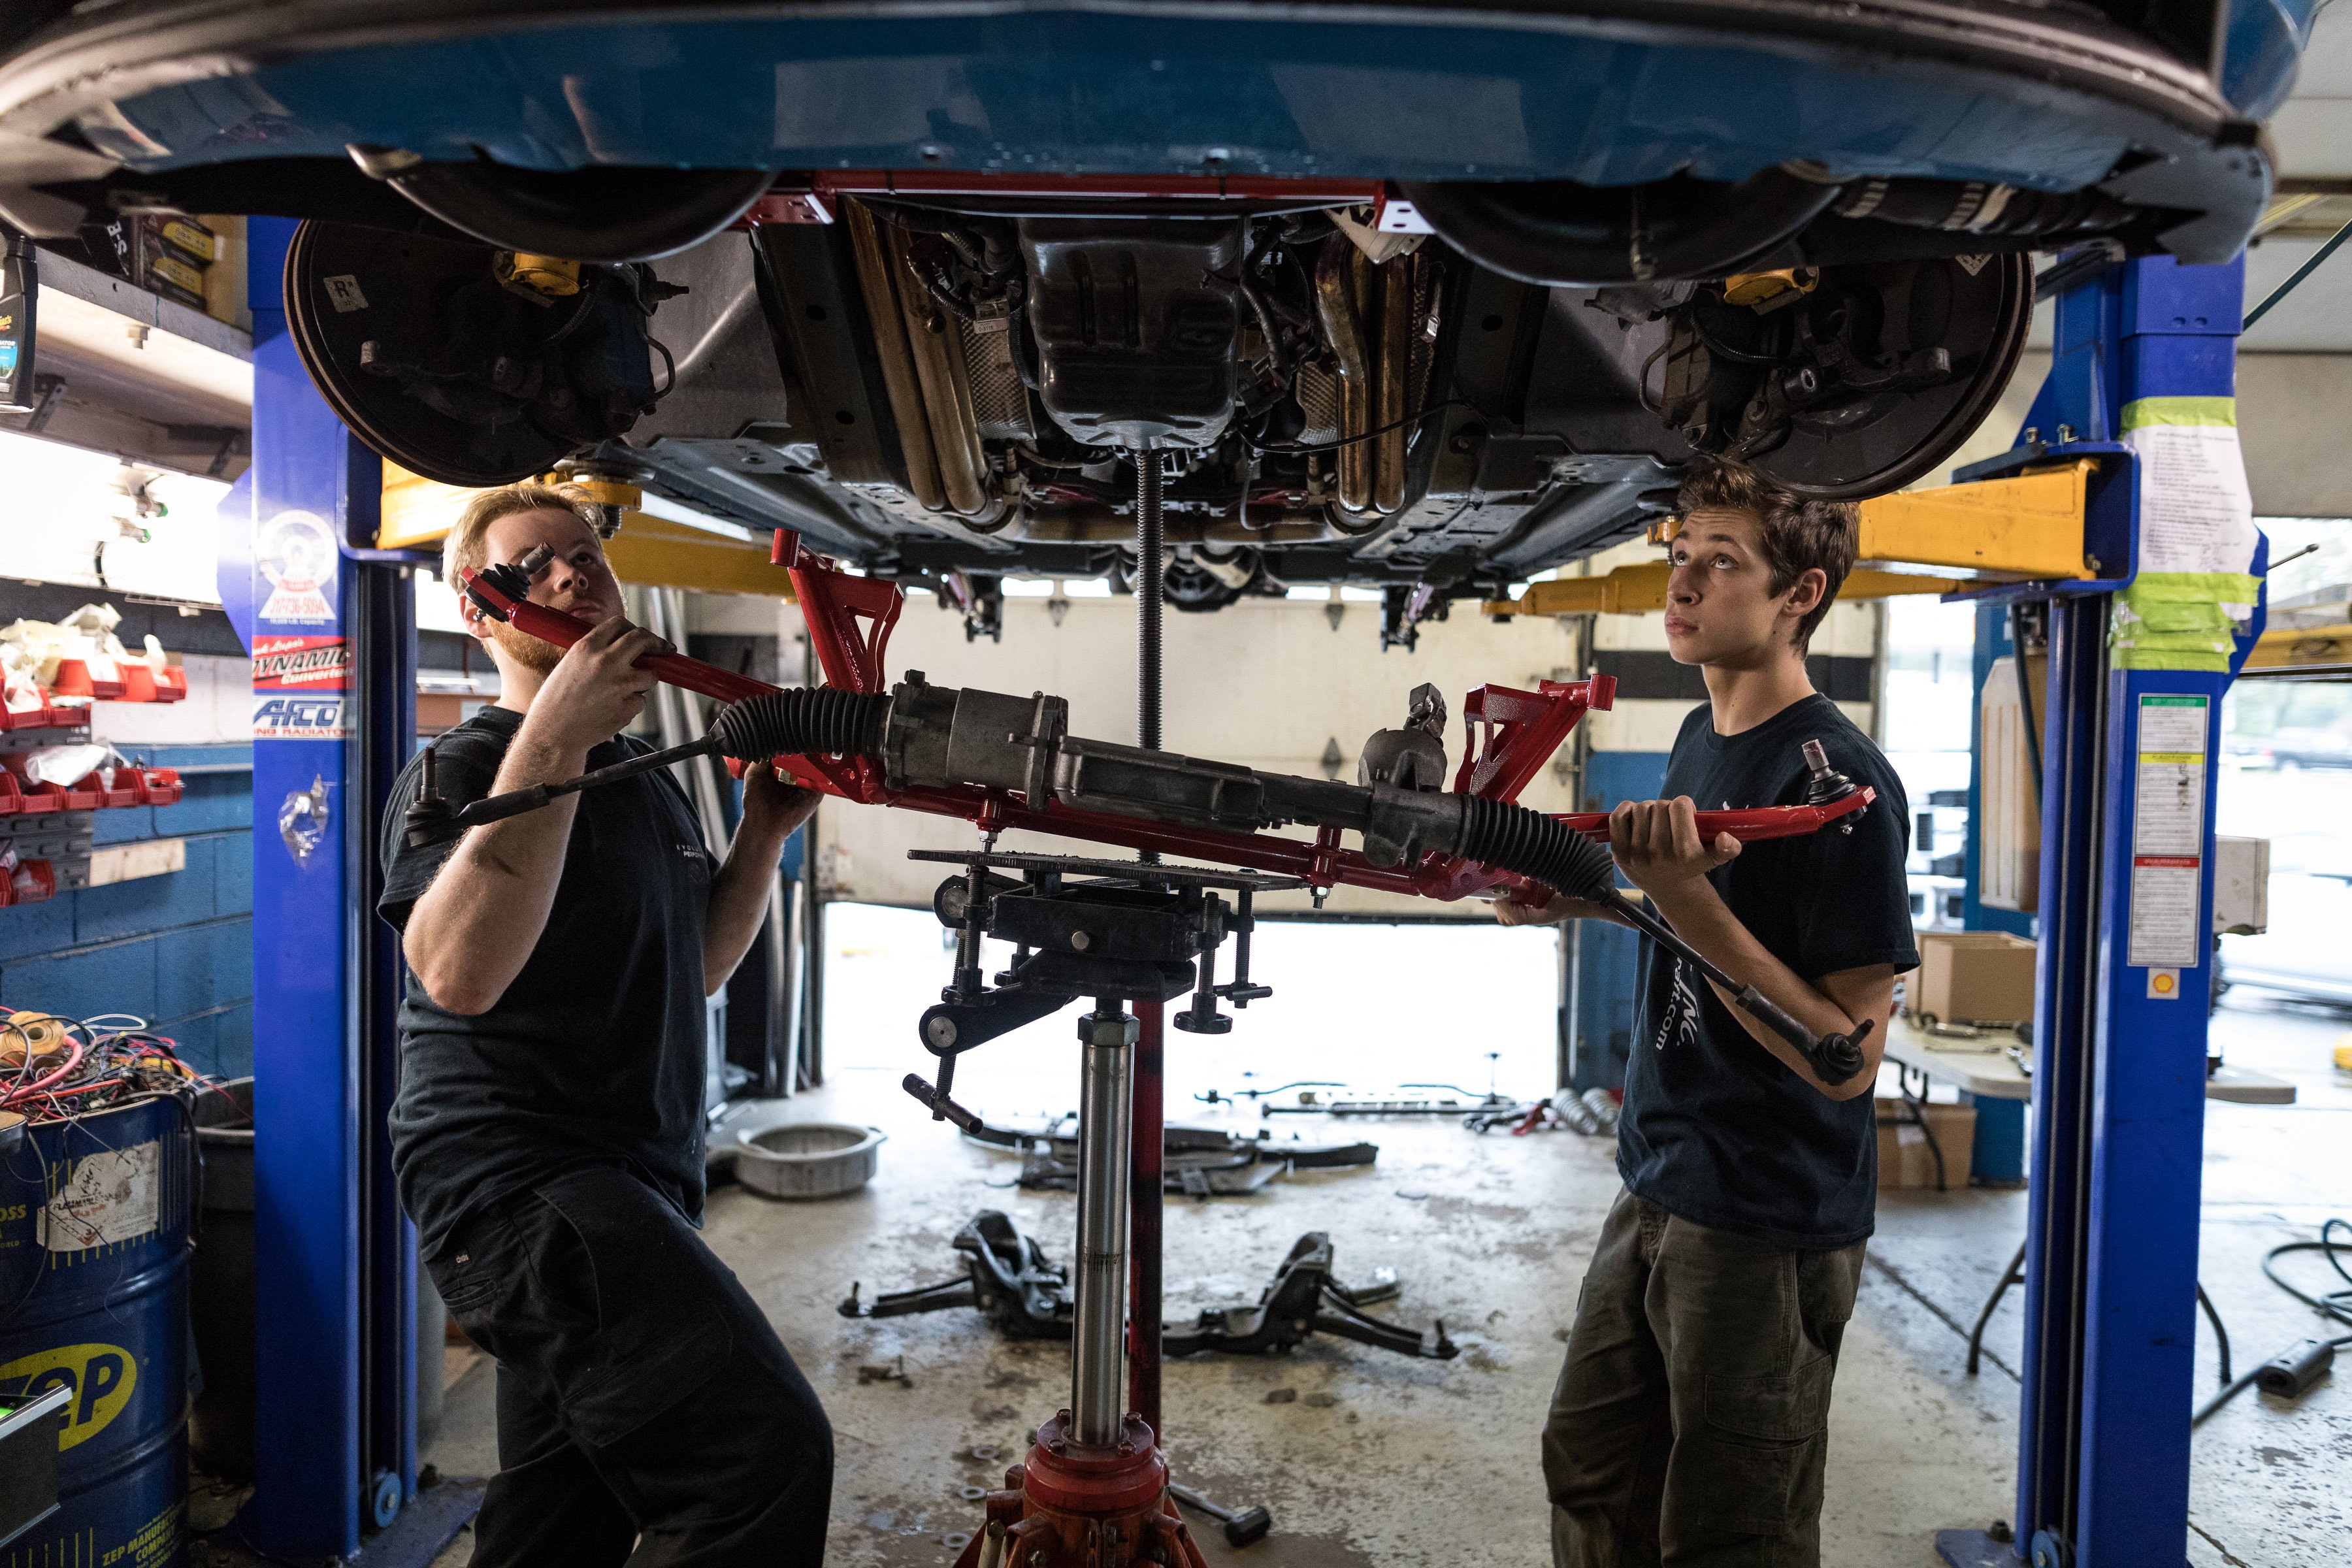
It's easiest to remove the old parts as one assembly, which required Steve to enlist Evolution's Dalton Winkler for an extra set of hands. With the BMR parts next to the stock ones, we can easily spot the differences. Steve installed the new lower control arms and mounted the steering rack prior to lifting the new K-member into place.
Torquing the K-member’s fasteners properly is critical. Follow all of the instructions included with it; BMR’s tech team is extremely thorough with providing all of the necessary information required for installation.
BMR’s K-member (PN KM018), a bolt-in piece, helps to significantly reduce front end weight, on the order of 20 pounds combined between the K-member and A-arms when compared to stock. BMR’s tubular K-member is crafted from three different tubing sizes—1.00-inch, 1.25-inch, and 1.50-inch—chosen for proper fitment, weight reduction, and superior strength. Weight is also reduced by integrating the engine mounts into the K-member’s design. Most importantly, there’s now a ton of room for activities compared to the stock K-member, which means installing headers is a breeze if you don’t already have them.
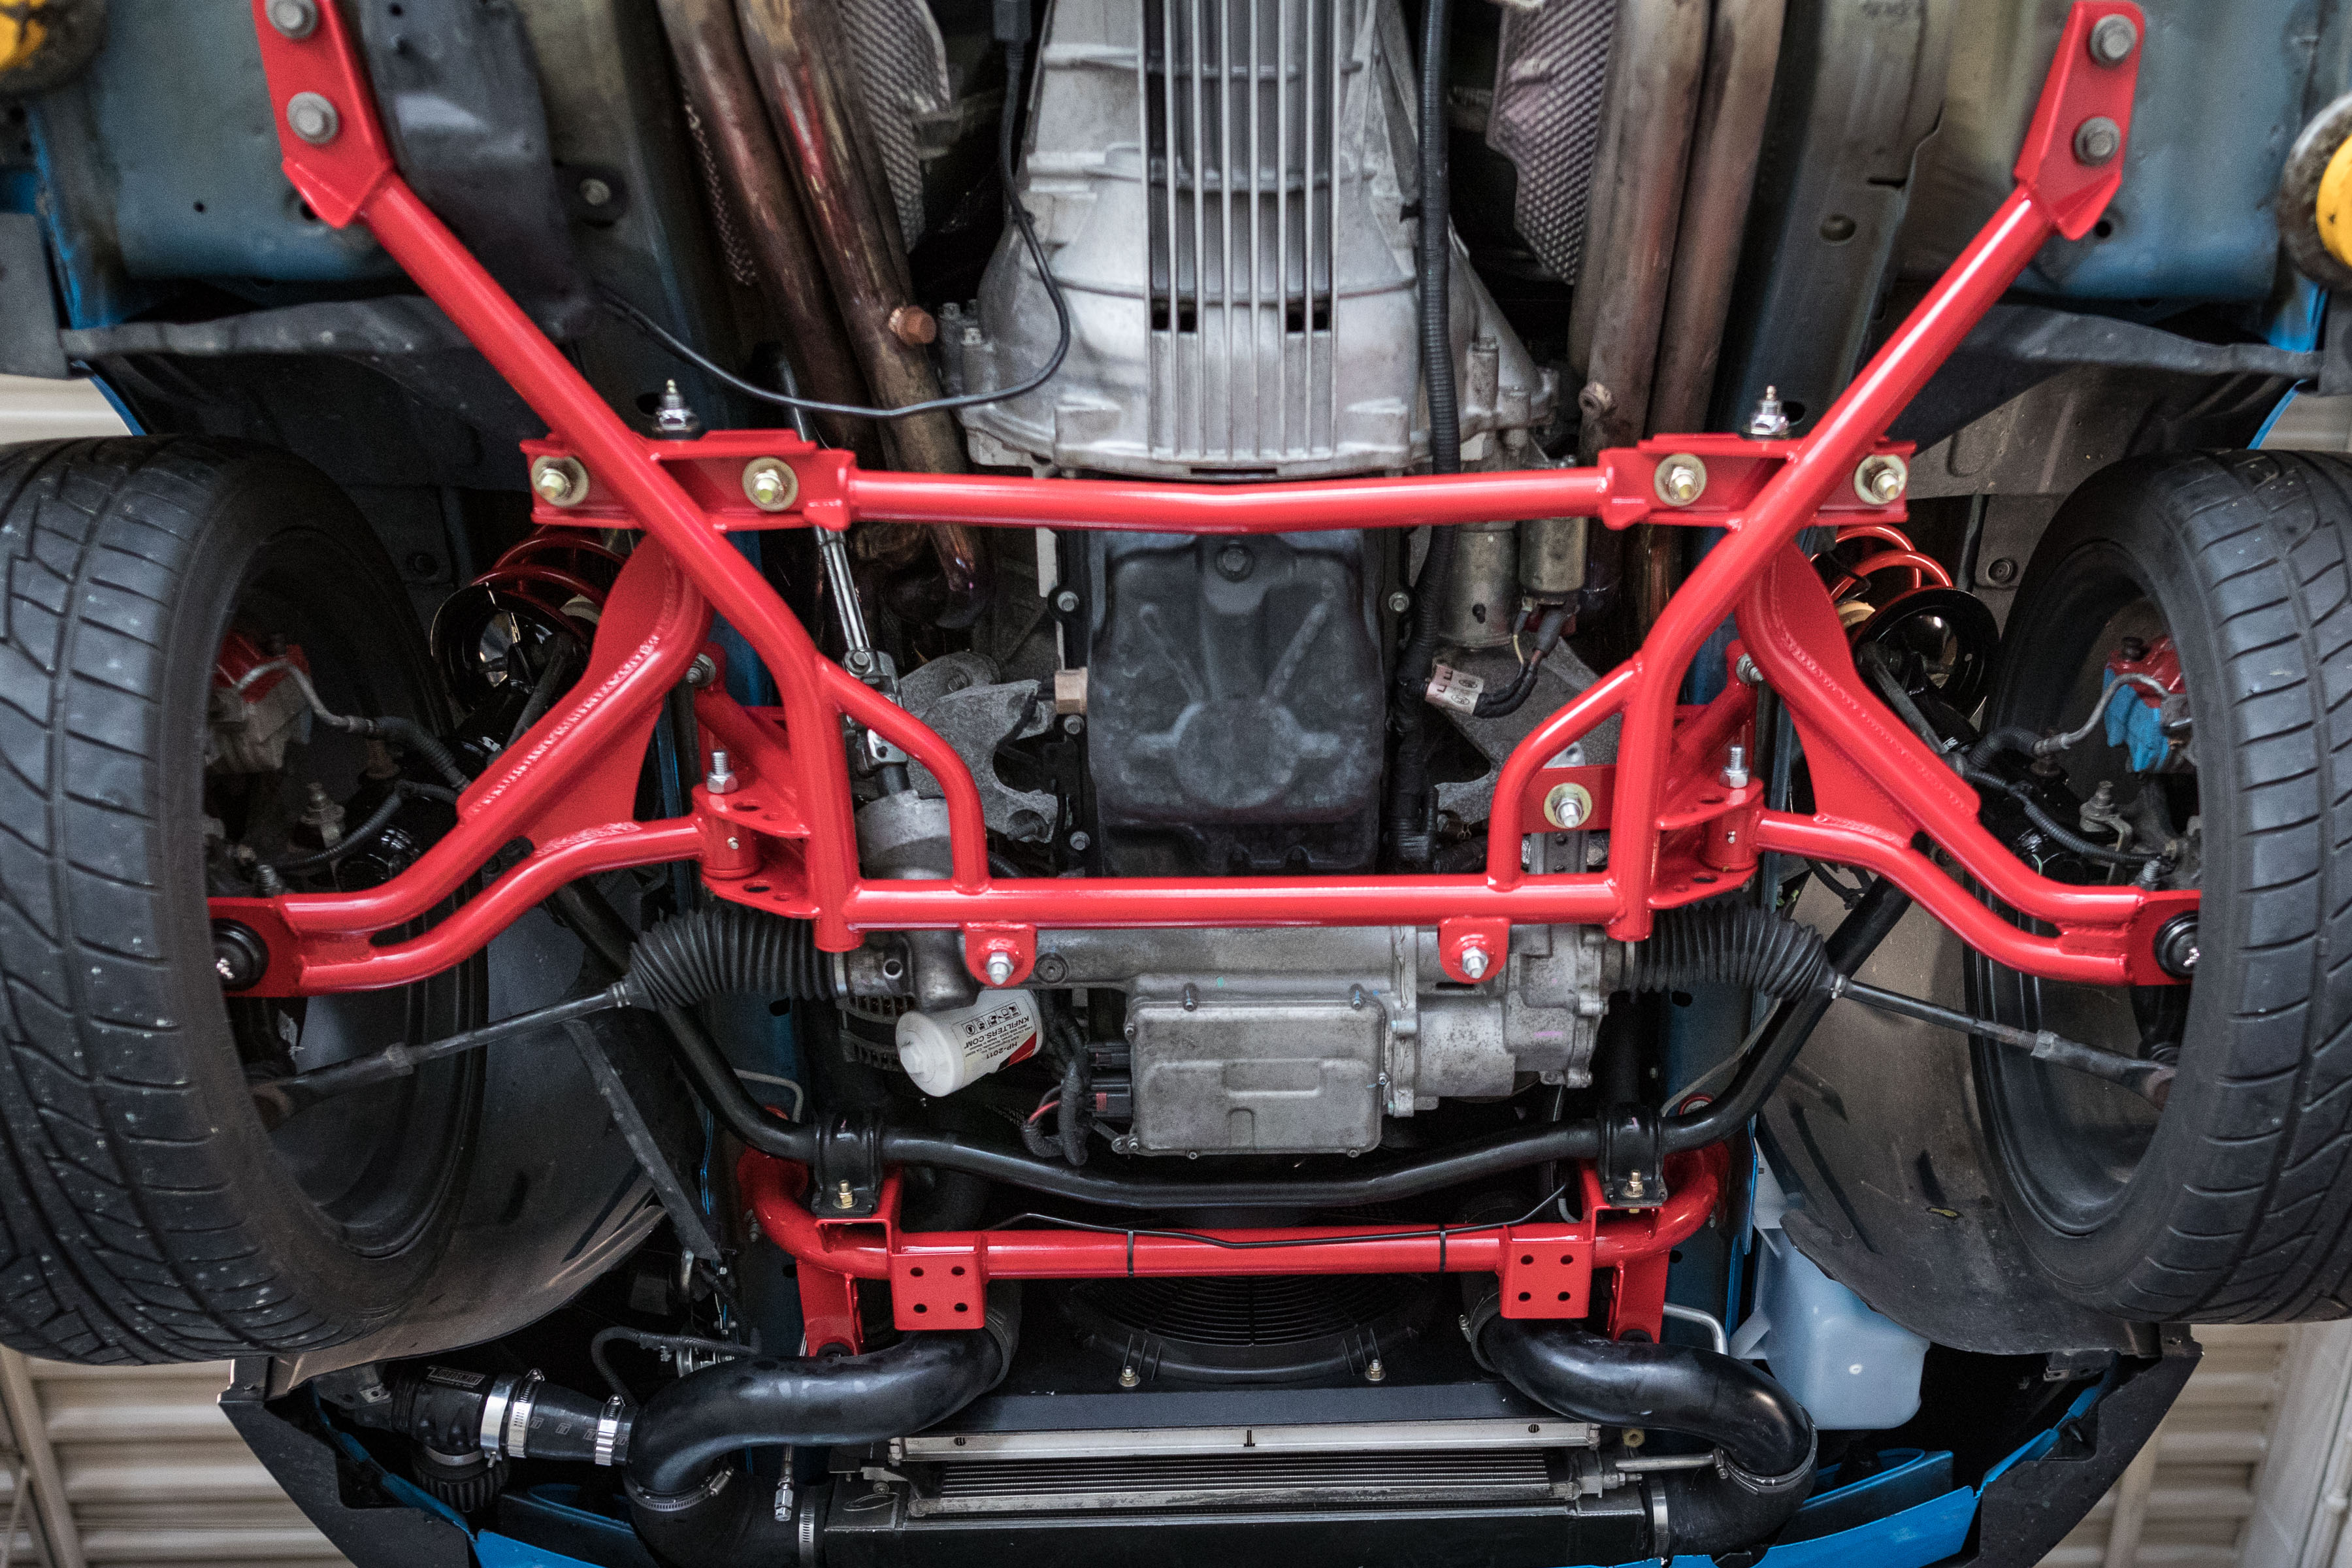
Much better! Not only have we lost plenty of weight from our portly street car, it’s now much easier to work around everything in the engine bay.
For this application, Aiken suggested BMR’s non-adjustable lower A-arms (PN AA021), which are ridiculously heavy-duty; built from .095-inch-wall 1.25-inch DOM tubing, these bad boys are super beefy. They have greasable heavy-duty ball joints, 95-durometer poly bushings in the front mount and greasable Delrin bushings at the rear mount. The bushings are fluted, which allows the grease to penetrate to the edges of the bushings and ensure proper lubrication. We can say that after driving the car, steering feel is immensely improved over stock; you can just point the car where you want it, and it goes.
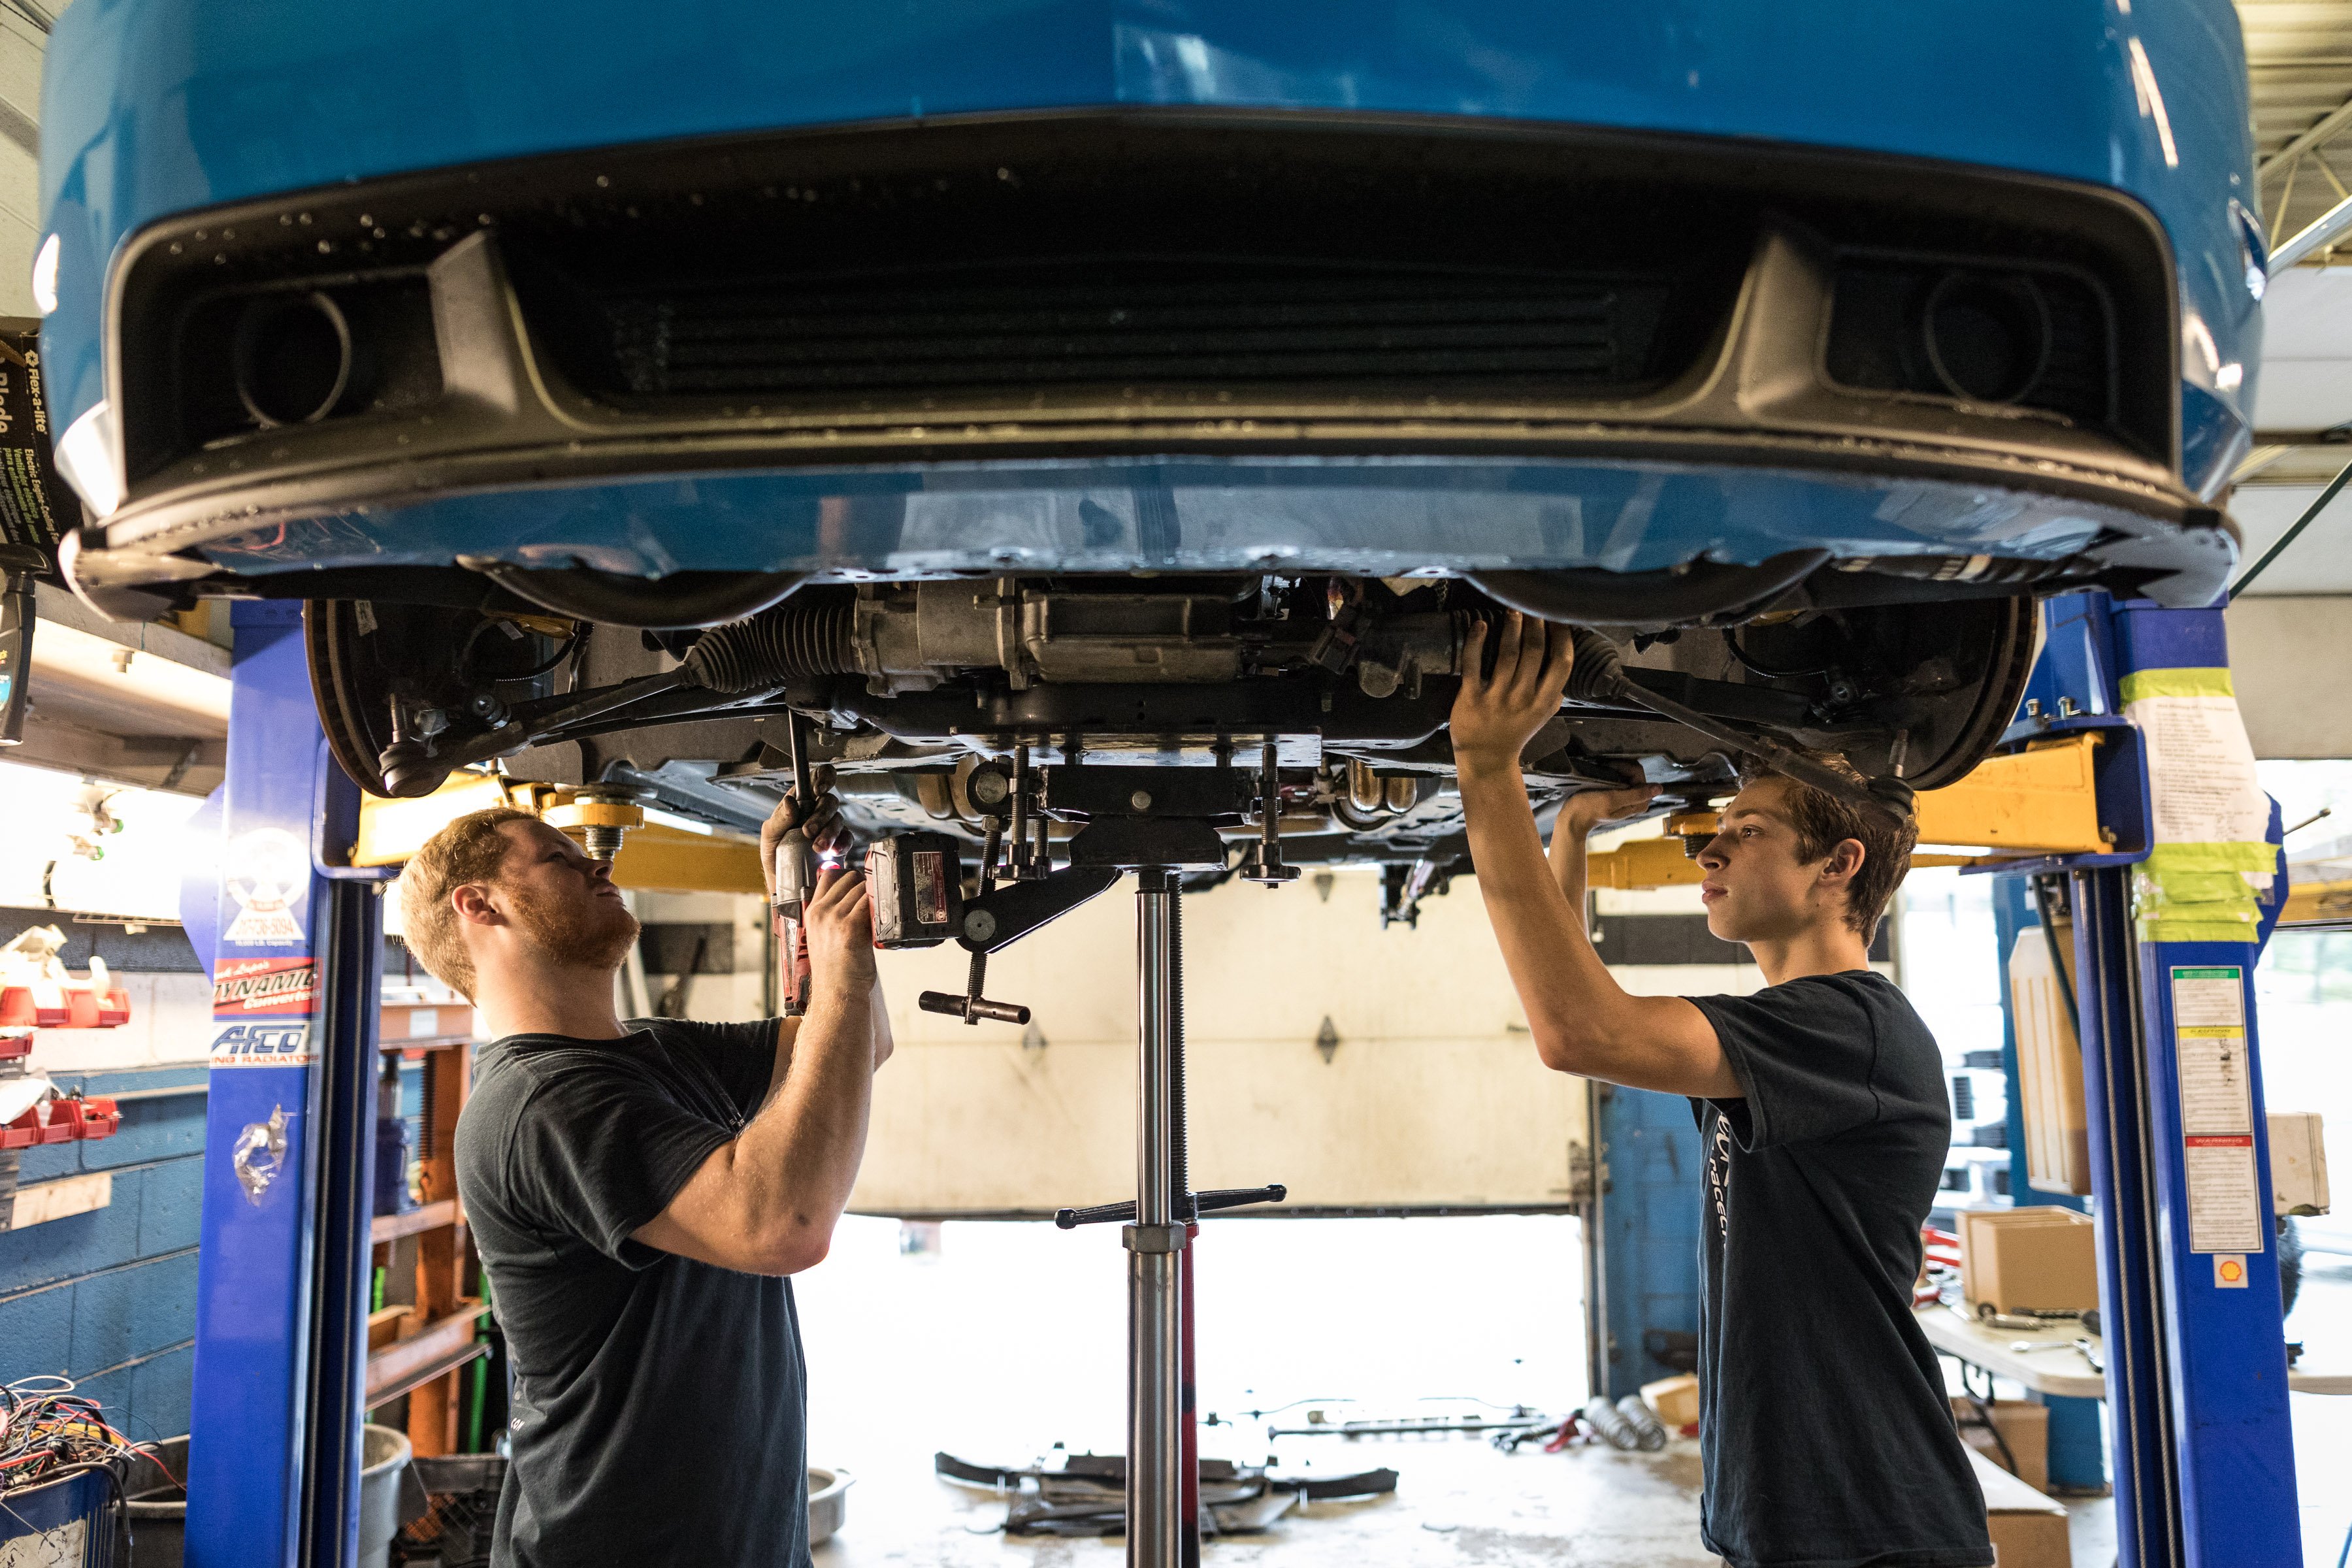
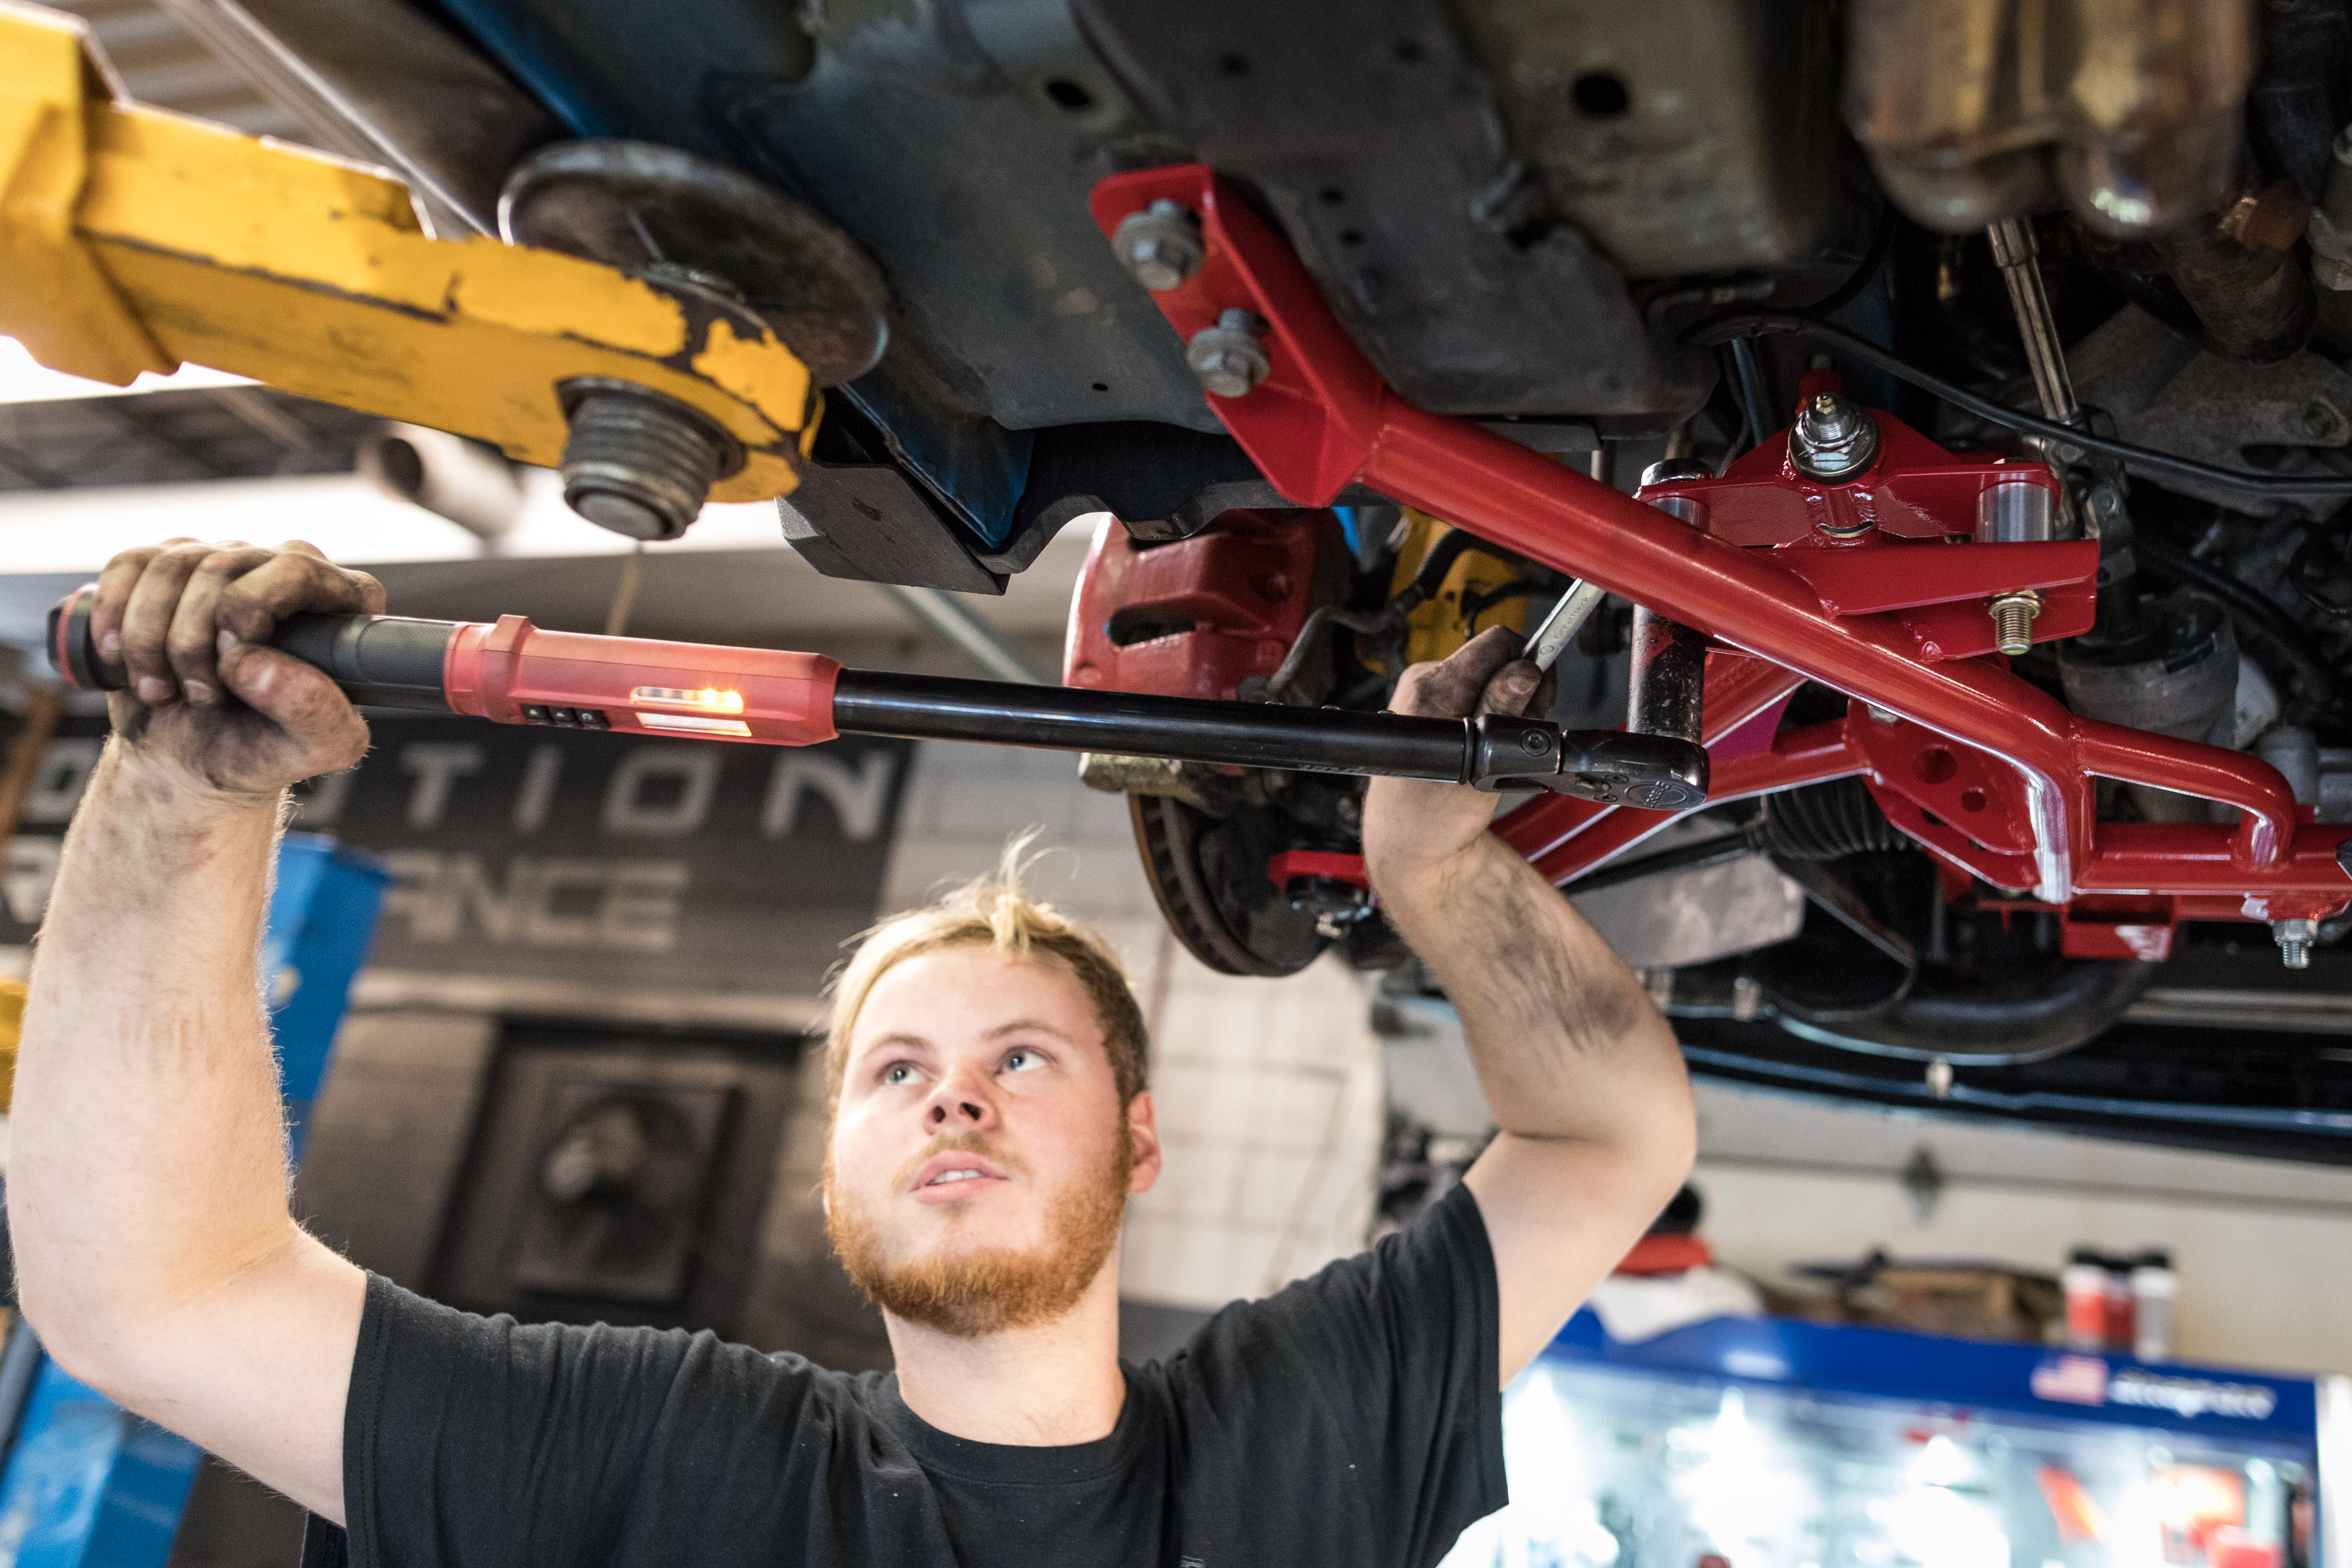
With the car’s weight on the tires, Steve went over all of the critical fasteners again.
We included the K-member brace (PN AAS001), which does exactly as its name says: brace the K-member at the rear A-arm mounting position to stiffen the K-member against high lateral loads, meaning your alignment will stay consistent no matter how you’re pushing the car. The last place to remove weight up front is through the use of the BMR radiator support (PN RS003). Eight pounds off the nose is a nice reduction, and the 1 5/8-inch bar also has mounts to support the sway bar. In our application, the stock sway bar was deemed to be the right choice for how we use the car; it’s the only stock component left in the suspension at this point.

By replacing the factory radiator support with BMR’s lightweight piece, we removed a bunch of weight from the nose of the car, It uses the factory mounting points and has provisions to mount the sway bar.
Doing The Dampening Thing
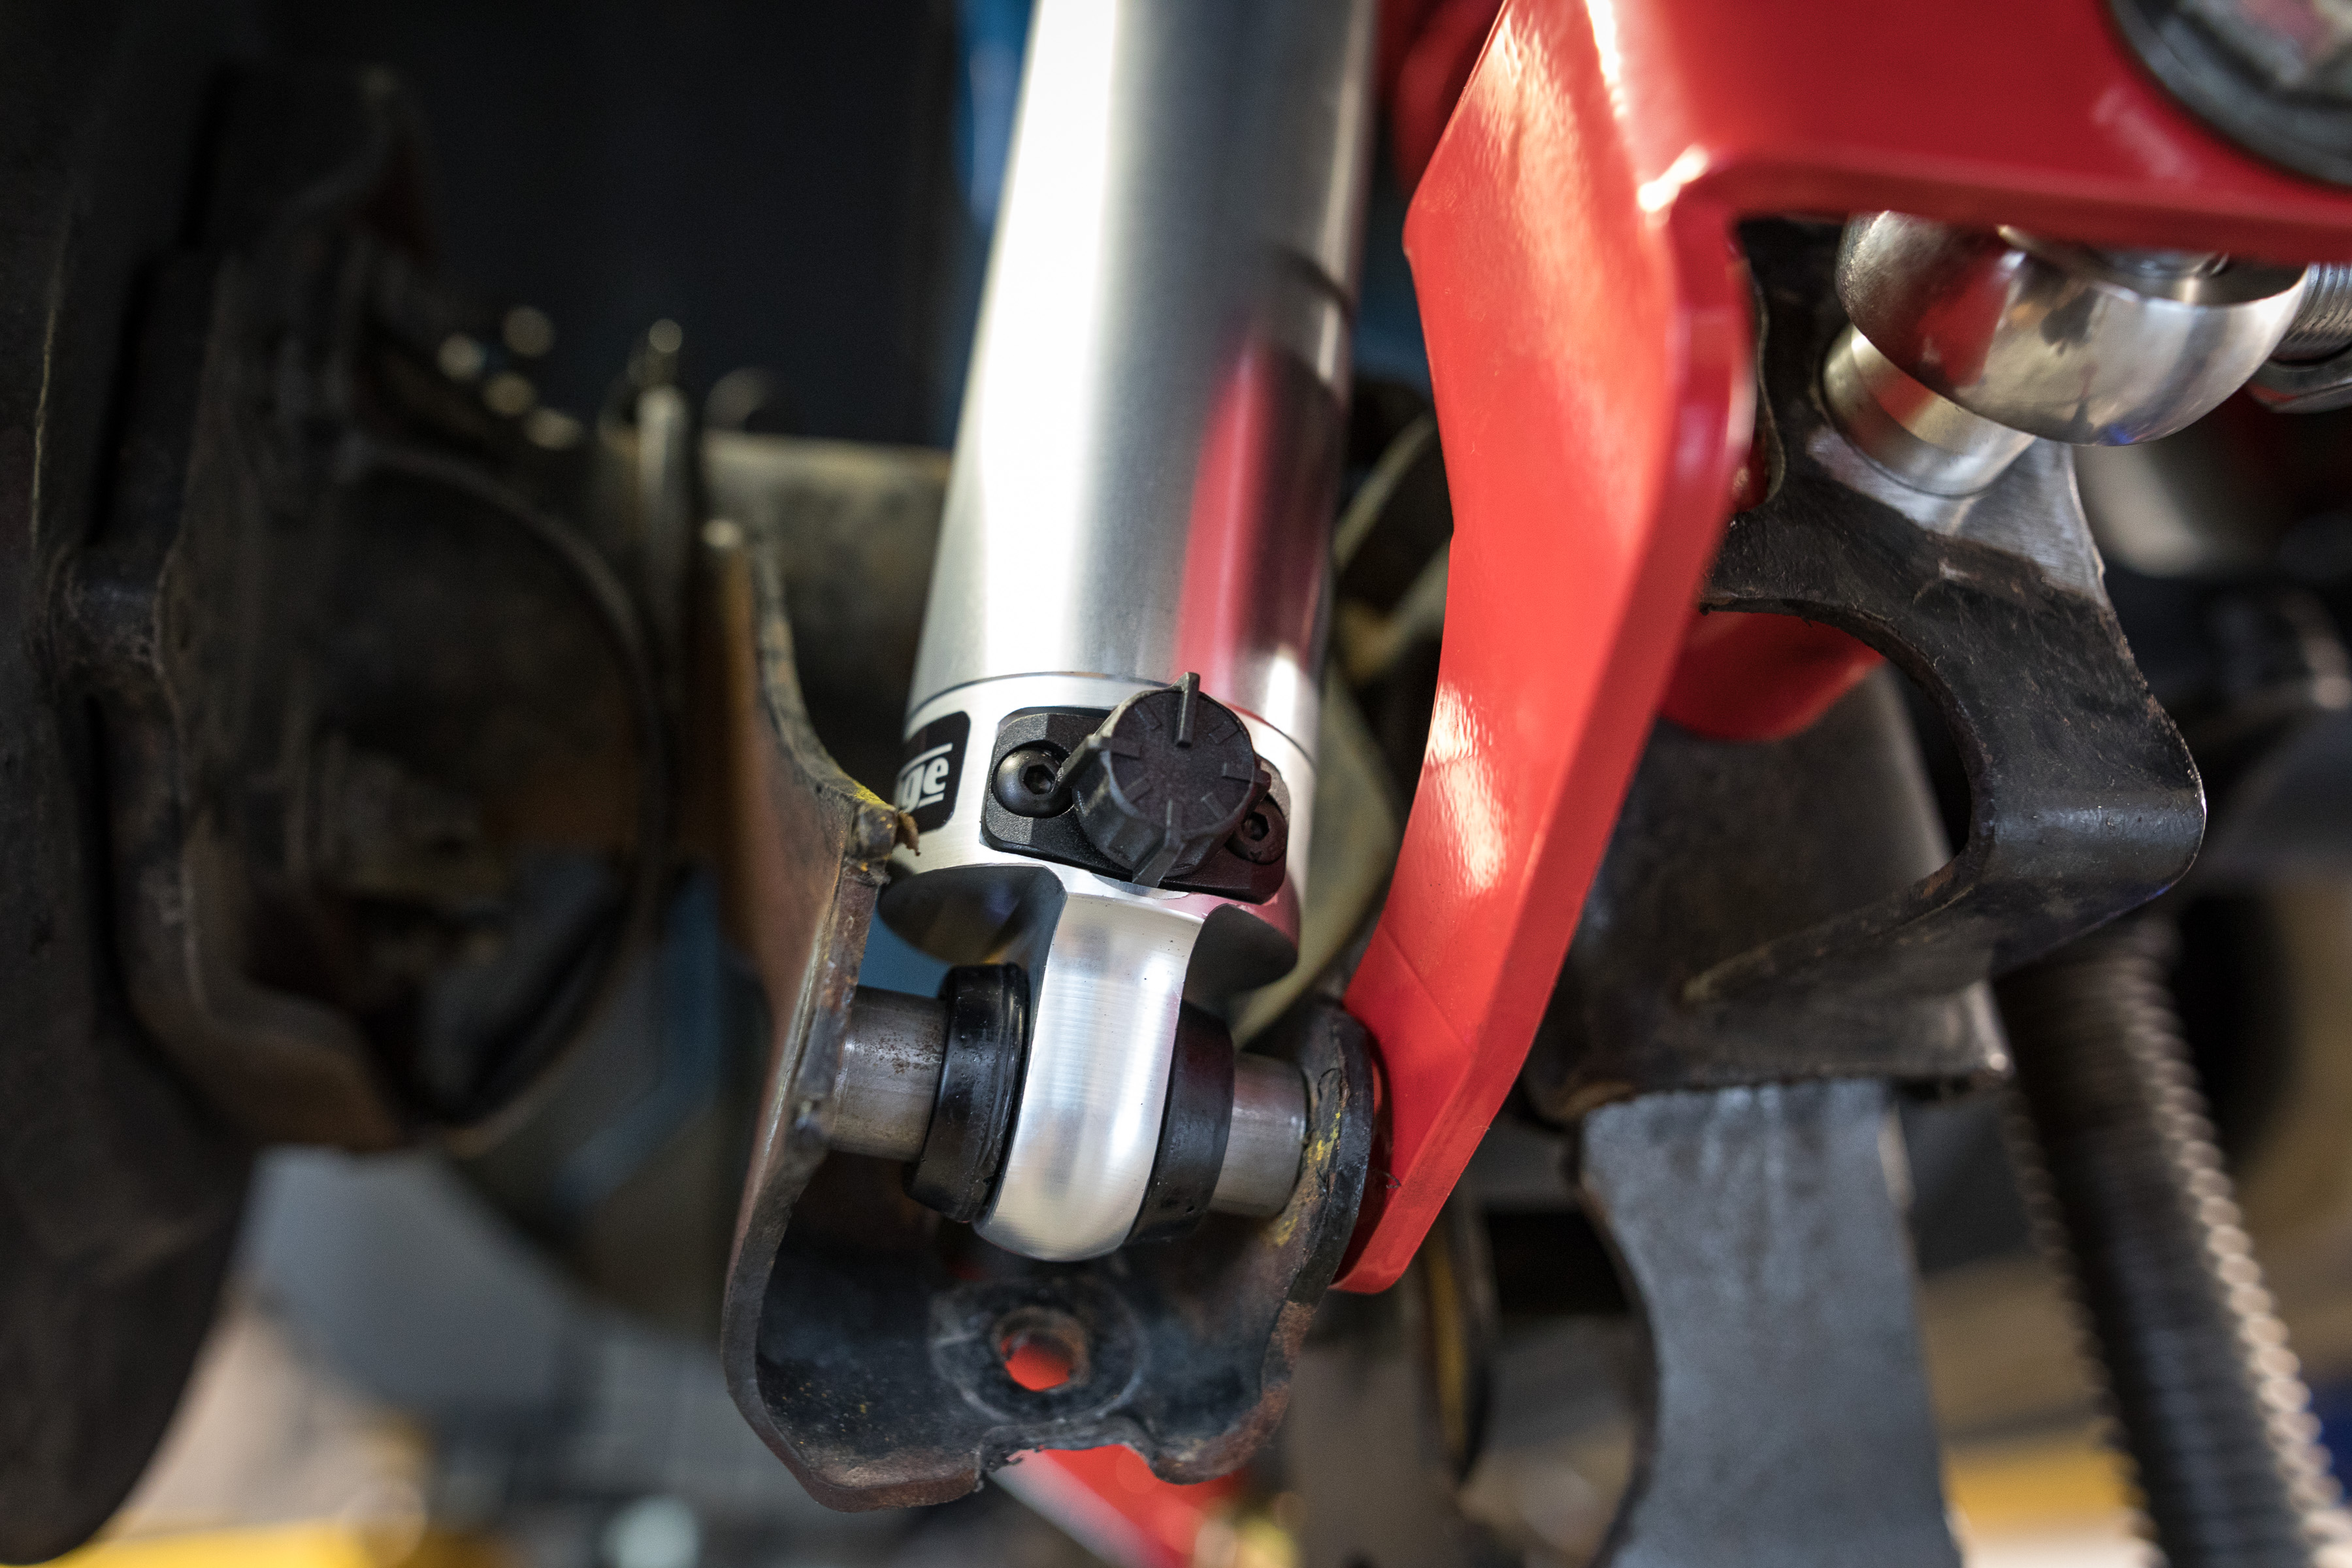
All of the suspension work would be for naught without upgraded dampers, and we reached out to JC Cascio at Strange Engineering to get his take on what would work best for us. To that end, he suggested the company’s tried-and-true single-adjustable front dampers which we actually spec’d for the 2005-’10 Mustang (PN S6009LM) based on Aiken’s recommendation. These work properly in our application with the GT500 upper strut mounts we chose to install. We used these instead of caster/camber plates; when you reverse the mount from the factory orientation, it helps to bring the camber adjustment right into spec without adding the plates to the equation.
“If you take an ’11–’14 Mustang GT strut mount and compare it to the GT500 strut mount from ’07-’14, there is a noticeable difference in quality,” says Aiken. “There is a more durable ball-bearing assembly and a higher-durometer rubber in the spring perch of the GT500 mount. With this strut mount, you have to use the ’05–’10 strut design. The thread height and the spacing at the top of the shaft on the GT500 strut is different from the ’11–’14 GT design.”
These struts offer 10 clicks of adjustment valving and are suitable for everything from drag racing to road racing. On the full soft setting, weight transfer is maximized toward the rear of the car to help plant the tires, yet the full stiff setting would be perfectly at home on a road course. The steel-body struts have an external adjustment knob at the bottom of the strut body, which is simple to adjust without jacking up the car, even though we’re 1.5-inches closer to the ground than stock.
Installing the struts and front springs was straightforward; we used the ’05-’09 GT500 strut mounts and struts in this application.
Since this car is currently equipped with an MT-82 transmission, we needed to be able to maximize rear shock adjustments for track conditions while retaining the street manners where the car is used most. Cascio suggested the company’s aluminum-body, double-adjustable shocks (PN S5042) so that we could adjust both compression and rebound and really be able to tailor the car to each track. These can also be adjusted without jacking the car up, although the compression side takes a bit of work to get to if you have tires on the larger side—the adjuster sits inside the shock bracket. These pieces bolt right into the stock location with a minimum of muss and fuss. In the event of an issue, they can also be rebuilt, and if you have a special application or special needs, Strange can re-valve them for you to tailor them directly to your application.
In Conclusion
There are some companies who manufacture parts which need a fair amount of massaging and adjustment and gentle pry bar application to make them “fit,” and then there are companies like BMR, who offer products which truly do bolt in and perform exactly as they should. There’s a reason that many of the quickest and fastest S197 and S550 mustang racers choose BMR’s suspension parts, and that’s simply because they perform as advertised. Kelly Aiken is a wealth of knowledge in how to get these cars to work, but sadly, we ran out of time to get the car to really figure out the shock tuneup on the track this season. We had the car out a few weeks ago, but hurt the clutch and won’t be able to get back there before it’s too cold in the northern half of the country for track time in 2018.
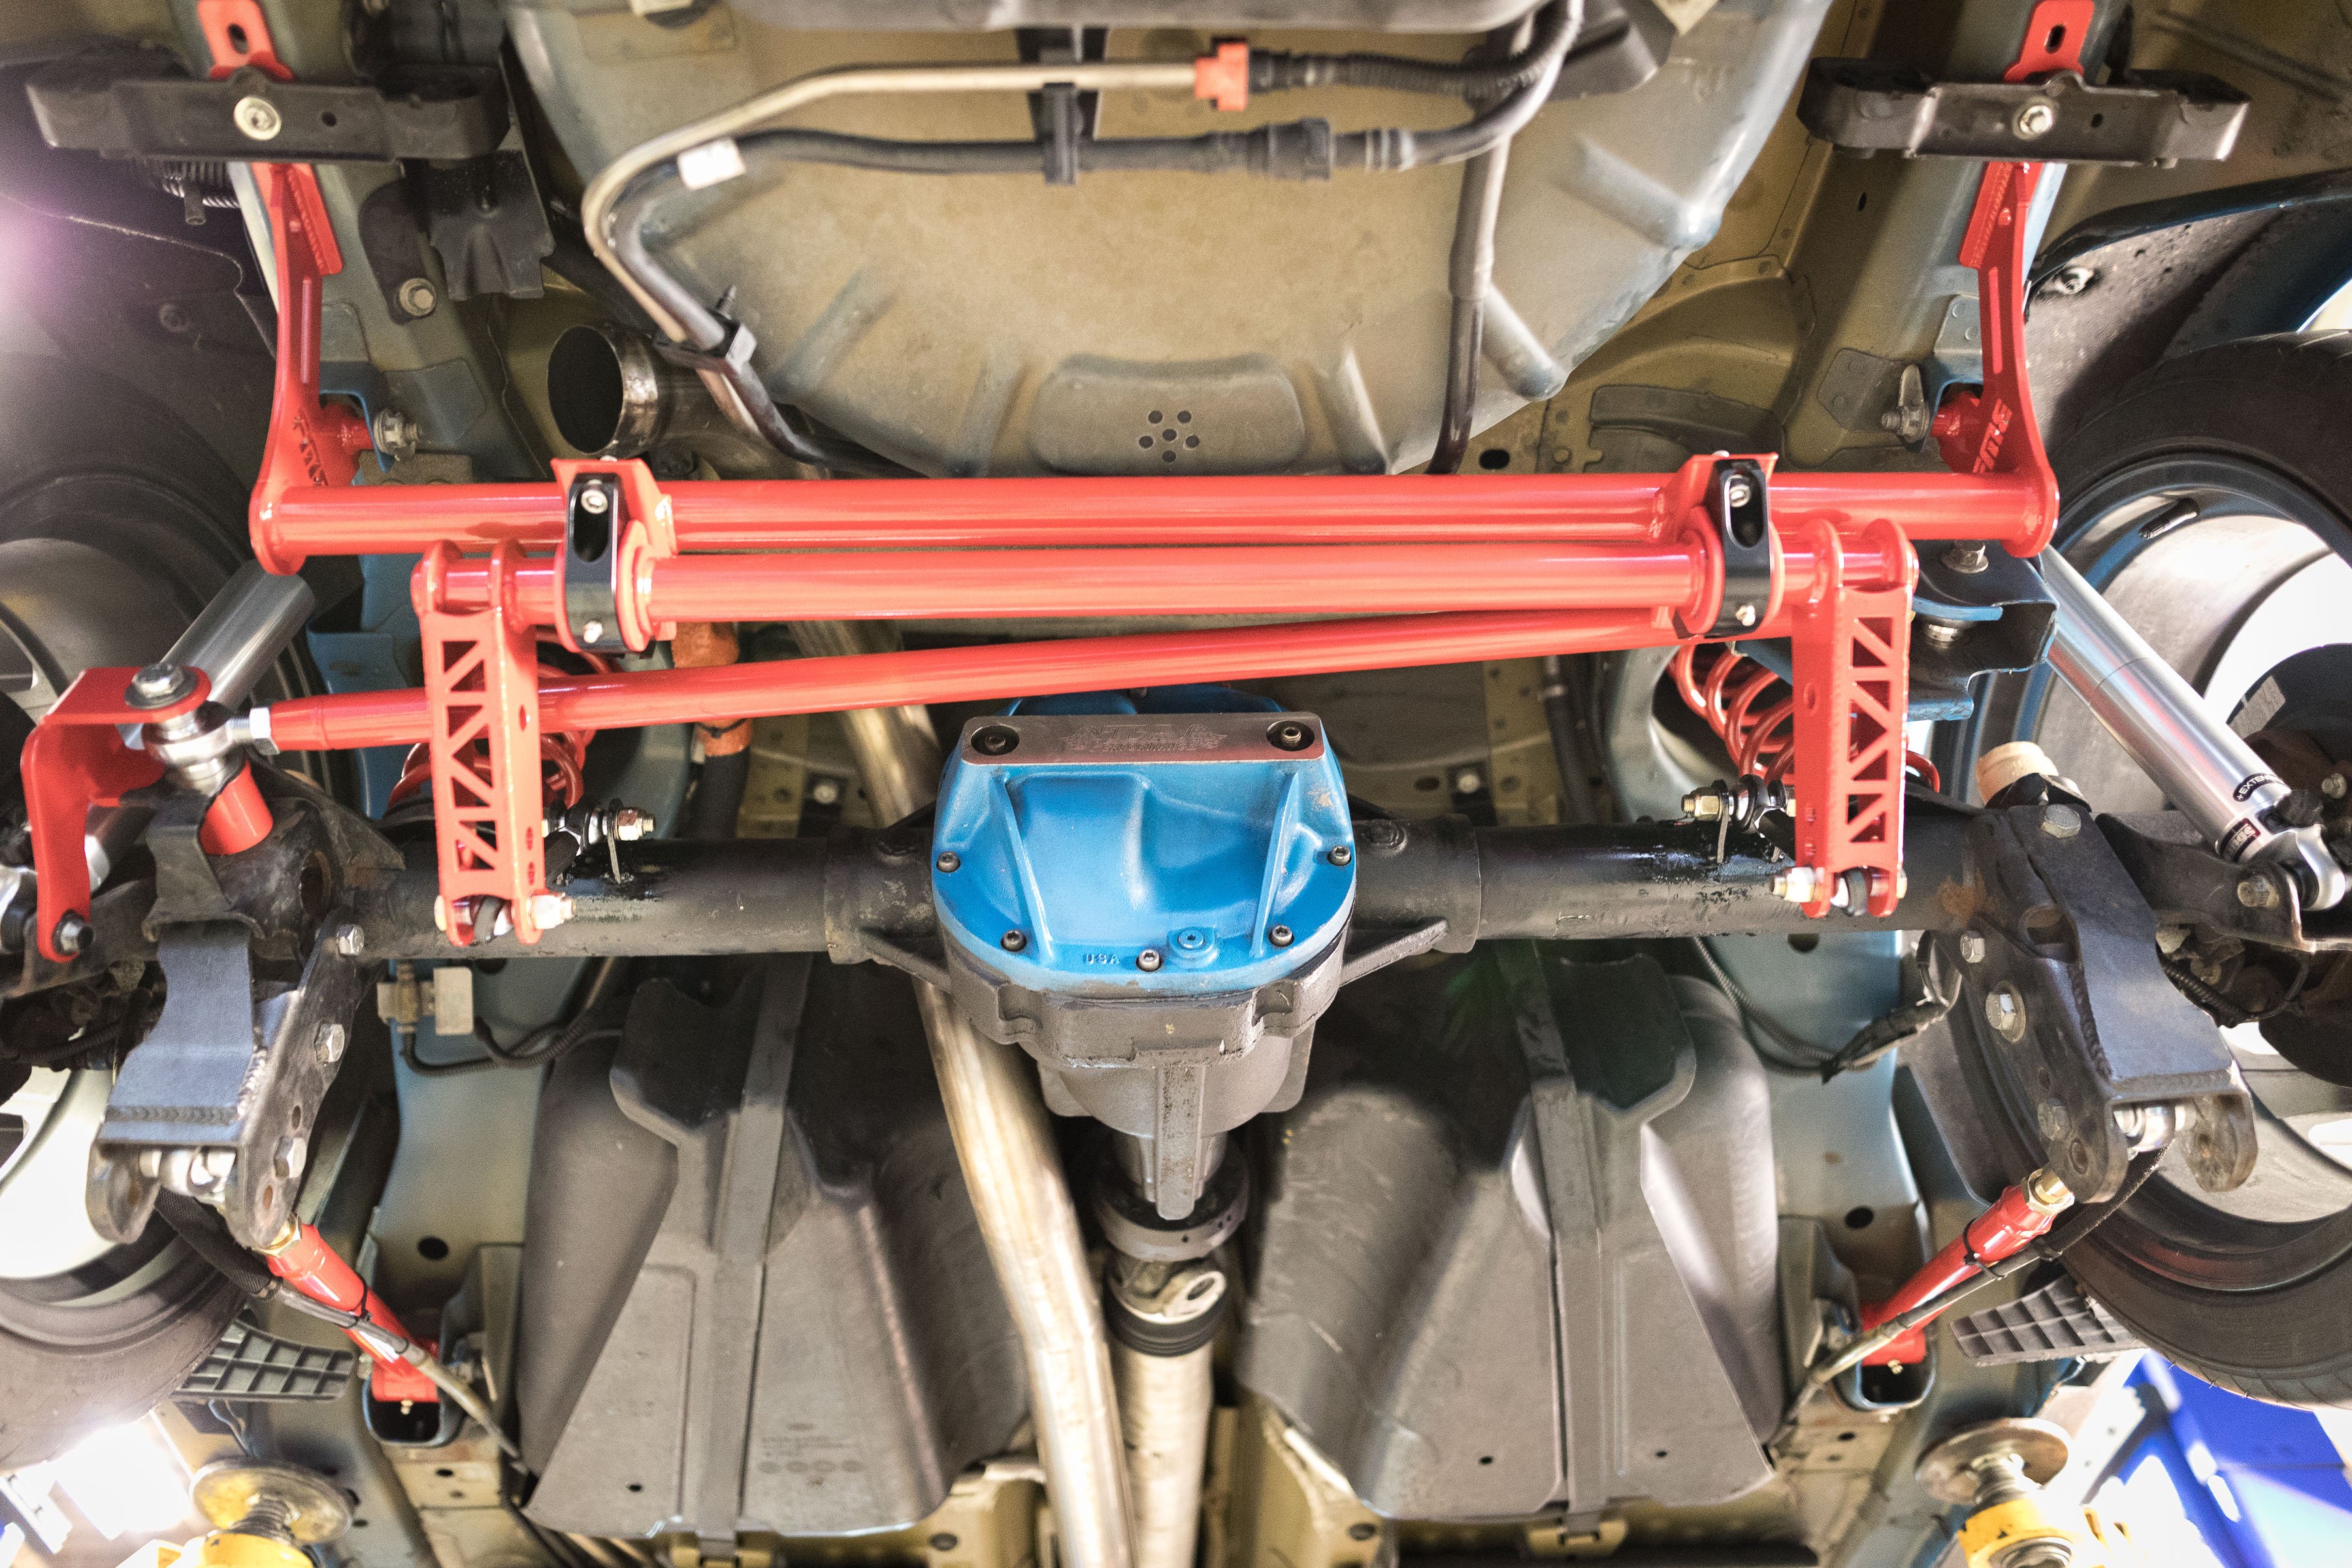
The rear suspension system, installed. The exhaust is not installed in this shot.
Regardless, the performance of the car on the street is vastly improved, and we mean really, really good, especially compared to the parts we took out. It handles like it’s on rails, and although there’s some rear suspension noise from the rod-end control arms, it’s tolerable and worth the tradeoff because of how the car performs. With many S197 cars nearing the six-figure odometer mark at this point, checking out the BMR catalog of parts is a wise idea when it comes time to replace and upgrade suspension parts.