While scrolling on social media one day, we found a video detailing how to restore a degas bottle for a Mustang, which really resonated. Step 1: Remove from the car. Step 2: Throw it in the garbage. Step 3: Replace it with something better. Why go through the trouble of making an eye-sore slightly less terrible? And the older the vehicle, the worse it ages and the worse the design of it. They get yellow, brittle, and unattractive from the start.
Every time we looked into Project Magneto’s engine bay, my eye was immediately drawn to the factory S550 degas bottle/coolant expansion tank. It was time to take action.
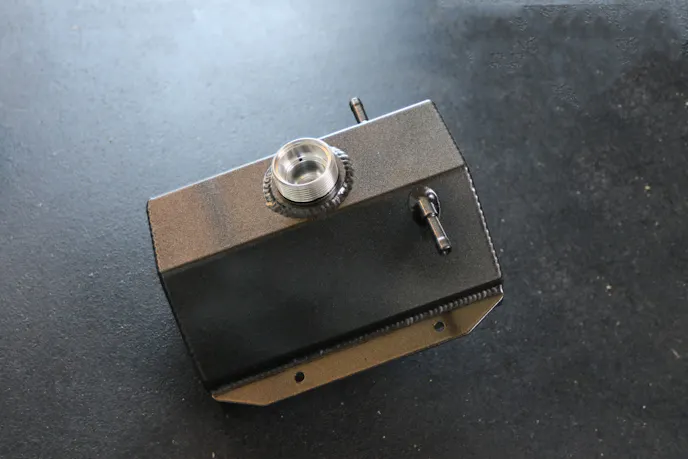
Although our 90,000-plus-mile 2018 Mustang GT isn’t exactly a show car, that doesn’t mean we had to drive it for eternity with fugly parts. (Have a little pride, man!) There are a few different aftermarket options on the market to replace the factory coolant expansion tank, but we admired the sleek design of the fabricated aluminum version from Moroso (PN 63806). There is something about Moroso’s dime-laying that speaks to us and this build. But the one thing that really grabbed us was that it came in a natural finish. We didn’t want polished or another flat black thing in the engine bay. We wanted to color-match it to the Magnetic Gray paint.

Install It In An Hour
When the tank arrived, we could tell it benefitted from sturdy, billet aluminum hose fittings. The tank feels substantial yet still light. The rail that mounts to the radiator is significantly thinner than the factory degas bottle, which we later realized would require shorter bolts. We aren’t sure if these came in the kit and we accidentally threw them out, but thankfully we dipped into our treasure trove of spare bolts for the car and all worked out.
Besides a socket for the two bolts that secure it, radiator hose clamp pliers are a necessity. We got away with regular pliers initially but when we went to reinstall the bottom hose on the new tank, we quickly realized that squeezing the pliers while pushing the hose on wasn’t possible. After a quick trip to the auto parts store for some radiator-hose pliers, and holy cow it was much easier not only to keep constant pressure on the clamp, but they grip the clamp perfectly.
Post-install, we are pleased with the fit and finish of the Moroso tank. It looks great, especially with the durable powder coat (We slipped many a time trying to use the pliers and managed to not ruin the finish). The only negatives were that between this tank and the VMP supercharger, the Ford Performance passenger-side air-oil separator does not fit. We’ll get that fixed later (VMP offers one designed to go with its kits), but in the meantime please excuse the zip-tie work.
Our preference is also to replace the factory spring clamps with the Gates PowerGrip heat-shrink clamps like VMP uses on the intercooler inlet/outlet and replace the two bolts with something like Eddie Motorsports billet washers if possible. We may also ditch the factory cap. But that’s for another day. It’s time to finish getting ready for the track! We’ve got a date with a 9-second time slip.
You might also like
How Well Do The Gen 4 Coyote F-150 Cylinder Heads Flow?
HeadGames Motorworks tears down the Gen 4 F-150 cylinder head to perform a rigorous Coyote head flow test and a deep dive as well.


