If you’re looking to save some extra coin when purchasing a new Mustang, the usual route is to find a base model variant, if you can. These models can typically save you thousands of dollars in comparison to their higher-end, optioned out versions. Take for example, a Performance Pack equipped Mustang versus a standard model – a price difference of nearly $2,500 from the factory between the two.
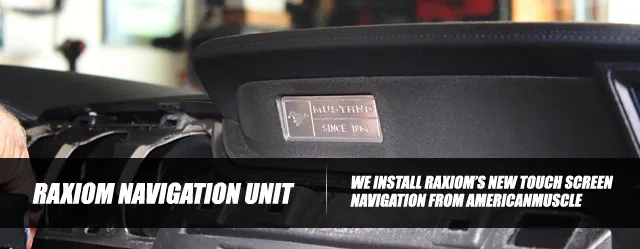
Sure, you don’t get those awesome amities like six-piston front brake calipers, a larger aluminum radiator, and so on and so forth right away – but that’s where the aftermarket comes in. Companies like Raxiom and AmericanMuscle are able to supply aftermarket options like its latest touch screen GPS navigation unit, designed for the 2015-plus Ford Mustang.
In today’s segment, we install and review Raxiom’s new unit in a reader’s car – a base model 2015 Ford Mustang EcoBoost, which came equipped from the factory with the unappealing standard radio and tiny four-inch screen. Follow along as we highlight the benefits of our new unit below.
What’s In The Box?

Comparing the factory head unit to Raxiom’s new Touch Screen GPS Navigation (PN 390088) proves that the OEM hardware pales in contrast; so we’ll spare you the details of the factory four-inch radio, and get right into the good stuff.
Raxiom Navigation And Touch Screen Upgrade For OEM Radio ('15-'17 All)

- 8-Inch touch screen
- Interface box
- Factory style dash bezel
- GPS antenna and mounting plate
- Rubber button pad
- HDMI cable
- AUX cable
- Main harness
- Camera converter cable
- Rearview camera cable
- Full two-year warranty standard
- PN 390088
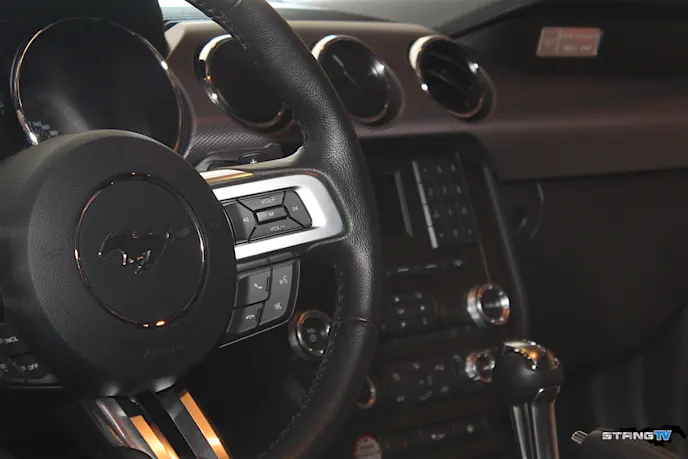
Right off the bat, you’ll notice the new Raxiom unit uses a much larger, eight-inch touch screen head unit – bringing modern style (and usability) to your modern Mustang.
Most notably, this unit retains many of the factory functions like the Microsoft Sync system and the now-standard equipped back up camera; while also including all of the necessary trim pieces for a factory finish.
The navigation system uses Raxiom’s latest software version, which is referred to as the ‘iGO NextGen’ software. This particular software version brings plenty of features with its arrival; such as updated compatibility with U.S. and Canadian maps, HDMI connectivity, USB charging, and more.
According to AmericanMuscle, the system is pre-loaded with this state of the art software, and even provides voice (and visual) turn-by-turn directions to any destination using easy-to-follow graphics. NextGen also includes 2D and 3D modes, as well as topography (and 3D building views) for major cities. As an added bonus, the iGO NextGen is also loaded with more than 17 million points of interest across the U.S. and Canada.


Installation
When it came down to the nuts-and-bolts of installing our new Raxiom touch screen navigation unit, it was pretty darn smooth if we do say so ourselves. In a home garage, we were able to complete the install in mere hours – just about thirty minutes shy of the three hours that Raxiom estimates to complete the job.
In fact, there wasn’t any hardcore wiring involved throughout the entire process. Though Raxiom does recommend that you allow a professional to install the new unit, we just want to clarify that we are by no means professionals; so it is quite possible to complete this installation in an afternoon in your own garage, if you’re feeling confident enough in your mechanical ability (we do recommend seeking a professional if you are not).


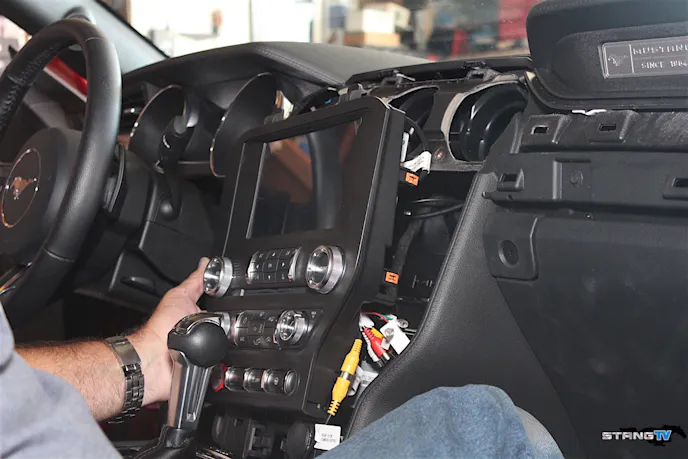
Next, we removed the factory trim piece which covers the factory head unit attached in the dashboard. We recommend being extremely cautious when you remove this piece yourself, as the buttons and switches on the front trim piece are connected to it from behind (doh!).
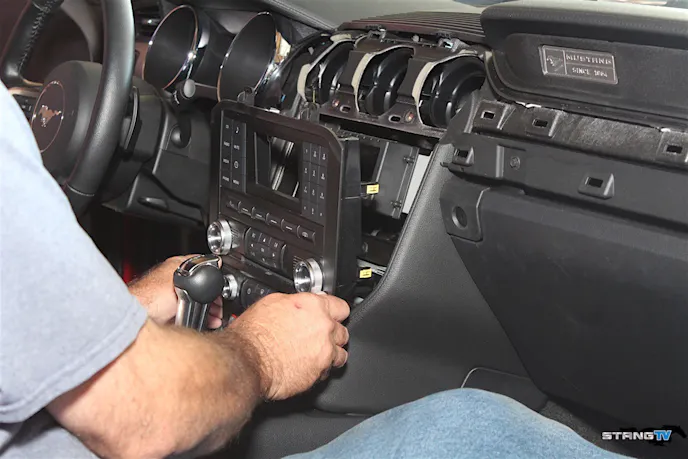


Another important note is to remember to reuse the factory felt which protects the CD tray from dust and other foreign objects. We almost forgot to reuse it during our installation, as it will need to be installed on the new radio dash piece (also, it would have been a grave mistake).
We removed all of the factory buttons and rubber backings from the factory unit, paying close attention to the order they were removed since they will need to be installed in the reverse order on the new piece. Since the Raxiom unit is touch screen – it does not utilize the three series of factory screen control buttons, so their rubber pads can be put aside.
Next we installed the replacement rubber pad that sits behind the six main audio control buttons below the screen, and then installed the remaining factory pads and buttons for the comfort controls and dynamic vehicle settings.


The HDMI connection will need to be routed through the glove box; you’ll then need to connect the rear camera input, and the supplied T-harnesses to the CD drive connectors behind the radio, the Sync box, and the antenna.
Raxiom recommends you install the antenna outside of the vehicle with a clear view of the sky, if possible.
The Finished Product

As we highlighted earlier, installing the new Raxiom touch screen navigation unit for the ’15-’17 Mustang from AmericanMuscle really was an easy endeavor. More than ninety percent of the installation was just unbolting the components that make up the factory radio assembly (and the new one for that matter), with the last ten percent being spent reinstalling everything with an easy plug-and-play approach.
You might be asking yourself, how does the unit perform? The owner of this Ruby Red Metallic Mustang EcoBoost is William – a long time reader of StangTV’s content, and he’s more than happy to entail the unit for us.


“One of the reasons why I really enjoy this unit is simply because it looks like it came from Ford,” William explained. “The fitment is perfect. Everything lines up like factory, and it really gives you an OEM look. I don’t think anyone would even know this was a Raxiom unit unless I turned the car on and showed them the start-up process with the logo.
“I love that this unit retains the factory Sync features too, as I use the hands-free option a lot while I’m on the road to take phone calls. All of the voice-controlled options work exactly the same. My favorite feature has to be the the OBD-II reader though. This is an incredible tool to have while you’re on the road, and it’s awesome that it’s completely built into the system. I can use it to monitor my tire pressure and electronics, which is an added bonus if you ask me.”

You might also like
Shelby’s F-250 Super Baja Proves Big Trucks Need Performance Love Too
Shelby American made its name on fast Cobras and Mustangs. For 2026, the company also offers an F-250 carrying the Super Baja moniker.

